Complete Beginner’s Guide to Designing Custom Challenge Coins
Everything you need to know — from your very first idea to holding a finished coin in your hand. No design experience required.
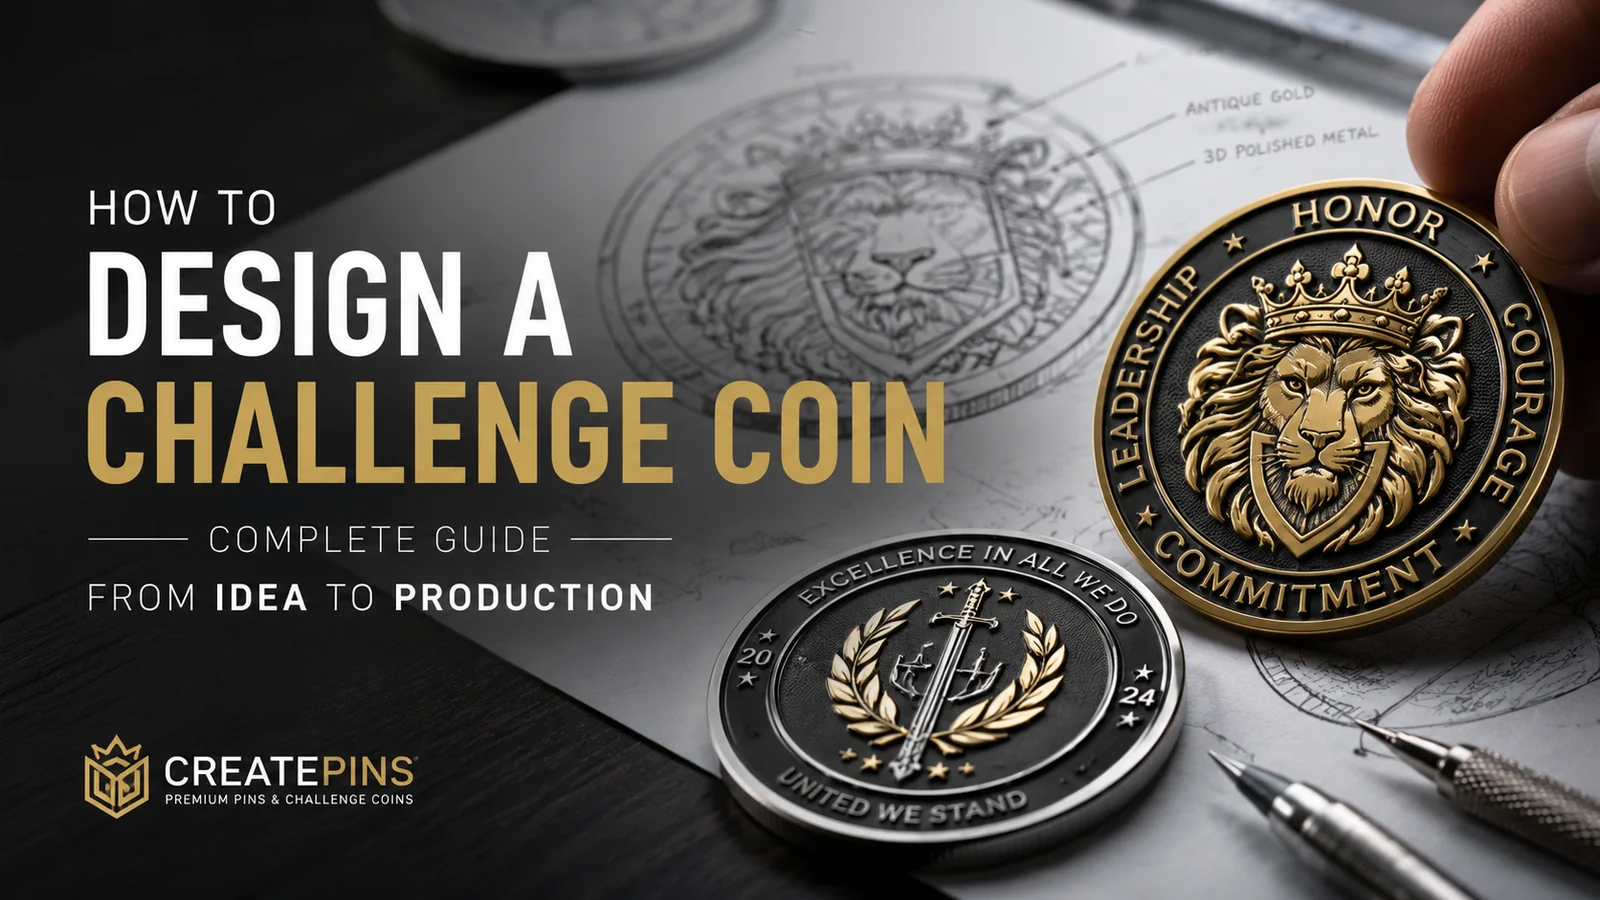
Challenge coins are more than just metal tokens — they represent identity, achievement, tradition, and trust. From military units and law enforcement agencies to corporations, clubs, and special events, challenge coins carry symbolic and collectible value that lasts for decades.
Designing one successfully requires balancing creativity with production realities. This guide walks you through every stage — from concept development to mass production — while explaining the technical limits, cost drivers, risks, and best practices that every beginner needs to know.
1 What Is a Challenge Coin?
A challenge coin is a custom-minted metal disc — similar to a large, thick medal — that is personally owned and carried by its recipient. It identifies the holder as a member of a specific group or as having achieved something significant.
🎓 Beginner Explainer: Think of a challenge coin like a personalised medal you keep in your pocket rather than hang on a wall. Unlike a badge or pin, a challenge coin has two fully designed sides, is thick enough to feel substantial in the hand, and is meant to be shown off when someone else produces theirs — that’s the “challenge” tradition.
Physical Specifications at a Glance
- Diameter: 38–50mm (1.5–2 inches) — about the size of a large shirt button to a 50-pence piece
- Thickness: 2.5–4.0mm — thicker than a standard coin but thinner than a poker chip
- Material: Zinc alloy, brass, iron, or copper depending on budget and use
- Finish: Enamel fills, metal plating, and optional special effects
- Weight: 15–45 grams depending on size and material
How Challenge Coins Differ from Standard Medals
- Challenge coins are carried daily in pockets or wallets — they must be durable enough to withstand constant handling
- They often feature custom shapes (shields, dog tags, stars) not just round discs
- They typically include unit crests, mottos, serial numbers, or other identifying information
- They are given personally, not awarded in ceremonies — the exchange itself carries meaning
Who Uses Challenge Coins?
- 🎖️ Military units — the original and most traditional use; given by commanders to recognise service
- 🚔 Law enforcement and fire departments — used for unit pride and commemorating service milestones
- 🏢 Corporations and brands — for employee recognition, client gifts, and promotional campaigns
- 🎓 Schools and universities — for alumni clubs, sports teams, and academic achievements
- 🎮 Gaming and hobby communities — collector coins for conventions, campaigns, and fandoms
- 📅 Events and conferences — exclusive commemorative coins for attendees
Design Implication: A challenge coin is handled more like a functional object than a display medal. Durability, tactile feel, and readability at arm’s length are as important as visual beauty. Keep this in mind throughout every design decision.
2 Custom Coin Idea & Concept Development
2.1 Define the Purpose First
Before touching any design tool, answer these questions clearly. Your answers will drive every decision that follows:
- What is this coin for? — Recognition, morale, fundraising, promotional gift, or collector item?
- Who will receive it? — Military veterans, employees, customers, event attendees?
- Will it be carried daily or mainly displayed? — Daily carry needs durability; display pieces can prioritise elegance
- Is it for a formal institution or a creative audience? — Affects how much tradition vs creativity should guide the design
- What is your budget per coin? — Sets firm limits on material, finish, and complexity choices
🎓 Beginner Tip: Write down your answers to these questions before you contact any manufacturer. The clearer your brief, the faster and cheaper your design process will be. Vague briefs lead to many revision rounds — which adds time and sometimes cost.
2.2 Symbolism & Visual Language
Challenge coins rely heavily on visual symbolism because they communicate a lot of meaning in a very small space. Here are the most commonly used symbols and what they traditionally represent:
- 🦅 Eagles, shields, swords → authority, protection, military heritage
- ⚓ Anchors, compasses, stars → navigation, steadfastness, direction
- 🔥 Flames, phoenixes → resilience, courage, firefighting heritage
- 📅 Numbers & dates → milestones, anniversaries, founding years
- 📜 Latin mottos → tradition, gravitas, institutional heritage
- ⚙️ Gears, circuits, technology → innovation, engineering, modern teams
⚠️ Common Beginner Mistake: Overloading the design with multiple symbols, a full motto, a logo, and a year on one side reduces legibility to near zero at actual coin size. Best practice: limit each side to 1 core visual element plus 1–2 supporting details (e.g., text or a border).
2.3 Gathering Reference Material
Before starting any artwork, collect:
- Reference photos of coins you admire (search “challenge coin gallery” or check manufacturer portfolios)
- Your organisation’s existing logo files in vector format (AI, EPS, or SVG)
- Any existing branding guidelines — colours, fonts, approved imagery
- Inspiration images for the overall mood — classic/traditional, modern/clean, bold/graphic
3Coin’s Size, Shape & Thickness Planning
3.1 Standard Size Guidelines
Coin diameter is the single biggest factor affecting detail capacity. Larger coins can hold more intricate artwork. Here is how the most common sizes compare:
| Diameter | Common Use | Detail Capacity | Best For Beginners? |
|---|---|---|---|
| 38mm (1.5″) | Budget / lightweight coins | Limited — keep designs simple | ⚠️ Only for very simple designs |
| 44mm (1.75″) | Most popular size worldwide | Good — balanced cost and detail | ✅ Yes — the best starting point |
| 50mm (2.0″) | Premium / collector coins | Excellent — complex art works well | ✅ Yes — if budget allows |
| Custom sizes | Special projects | Varies | ❌ Not recommended for first orders |
🎓 Beginner Recommendation: Start with 44mm. It is the most popular size for good reason — it fits comfortably in a pocket, has enough surface area for a well-balanced design, and offers the widest range of production options at competitive prices.
3.2 Thickness: Why It Matters
Thickness affects how the coin feels in the hand, how much engraving depth is possible, and how resistant the coin is to warping during production:
- 2.5mm (thin minimum) — Light, economical, but NOT recommended for heavy engraving or complex relief. Risk of warping during plating.
- 3.0mm (standard) — The sweet spot. Solid feel, good depth for engraving, works with all finish types. Best for beginners.
- 3.5–4.0mm (premium thick) — Exceptional weight and feel. Preferred for military and collector editions. Higher cost and shipping weight.
⚠️ Production Risk: Coins thinner than 2.5mm have a significantly higher warp rate during the plating process. The heat and chemical exposure cause thin coins to bow, which is usually only caught during final QC — costing production time and increasing rejection rates.
3.3 Custom Shapes: Exciting but Complicated
Custom outlines (shields, dog tags, stars, state shapes) are eye-catching and memorable — but they come with real production trade-offs:
- ✗Increase mold complexity — custom dies cost more and take longer to produce
- ✗Add polishing labour — complex edges are harder to polish cleanly
- ✗Reduce edge consistency — tight inner corners are prone to micro-cracks
- ✓Minimum inner corner radius: ≥ 1.2mm — any sharper and the metal may crack during stamping
🎓 Beginner Recommendation: For your first coin, stick to a round or simple shield shape. Once you understand the production process, you can explore custom shapes on your second order with full confidence.
4 Custom Coins Front & Back Layout Strategy
Challenge coins have two fully designed sides — the obverse (front/heads) and the reverse (back/tails). Planning what goes where before any artwork is created saves significant revision time.
4.1 Obverse (Front) — The Hero Side
The front carries the most important visual impact. It should communicate the coin’s primary identity at a glance:
- Primary emblem or logo — the largest, most dominant element
- Organisation name — in a readable font, typically around the outer edge
- Year or primary motto — secondary text supporting the main emblem
Design Rule: The obverse should be readable from one arm’s length away (approximately 60–70cm). If you can’t read it at that distance, the text is too small or there is too much content fighting for attention.
4.2 Reverse (Back) — The Story Side
The back allows more narrative content — details that matter to recipients but don’t need to be front-and-centre:
- Secondary message or department name
- Creed, mission statement, or core values
- Serial number area (leave a blank rectangle or circle if numbering individually)
- Website or contact details for corporate/promotional coins
⚠️ Text Limits: Minimum recommended font height is 1.2mm at production size. Below this, letterforms blur or merge during polishing. Maximum readable words per side: 25–30 words. Anything more becomes a wall of unreadable text at coin scale.
4.3 Layout Zones: The Safe Area System
Think of each coin face as having three zones:
- Outer border zone (outermost 3–4mm) — best for circular text, decorative borders, or rope edge detail
- Mid zone (next 4–6mm ring inward) — good for supporting elements, flags, additional text
- Central zone (inner circle) — reserved for your primary emblem; keep it uncluttered
🎓 Beginner Tip: Draw three concentric circles on paper representing these zones and assign each design element to a zone before you start digital work. This spatial planning prevents the most common layout mistake — putting too much in the centre and crowding out the primary image.
5 Line Art & Relief Design
🎓 What is “relief”? Relief design refers to how elements on the coin sit at different heights. Raised metal (higher than the background) catches light and forms outlines. Recessed areas (lower than the surroundings) are where enamel paint is filled in, or where texture is added. Think of it like a bas-relief sculpture pressed into a coin.
5.1 Raised vs Recessed Metal
- Raised metal = outlines, borders, text characters, fine detail lines. These are the “walls” of your design.
- Recessed areas = the “pools” that hold enamel paint, or textured backgrounds like crosshatching or sandblasting
Minimum production tolerances you must respect:
- Raised lines: minimum 0.3mm wide — thinner lines fill in during plating
- Recess depth: minimum 0.25mm — shallower recesses disappear after polishing
- Text stroke width: minimum 0.3mm at production size — thin fonts become unreadable
⚠️ Below These Limits: Fine details fill in during the electroplating process (metal deposits into tiny recesses) and vanish during polishing. Always verify your line weights at actual production size, not at the zoomed-in screen view used for designing.
5.2 2D vs 3D Relief — Which Should Beginners Choose?
| Relief Type | What It Looks Like | Cost | Best For | Beginner-Friendly? |
|---|---|---|---|---|
| 2D (flat levels) | Flat background with raised outlines; enamel fills recessed areas | Lowest | Most challenge coins, logos, text | ✅ Yes — start here |
| Partial 3D | Key elements raised in sculptural relief above the flat background | Medium | Eagles, portraits, detailed emblems | ⚠️ Possible with experience |
| Full 3D | Entire coin surface is sculpted like a figurine | Highest | Premium collector pieces | ❌ Not for first orders |
⚠️ Important: Full 3D coins cannot use soft enamel effectively. The highly sculpted surface doesn’t allow enamel to be cleanly applied and cured in recessed areas. If you want enamel colours, stay with 2D or partial 3D relief.
6 Color Choices & Enamel Types
🎓 How enamel works on coins: Enamel is a glass- or resin-based pigment that is hand-filled into the recessed areas of the coin, then baked or cured to harden. It is NOT paint — it is a durable, permanent fill that bonds to the metal. Think of it like filling in the “dips” in the coin surface with coloured glass.
6.1 Soft Enamel — The Most Popular Choice
The enamel is filled into recessed areas but sits slightly below the raised metal borders, creating a textured, tactile feel. You can feel the raised metal lines when you run your finger across the coin.
- ✓Most cost-effective enamel option
- ✓Supports up to 8+ distinct colors
- ✓Tactile texture adds to the premium feel
- ✓Fastest production turnaround
- ✗Slight dust attraction in the recessed areas during filling
- ✗Textured surface (some prefer fully smooth)
6.2 Hard Enamel (Imitation Cloisonné) — The Premium Choice
Enamel is applied in multiple layers, each baked and polished, until the surface is completely flush with the raised metal. The result is a perfectly smooth, glass-like surface — like a high-quality watch face.
- ✓Smooth, polished surface — the most premium feel
- ✓More durable surface — enamel is less likely to chip
- ✓Preferred for high-end military, corporate, and collector coins
- ✗Color count recommended ≤ 6 (more colors increase polishing complexity)
- ✗Requires thicker metal base (≥ 3.0mm) to withstand polishing
- ✗Higher per-unit cost than soft enamel
6.3 Printed Colors (CMYK / UV Print)
A printing plate applies photographic colour directly to the coin surface, then sealed with a protective epoxy coat. This allows gradients, photographic imagery, and complex illustrations impossible with standard enamel.
⚠️ Durability Risk: Printed areas wear faster than enamel fills, particularly on coins that are frequently handled. For pocket-carry coins, standard enamel is always more durable than printed colour. Reserve printing for display coins or designs where visual complexity outweighs daily-handling durability.
6.4 How to Specify Colors for Production
Always use Pantone Solid Coated (PMS C) color numbers when specifying enamel colors. HEX and RGB codes are screen-based and cannot be accurately translated to physical pigments:
- Red: Pantone 185 C | Royal Blue: Pantone 286 C | Gold: Pantone 123 C
- Green: Pantone 356 C | Black: Pantone Black C | White: Factory White
- Use the free Pantone Color Finder to convert your HEX codes to the closest PMS equivalent
7 Metal Material Selection
The metal your coin is made from affects its weight, cost, durability, and how it ages over time. Here is a clear breakdown for beginners:
Zinc Alloy
The standard choice for most challenge coins. Easy to cast into complex shapes, accepts enamel fills beautifully, and is highly cost-effective for medium to large runs. Best choice for beginners.
Brass
The traditional material for military challenge coins. Heavier and more substantial in the hand than zinc alloy. Best for coins where weight = perceived value, such as awards and recognition pieces.
Iron
The most affordable option for large quantity orders. Slightly more prone to corrosion if the plating is scratched, so less ideal for daily-carry coins. Best for event giveaways and promotional distributions.
Copper
A premium choice for high-value collector coins. The warm natural colour and exceptional weight make it feel truly special. Copper develops an attractive natural patina over time, which many collectors prize. Reserved for special editions and presentation pieces.
💡 Weight vs Shipping: Heavier metals (brass, copper) feel significantly more valuable when held — but they add real weight to your shipment. A 100-coin order in brass weighs 2–3× more than the same order in zinc alloy, directly increasing your shipping costs. Factor this into your budget calculations.
8 Plating & Finish Options
Plating is the metallic surface coating applied to the entire coin after it is cast. It determines the coin’s colour, reflectiveness, and how well it hides scratches and fingerprints from daily handling.
🎓 Beginner Explainer: Plating is like choosing the paint colour for a car — it dramatically changes the coin’s appearance and feel without changing the underlying structure. The plating sits on top of the base metal and forms the “raised” lines and borders you see between enamel fill areas.
Dual & Specialty Finishes (Advanced)
Two-tone plating, sandblasted backgrounds, and diamond-cut edges can make a coin truly exceptional — but they increase complexity and cost:
- Two-tone plating — different metals on different areas; e.g., gold emblems on a silver background
- Sandblasted backgrounds — matte texture on flat areas contrasts with shiny raised elements
- Diamond-cut edges — machine-cut geometric patterns on the coin’s edge
⚠️ Production Risk: Multiple or sequential platings increase the reject rate by approximately 5–10% due to the additional process steps and adhesion risks between metal layers. Not recommended for first-time orders.
9 Edge Design Choices
The coin’s edge — the thin band running around the circumference — is often overlooked by beginners but is a visible and tactile design detail that contributes significantly to the overall feel:
| Edge Style | Description | Cost | Best For |
|---|---|---|---|
| Flat / Smooth | Plain, straight edge with no texture | Standard (no extra cost) | All coins — the safe default for beginners |
| Rope Edge | Twisted rope pattern around the edge | Low extra cost | Military and heritage coins |
| Spur / Diamond Edge | Angular pattern like gear teeth | Low extra cost | Tactical, law enforcement themes |
| Reeded (coin-style) | Parallel vertical lines like a currency coin | Low extra cost | Any coin — adds authenticity |
| Custom engraved text | Text or numbers engraved around the edge | Medium extra cost | Serial numbers, mottos, personalisation |
💡 Production Limit: Edge detail depth must be ≤ 0.4mm for clean, consistent polishing. Deeper edge cuts are difficult to polish evenly and may show inconsistencies across a batch.
10 Preparing Your Artwork File
This is one of the most important sections for beginners — the quality of your artwork file directly determines how quickly production begins, how many revision rounds are needed, and ultimately how good your coin looks.
🎓 Don’t have design skills? That’s fine. Most reputable manufacturers — including CreatePins.com — offer free design assistance. You can describe your concept, upload a rough sketch, or share reference images, and the design team will create a professional proof for your approval. You don’t need to be a graphic designer to get a great coin.
10.1 What File Format to Submit
| Format | Type | Quality for Production | Notes |
|---|---|---|---|
| AI (Adobe Illustrator) | Vector | ⭐⭐⭐⭐⭐ Best | Native format for most manufacturers |
| EPS | Vector | ⭐⭐⭐⭐⭐ Best | Widely compatible vector format |
| SVG | Vector | ⭐⭐⭐⭐ Excellent | Great for web-based designs |
| PDF (vector) | Vector | ⭐⭐⭐⭐ Excellent | Must be saved from a vector tool |
| PNG (high-res) | Raster | ⭐⭐⭐ Acceptable | Min. 300 DPI; will need redraw |
| JPG / JPEG | Raster | ⭐⭐ Last resort | Compression artefacts cause issues |
| Paper sketch / photo | Reference | ⭐ Reference only | Always accepted as a starting point |
10.2 What to Include in Your Brief
When submitting your artwork or concept, always include:
- ✅ Intended coin diameter (e.g., 44mm)
- ✅ Intended thickness (e.g., 3.0mm)
- ✅ Plating finish (e.g., antique gold)
- ✅ Enamel type (soft or hard)
- ✅ Pantone color numbers for each enamel area
- ✅ Any text that must appear — spelled exactly as required
- ✅ Edge style preference
- ✅ Quantity required and delivery deadline
11 Proofing & Pre-Production Checks
The proof is a digital visualisation of your coin — showing both sides at actual size — that you must formally approve before production begins. Never rush this step. Errors discovered after approval go into production and cannot be corrected without starting over.
What to Check on Every Proof
- ✅ Spelling and grammar — read every word twice, including mottos and serial number formats
- ✅ Text alignment — is curved text centred properly? Are margins even?
- ✅ Color codes — confirm each enamel area matches your specified Pantone code
- ✅ Plating colour — does the proof show the correct metal finish?
- ✅ Orientation — both sides should be “top aligned” (rotating the coin 180° on its vertical axis, both sides read correctly)
- ✅ Serial number placement — confirm placement, size, and format if applicable
- ✅ Metal line thickness — are all raised outlines thick enough to survive production?
⚠️ The Biggest Beginner Risk: Approving a proof without checking metal line thickness. Fine lines that look perfect on screen become invisible or merged after plating and polishing. Always request that your proof clearly shows minimum line widths, and ask the manufacturer to flag any lines below 0.3mm.
What to Request From Your Manufacturer
- Vector proof — a clean digital file showing exact dimensions and details
- 3D render or mold simulation — a photorealistic preview of how the finished coin will appear
- Pre-production (PP) physical sample — for large orders or color-critical projects, a physical coin made before full batch production begins
12 Production Process Overview
Understanding what happens in the factory helps you set realistic timelines and know when to follow up if things seem delayed.
- Artwork Finalisation
Your approved vector proof is prepared into manufacturing-grade files for CNC mold programming.
- CNC Mold Engraving
A precision CNC machine engraves your design into a hardened steel die. This is the most time-intensive step — molds for complex designs can take 1–3 days alone.
- Die Casting or Stamping
Molten metal is injected into the mold (die casting) or the die stamps the design into a metal blank (stamping). Each coin is formed at this stage.
- Trimming & Edge Finishing
Excess metal is trimmed, and edge treatment (rope, reeded, etc.) is applied. Custom shapes are cut at this stage.
- Plating
Coins are electroplated in the chosen metal finish — gold, silver, antique brass, etc. Multiple plating steps occur for specialty finishes.
- Enamel Filling
Enamel pigment is hand-filled into each recessed color area. For multiple colors, this is done in stages with drying time between each fill.
- Curing & Polishing
Filled enamel is baked or UV-cured to harden. Hard enamel coins go through additional polishing to achieve the flush surface.
- Quality Inspection
Each coin is individually inspected for color overflow, plating defects, warping, and misalignment. Defective coins are rejected.
- Packaging & Shipping
Approved coins are packaged per your specification and shipped via your chosen method.
📅 Typical Lead Times:
Standard production: 15–21 days from artwork approval
Rush production: 10–12 days (additional cost applies)
Shipping (international): Add 3–7 days for express / 7–20 days for economy
Always add a 2–3 day personal buffer on top of the manufacturer’s quoted delivery date.
13 Cost Breakdown & Budgeting for Beginners
One of the most common questions from first-time buyers is “how much will my coins cost?” Here is a transparent breakdown of every cost component and how to estimate your total investment.
Cost Components Explained
| Cost Component | What It Is | Typical Range | Avoidable? |
|---|---|---|---|
| Mold / Die setup | One-time cost to engrave your custom design into the production die | $50–$200 per side | ❌ No — every unique design needs a mold |
| Unit production cost | Per-coin cost for casting, plating, enamel, and finishing | $2.00–$6.00 per coin | ✅ Reduce via larger quantities |
| Special finishes | Glow-in-the-dark, glitter enamel, epoxy dome, dual plating | +$0.50–$2.00 per coin | ✅ Omit to reduce cost |
| Packaging upgrade | Velvet pouch, acrylic capsule, or custom foam box | +$0.50–$3.00 per unit | ✅ Use poly bags for budget orders |
| International shipping | Courier fee from factory to your address | $30–$150 per order | ✅ Economy shipping saves $30–$80 |
| Rush production fee | Priority queue placement for faster turnaround | +20–50% of production cost | ✅ Plan ahead to avoid |
Budget Estimate Examples
🟢 Starter Order — 100 coins, 44mm, zinc alloy, antique gold, 3 soft enamel colours, poly bag packaging:
Estimated cost: $280–$420 total (~$2.80–$4.20 per coin including setup and shipping)
🔵 Mid-Range Order — 250 coins, 44mm, brass, two-tone plating, 4 hard enamel colours, velvet pouch:
Estimated cost: $900–$1,400 total (~$3.60–$5.60 per coin)
💡 Cost-Saving Rules for Beginners:
1. Order at least 100 coins — below this, the mold cost dominates and per-unit price is high.
2. Start with 2–4 soft enamel colors on a zinc alloy base with antique gold plating.
3. Use poly bags for your first order — upgrade packaging on your second order once you’ve tested the design.
Ready for Professional Results?
At CreatePins.com, we specialise in turning your coin concept into a beautiful, durable reality — from free design assistance to full production and worldwide shipping. Tell us your idea and we’ll handle every technical detail.
Includes free 3D render, design review, and colour optimisation with every quote.
14 Quality Control Standards
Understanding QC standards helps you set realistic expectations and know what to do if coins arrive with defects.
What QC Inspectors Check for
- Color overflow — enamel that has bled past its metal border into adjacent areas
- Plating bubbles or blistering — caused by moisture or contamination during the plating process
- Warping or bowing — coins that aren’t perfectly flat (more common with thin coins)
- Misaligned obverse/reverse — the front and back designs not being correctly oriented relative to each other
- Missing or incomplete enamel — small areas where enamel hasn’t fully filled the recess
- Surface scratches from handling — particularly visible on shiny finishes
📊 Industry Standard Defect Rate: In mass production, an acceptable defect rate is ≤ 2–3% of the batch. A reputable manufacturer should replace or credit defective coins beyond this threshold. Always confirm the manufacturer’s defect policy before placing your order — and always order 5–10% more coins than you strictly need to account for production variance.
15 Packaging & Presentation
How your coin is presented when received dramatically affects how the recipient perceives its value — even before they look at the design itself.
| Packaging Type | Description | Cost Premium | Best For |
|---|---|---|---|
| Poly bag | Simple clear plastic bag with resealable seal | No extra cost | Budget orders, internal distribution |
| Velvet pouch | Soft fabric drawstring bag — black or coloured | +$0.50–$1.00 | Awards, gifts, presentations |
| Acrylic capsule | Hard clear case that protects and displays the coin | +$0.80–$1.50 | Collector coins, displays |
| Custom foam box | Rigid box with foam insert holding the coin | +$2.00–$4.00 | Premium gifts, executive coins |
| Card backer | Printed card with coin attached — like a display card | +$0.50–$1.50 | Retail sale, events |
✅ Perceived Value Fact: Research consistently shows that premium packaging increases perceived product value by up to 30% — even when the product inside is identical. If your coins are gifts or recognition awards, the packaging investment pays for itself in recipient response.
16 Common Design Mistakes to Avoid
These are the errors we see most often from first-time coin designers. Every item on this list has caused real production problems and disappointed clients. Learn from their experience.
- Design for the metal first — graphics second
- Test readability by printing at 50% scale
- Choose antique finishes for complex engraved art
- Limit each side to 1 primary symbol + supporting elements
- Use minimum 1.2mm font height at production size
- Order 5–10% buffer stock to cover production variance
- Specify Pantone codes — never just HEX
- Request a 3D render before approving production
- Pack both sides with too much text and detail
- Use thin fonts (below 0.3mm stroke at production size)
- Rely on gradients without specifying offset printing
- Ignore metal tolerances and line thickness minimums
- Choose shiny nickel or gold for a daily pocket-carry coin
- Order under 50 coins for your first run
- Rush-approve a proof without checking spelling
- Specify colours in HEX or RGB only
17 Final Expert Tips
These are the principles that separate good coins from great ones — accumulated from hundreds of successful custom coin projects:
- 🏅 Design for metal first, graphics second. Everything on a challenge coin is defined by what the metal can hold. If a detail can’t survive plating and polishing, it shouldn’t be in the design.
- 🔍 Test readability at 50% scale. Print your design at half its intended size. If you can’t read it clearly, simplify. Coins are small; details that work on a screen often vanish in metal.
- 🎨 Choose antique finishes for complex artwork. Antique gold, silver, and bronze make intricate engraved detail pop — because the antique patina naturally settles into recesses, creating contrast without extra cost.
- 📦 Plan a 5–10% production buffer. Always order more than you need. Giving away the extras is far cheaper than reordering a second batch, which means paying the mold setup cost again.
- 📝 Brief your manufacturer like a professional. The more specific your written brief — including exact Pantone codes, dimensions, finish names, edge type, and delivery deadline — the fewer revision rounds you’ll need.
- 👁️ Have someone else proofread your proof. You’ve looked at your design so many times you’ll miss spelling errors. Always have a second set of eyes check any text before approving.
- 📸 Photograph your approved PP sample. Keep it on file. If you ever reorder, this reference ensures colour consistency between batches.
Conclusion: Your First Coin Starts With One Decision
A successful challenge coin is the result of strategic design, technical awareness, and disciplined production planning. It does not require a graphic design degree, a large budget, or industry connections. It requires clarity of purpose, honest communication with your manufacturer, and the patience to get the proof right before approving production.
By understanding material limits, manufacturing risks, and cost drivers early — as you now do — you can create a coin that is meaningful, durable, and worthy of being carried with pride for years.
Your first step:
- Answer the five brief questions from Section 2 — purpose, audience, daily carry or display, budget, quantity
- Gather your logo files or create a rough sketch of your concept
- Contact CreatePins.com with your brief — our team will take it from there
Start Your Challenge Coin Project Today
Whether you have a finished design or just a rough idea, our team at CreatePins.com will guide you from concept to completed coin — with free design assistance, a 3D render, and expert production support at every step.
FAQ: Custom Challenge Coins
The most common questions from beginners ordering their first custom challenge coin. Click any question to expand the full answer.
- What exactly is a challenge coin?
A challenge coin is a custom-minted metal token, typically 38–50mm in diameter and 2.5–4mm thick, used to represent membership, achievement, or identity within a group. They originated in military culture — commanders would give coins to soldiers to recognise service — but are now used in law enforcement, corporate, collector, and community contexts. Unlike medals, challenge coins are meant to be carried daily and shown when another member produces theirs — that’s the “challenge” tradition.
- How much does it cost to make a custom challenge coin?
A typical first order of 100 standard zinc alloy coins (44mm, antique gold, 3 enamel colours) costs approximately $280–$420 total, including mold setup and international shipping. The per-coin cost reduces significantly with quantity — 250 coins of the same spec might cost $600–$900 total. Brass, copper, hard enamel, specialty finishes, and premium packaging all increase the cost. Always request a itemised quote so you can see exactly where your budget is going.
- How long does it take to produce custom challenge coins?
Standard production takes 15–21 days from artwork approval, plus 3–7 days for express international shipping (longer for economy). Rush production is available in 10–12 days at an additional 20–50% cost premium. Always build in a personal 2–3 day buffer beyond the manufacturer’s quoted date for your hard deadline — especially for event-driven orders where lateness cannot be accommodated.
- What file format should I submit for my coin artwork?
Vector files (AI, EPS, or SVG) are the gold standard — they scale to any size without quality loss and map directly to the CNC mold production process. If you only have a PNG or JPG, submit the highest-resolution version available (minimum 300 DPI at intended print size). Most manufacturers, including CreatePins.com, will redraw raster artwork into clean vector format as part of the design service. A paper sketch with written notes is also a completely acceptable starting point for free design assistance.
- Can I design a challenge coin myself with no design experience?
Absolutely yes. Most reputable manufacturers offer free design assistance — you describe your concept, upload a rough sketch or reference images, and the design team creates a professional digital proof for your approval. You direct the creative vision; they handle the technical execution. The most important thing you can do as a non-designer is be specific about what you want: clear descriptions, reference images, and answers to the brief questions in Section 2 of this guide will get you to a great result faster than you might expect.
- What plating finish should a beginner choose?
Antique gold, antique silver, or antique bronze are the three best choices for first-time coin buyers. These “antique” finishes have a darkened, heritage-look patina that makes engraved detail pop visually, hides fingerprints and light scratches from daily handling, and is more forgiving of minor surface imperfections in production. Shiny gold and nickel finishes look spectacular in photos and when new, but show every fingerprint, micro-scratch, and handling mark — making them better suited to display coins than coins that will be carried in pockets.
- What is the difference between soft and hard enamel coins?
Soft enamel sits recessed below the raised metal borders. You can feel the texture when you run your finger across the surface. It is more cost-effective, supports more colours, and has a faster production turnaround — the best choice for most beginners and most budgets. Hard enamel is polished layer by layer until perfectly flush with the metal, creating a smooth, glass-like surface with a premium feel. It costs more, requires a thicker coin base, and is best limited to 6 or fewer colours. Both types produce beautiful, durable coins — choose based on your budget and whether you prefer a textured or smooth feel.
- What is the minimum order quantity?
Most manufacturers require a minimum of 50–100 coins. This is because the custom mold and setup cost must be economically spread across enough units. Ordering below the minimum is sometimes possible at a significant per-unit premium. For most first-time buyers, 100 coins is the ideal starting quantity — it keeps per-unit cost reasonable, provides enough buffer for production variance, and gives you extras for future distribution without over-committing your budget.
- How many enamel colours can my coin have?
Soft enamel coins comfortably support 4–8 distinct colours without significant cost increases. Hard enamel is best kept to 6 or fewer colours due to the polishing complexity. Beyond 8 colours, costs rise noticeably, production time increases, and the risk of colour bleed between adjacent fill areas grows. For printed colours (photographic gradients or photorealistic detail), CMYK or UV printing can be applied to a specific area of the coin — this extends the colour range further but reduces durability in that printed area compared to standard enamel fills.
- What should I check when my coins arrive?
When your coins arrive, inspect a sample of at least 10–15 coins (or all of them for small orders) against your approved proof. Check for: colour accuracy and consistency across the batch, colour overflow past metal borders, plating consistency and any bubbling, that both sides are correctly aligned when you flip the coin, that any text is fully legible, and that the finish matches your specification. Document any defects with photographs immediately. Most reputable manufacturers will replace or credit defective coins — but you need to report issues promptly, typically within 7–14 days of receipt.
📚 Further Reading & Resources
- Pantone Color Finder — Look up PMS codes to specify your enamel colours accurately for production
- CreatePins.com Blog — More production guides covering enamel types, file formats, and ordering tips
- Adobe Illustrator — Saving & Exporting Artwork — How to save vector files for manufacturing submission
- Inkscape Free Vector Design Tutorials — Free tool for creating production-ready vector coin artwork
- DHL Express International Shipping — Estimated transit times for express international coin deliveries