
How to Fix Enamel Pin Damage at Home
A practical home repair guide for scratches, small chips, bent posts, and tarnished metal — plus when remaking your pin is the smarter long-term solution
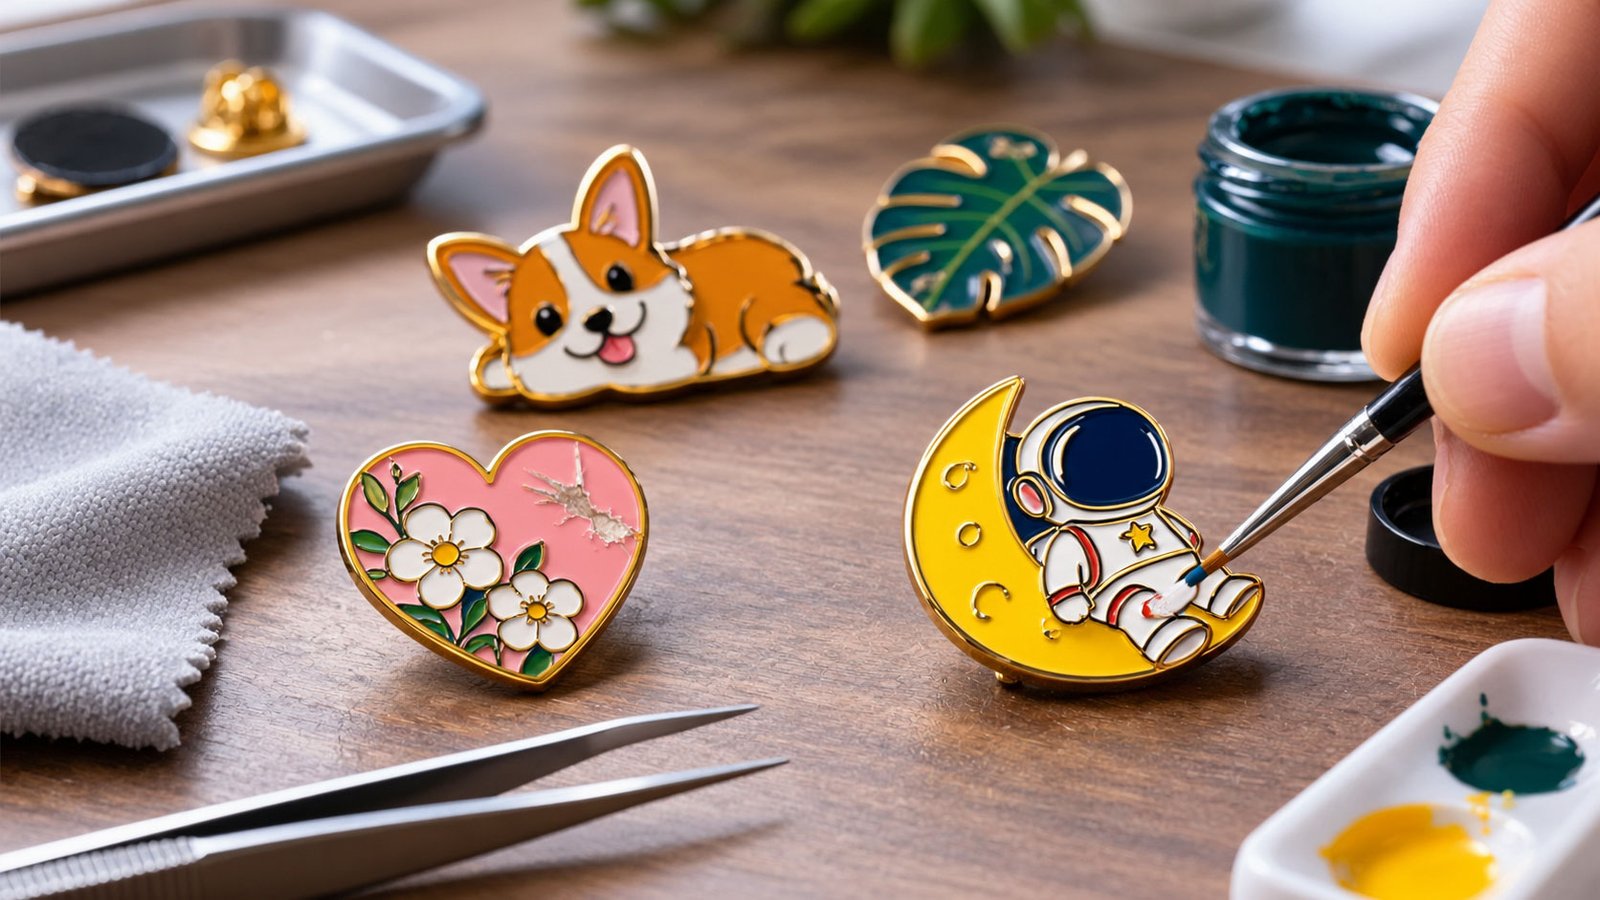
Enamel pins are made to last — but daily wear, bags, jackets, and shipping accidents can still cause minor damage over time.
The good news? Many small enamel pin issues can be fixed at home with basic tools and a little patience.
This guide covers all common minor enamel pin damages that are realistically repairable without professional equipment. We’ll also explain when repair is no longer worth the risk — and why remaking your design with CreatePins is often the smarter long-term solution.
What Enamel Pin Damage Can Be Repaired at Home?
Home repair is suitable only for cosmetic or minor structural surface issues. If the metal is deeply cracked, plating is peeling at scale, or enamel has fallen out completely — DIY repair will be temporary at best and may accelerate further damage. Use this checklist to assess your enamel pin before attempting any repair.
- Light surface scratches on metal or enamel
- Small hairline or shallow enamel chips
- Bent pin posts or loose clutch backs
- Surface tarnish, oxidation, or dull plating
- Minor discoloration from exposure
- Loose but structurally intact enamel areas
- Missing or broken butterfly clutch (replacement)
- Missing enamel sections (large voids)
- Deep cracks through the metal base
- Large dents or warped pin face
- Severe or widespread plating failure
- Multiple types of damage simultaneously
- Antique, rare, or high-value collector pins
- Pins where repair would reduce resale value
🔍 Before attempting any repair, photograph your pin under good lighting at multiple angles. This gives you a “before” reference and helps you track whether the repair improved or worsened the damage.
How to Fix Enamel Pins with Houlsehold Tools
You don’t need a workshop or specialist equipment. Most of these tools are household items or available from a craft store for a few dollars combined. The quality of your repair depends far more on patience and technique than on expensive materials.
🛠️ The Complete DIY Enamel Pin Repair Kit
Soft microfiber cloth
Toothpicks or wooden skewers
Cotton swabs
Clear epoxy resin or enamel paint
Fine-grit sandpaper (800–2000 grit)
Flat or needle-nose jewelry pliers
Clear nail polish or UV resin
Isopropyl alcohol (70–90%)
Magnifying glass or loupe
Bright directional lamp
Metal polish (jewelry grade)
Replacement butterfly clutches
The 5 Most Common Repairs
Fixing Light Scratches
Step-by-Step Repair
- Work in a bright, well-lit area — use a magnifying glass if available to assess scratch depth before proceeding
- Clean the entire enamel pin surface with a cotton swab lightly dampened with isopropyl alcohol; allow to dry completely (2–3 minutes)
- For metal surface scratches: buff gently in a circular motion with a microfiber cloth; for persistent scratches, apply a tiny amount of jeweler’s polish on a cotton swab, work only the metal areas, then wipe clean
- For enamel surface scratches (hairline only): use a toothpick to apply the thinnest possible layer of clear UV resin or clear nail polish directly into the scratch line — do not flood the surrounding enamel
- Allow to cure fully — UV resin cures in 60 seconds under a UV lamp; clear nail polish needs 2–4 hours minimum, 24 hours preferred
- Once fully cured, lightly buff the repaired area with a microfiber cloth to blend the surface sheen
Filling Small Enamel Chips
Step-by-Step Repair
- Assess the chip: it must be shallow (not cutting through the metal base) and small (under 2mm) for DIY to be practical
- Clean and dry the chipped area thoroughly with isopropyl alcohol; remove any loose enamel fragments with a toothpick — do not press them back in
- Select or mix a matching enamel or model paint color; test your color match on white paper first and let it dry (colors shift when dry)
- Using a toothpick or fine brush, apply paint only inside the chip area; avoid painting over the surrounding enamel or metal lines
- Apply in thin layers — a single thick layer will shrink and crack as it dries; 2–3 thin coats produce a more durable fill
- Allow a full 24 hours between coats and after the final layer before touching
- Once the paint is fully cured, apply a very thin seal coat of clear UV resin or clear nail polish over the filled area only
Straightening Bent Pin Posts
Step-by-Step Repair
- Place the pin face-down on a soft surface (folded microfiber cloth) to protect the enamel during repair
- Hold the pin base firmly but without squeezing — grip only the back metal plate, not the enamel face
- With flat-nose or needle-nose jewelry pliers in your other hand, grip the post near its base — not at the tip
- Apply slow, steady, gradual pressure to bend the post back toward vertical; take 5–10 seconds per small movement
- Check alignment every few degrees — stand the pin on a flat surface to test straightness
- Stop immediately when straight; do not attempt to “overshoot and spring back” — this weakens the metal
- If the clutch back is bent or damaged, replace it entirely — butterfly clutches are inexpensive and widely available online
Removing Tarnish & Oxidation
Step-by-Step Repair
- Assess the tarnish level: light dulling vs. dark oxidation spots vs. green verdigris (copper oxidation) each require slightly different approaches
- For light surface tarnish: buff the metal areas gently with a clean, dry microfiber cloth using small circular motions — this alone often restores shine on recently tarnished pins
- For moderate tarnish: apply a very small amount of jeweler’s polish (or a paste of baking soda and water as a budget alternative) to a cotton swab
- Work the polish only on the metal lines — avoid pressing it into enamel fill areas where it can leave residue or cause micro-abrasion
- Wipe away all polish residue with a clean cotton swab dampened with water, then dry immediately with a microfiber cloth
- Follow with a light wipe of isopropyl alcohol to remove any remaining residue; allow to air dry fully
- To prevent re-tarnishing, store restored pins in an anti-tarnish zip bag or with a small silica gel packet
Re-Securing Loose Enamel
Step-by-Step Repair
- Identify the loose area — press very gently on each enamel section; a section that gives slightly or sounds hollow has lost adhesion
- Do not attempt this repair if the enamel section is already partially lifted — this indicates deeper adhesion failure and the section will likely chip out during repair
- Clean the surrounding area with isopropyl alcohol and allow to dry fully
- Using a very fine toothpick, carefully work a micro-drop of clear UV resin or a UV-cure adhesive under the edge of the loose enamel area
- Immediately press the enamel flat and hold steady for 30–60 seconds
- Cure with a UV lamp for 60 seconds, or allow 2–4 hours if using clear nail polish as the adhesive
- Wipe away any adhesive that seeped onto the surrounding metal with a cotton swab dampened with isopropyl alcohol immediately (before curing)
🔄 Too much damage to repair at home? Our team at CreatePins can remake your original design with improved durability and a professional finish.
Get a Free Remake QuoteDamage Severity Quick Reference
Use this table to quickly assess which approach is right for your specific damage type before committing to a repair method.
| Damage Type | Severity | DIY Fixable? | Recommended Action |
|---|---|---|---|
| Light surface scratch | Low | Yes | Polish + clear seal coat |
| Deep scratch through enamel | Medium | Partially | Fill + seal; visible repair likely |
| Small enamel chip (<2mm) | Medium | Yes | Color-matched fill + seal |
| Large enamel chip (>2mm) | High | No | Consider remaking |
| Bent pin post (first time) | Low | Yes | Straighten with pliers |
| Bent post (repeatedly bent) | Medium | Partially | Replace with locking clutch |
| Snapped pin post | High | No | Professional repair or remake |
| Surface tarnish / oxidation | Low | Yes | Polish + anti-tarnish storage |
| Plating loss (small area) | Medium | Partially | Cosmetic cover; will recur |
| Widespread plating failure | High | No | Remake with better plating spec |
| Loose enamel section | Medium | Yes | UV resin re-adhesion |
| Missing enamel section | High | No | Remake |
⏹️ When Repair Isn’t Worth It
DIY repairs are cosmetic and temporary by nature. If you notice any of these conditions, attempting home repair is likely to produce disappointment — or make the enamel pin worse.
Repeated Chipping in the Same Spot
If the same enamel area keeps chipping after repair, the adhesion between the enamel and metal die is compromised at a structural level — a DIY fix won’t resolve the root cause.
Visible Color Mismatch After Repair
If your color fill is noticeably off-shade, the repair is worse than the original damage. Mismatched fills draw the eye directly to the flaw rather than away from it.
Structural Weakness or Metal Fatigue
If the enamel pin feels brittle, flexes more than it should, or if you can see stress lines in the metal — stop. Further handling may cause complete failure.
Multiple Simultaneous Damage Types
A combination of chips, scratches, tarnish, and a bent post makes a compelling case for starting fresh. Layering multiple DIY repairs produces diminishing returns.
Antique or High-Value Collector Enamel Pins
Any DIY repair on a rare, sentimental, or monetarily valuable enamel pin risks reducing its value permanently. Consult a professional restorer first, or accept the pin as-is.
Commercial or Brand Pins
If the pin represents your brand or product line and is visible in marketing materials or to customers, a DIY repair is unlikely to meet the quality standard your brand requires.
Remember: every DIY repair is a temporary cosmetic solution, not a permanent fix. For pins that are valuable, sentimental, or represent your brand — professional remaking delivers a better result every time.
🔄 Why Remaking Your Pin Is Often the Smarter Choice
DIY repairs address symptoms. Remaking addresses the cause — and gives you the opportunity to produce a better pin than the one that was damaged. For artists, brands, and serious collectors, remaking delivers outcomes that home repair simply cannot match.
Fix Original Design Flaws
Correct color accuracy issues, thin die lines, or size problems from the first production run — producing a pin that’s measurably better than the original.
Upgrade Material Durability
Switch to harder enamel, thicker metal stock, or a more durable plating option — addressing the root cause of the damage rather than patching the result.
Improve Colors & Detail
Adjust Pantone colors, refine die line weights, or improve fine detail legibility based on what you learned from the first production run.
Increase Long-Term Value
A higher-quality remake holds its appearance longer, reduces future repair needs, and commands higher resale or brand value compared to a patched original.
Everything included when you remake with CreatePins:
Professional Color Matching
Stronger Metal Bases
Improved Enamel Techniques
Better Plating Options
Free Design Support
Final Thoughts
Small enamel pin damage doesn’t always mean the pin is ruined. With simple tools, patience, and realistic expectations, minor damage — scratches, small chips, bent posts, surface tarnish — can be meaningfully improved at home.
But when repairs become frequent, colors don’t match, or the pin represents something more than a casual accessory — the best fix isn’t glue or polish.
It’s a better-made pin. ✨
Ready for a Permanent Solution?
Turn damage into an opportunity for improvement. Remake your pin with CreatePins — professional quality, precise color matching, and material upgrades that make it last.
Remake or Upgrade Your Pin Design →Free design review · Material upgrades available · Quality guarantee · Expert support
Frequently Asked Questions
Common questions about repairing enamel pin damage at home.
Yes — light surface scratches can often be addressed at home. For metal scratches, a microfiber cloth polish can reduce visibility. For hairline scratches in the enamel itself, a thin layer of clear UV resin or clear nail polish applied with a toothpick and allowed to cure fully can seal the scratch and restore a smooth surface. Deep scratches that removed material are harder to fix invisibly, but the method still improves appearance significantly.
Small enamel chips can be filled with matching enamel or model paint applied carefully with a toothpick directly into the chip. Once dry (allow 24 hours minimum), seal with a thin layer of clear UV resin or nail polish. The biggest challenge is color matching — enamel pin colors are Pantone-specified and hobby paints are rarely an exact match, so repairs may be slightly visible on close inspection.
A bent pin post can be carefully straightened using flat-nose or needle-nose jewelry pliers. Hold the pin base firmly with one hand, grip the post near its base with the pliers, and apply slow, steady pressure to bend it back toward alignment. Check frequently and stop as soon as it’s straight — over-bending weakens the metal. Posts can only be straightened once or twice before the metal fatigues and risks snapping.
For light tarnish, buff the metal areas gently with a soft microfiber cloth. For more stubborn oxidation, a tiny amount of jeweler’s metal polish on a cotton swab — applied only to the metal lines and avoiding enamel fill areas — can restore shine. Clean away all residue with isopropyl alcohol on a cotton swab and allow to dry fully. Avoid harsh chemical cleaners which can damage enamel and accelerate plating degradation.
Consider remaking when: the same area keeps re-chipping (indicating adhesion failure), DIY color matching produces a visible mismatch, the pin has multiple types of damage simultaneously, the metal feels structurally weak or fatigued, or the pin is part of a brand or commercial release where professional appearance matters. DIY repairs are cosmetic and temporary — for pins that represent your brand or have significant value, professional remaking produces a better long-term result.
Most repairs require only basic household tools: a soft microfiber cloth, cotton swabs, toothpicks for precise paint application, isopropyl alcohol for cleaning, clear nail polish or UV resin as a sealant, and flat or needle-nose jewelry pliers for post straightening. For chip fills, you’ll also need enamel or model paint in a matching color. A magnifying glass is highly recommended for precise work on small pin details.
Clear nail polish is safe to use as a protective sealant or scratch filler on enamel pins. Apply a very thin coat with a fine brush or toothpick and allow it to cure fully before handling. Avoid colored nail polish as the solvents can interact with enamel fill, and never use acetone-based nail polish removers near enamel pins — acetone can damage both enamel fill and metal plating.
References & Further Reading
- CreatePins — How to Clean Enamel Pins: Complete Care Guide
- CreatePins — Common Enamel Pin Defects: Quality Control Guide
- CreatePins — What to Do If Your Custom Enamel Pins Arrive Damaged
- CreatePins — Enamel Pin Thickness Explained: Quality, Size & Cost
- CreatePins — Custom Enamel Pins: Manufacturing Options



This is a practical and informative guide for anyone looking to restore damaged enamel pins instead of replacing them. Minor issues such as light scratches, small enamel chips, bent pin posts, loose backs, and surface tarnish can often be repaired at home with simple tools and a bit of patience. The article also emphasizes knowing when a DIY fix is no longer worthwhile—particularly for severe damage, valuable collector’s pins, or large missing enamel sections—where professional restoration or remanufacturing may be the better option. Whether you’re a casual collector or a pin enthusiast, these repair tips can help extend the life of your favorite enamel pins while keeping them looking their best. ([createpins.com][1])
[1]: https://createpins.com/blog/how-to-fix-enamel-pin-damage-at-home/?utm_source=chatgpt.com “How to Fix Enamel Pin Damage at Home | CreatePins”