How to Clean Enamel Pins: Complete Care Guide
Gentle cleaning, advanced techniques, and pro tips to keep your enamel pins looking brand new for years.
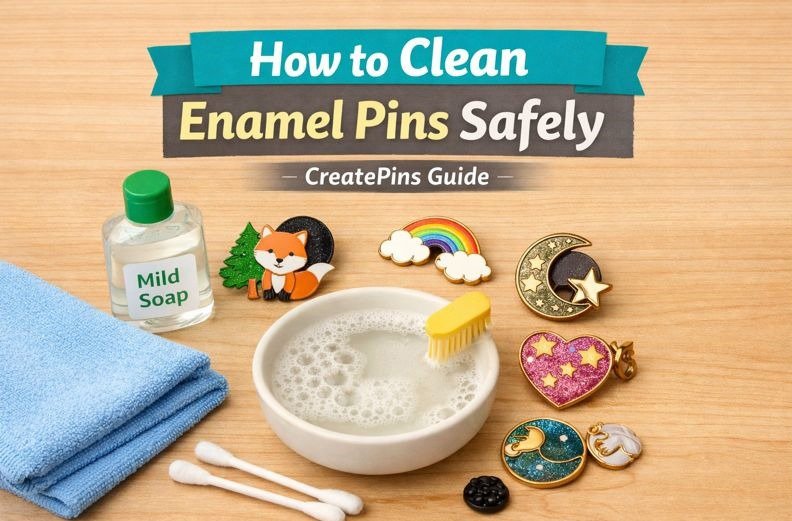
Enamel pins are small, durable, and stylish accessories that have become popular for expressing personality, fandom, and style. However, despite their sturdy appearance, they require proper care to maintain their beauty. Dust, sweat, skin oils, moisture, and everyday wear can dull their shine, cause discoloration, or even lead to rust if not cleaned correctly.
This expanded guide includes everything from basic cleaning to special finishes (glitter, glow, epoxy), a quick-reference cleaning table, pro manufacturer tips, and advanced storage solutions. Whether you’re a new collector or a seasoned pin creator, you’ll find practical advice to keep your pins pristine.
Why Regular Cleaning Matters
- Restore shine and color vibrancy – Oils and dust create a dull film.
- Prevent rust and corrosion – Moisture attacks metal posts and backings.
- Protect enamel from cracking or staining – Some contaminants etch the surface.
- Extend lifespan – Well-maintained pins become vintage treasures.
- Keep pin backs functional – Dirt buildup interferes with clutch backs.
- Maintain collector value – Pristine pins command higher prices.
If you own limited edition, vintage, or particularly valuable enamel pins, consider consulting a professional jewelry cleaner before attempting any cleaning. Some vintage finishes and materials require specialized care.
Essential Cleaning Supplies (Expanded)
🧼 Basic Cleaning Kit
- Soft microfiber or lint-free cloth
- Cotton swabs (Q-tips) & wooden toothpicks (for crevices)
- Mild dish soap (fragrance-free, no citrus)
- Lukewarm water (never hot)
- Soft-bristled toothbrush (child-size or baby brush)
- Soft paintbrush (for dry dusting)
✨ For Metal Parts (Optional)
- Baking soda (for metal posts only – make a thick paste)
- White vinegar (diluted 1:4 with water, rinse thoroughly)
- Jewelry polishing cloth (avoid enamel)
- Anti-tarnish strips for storage
🚫 Absolute No-Gos
- Paper towels (micro-scratches)
- Abrasive sponges or melamine foam (Magic Eraser)
- Harsh chemicals (bleach, ammonia, acetone)
- Alcohol-based wipes or hand sanitizer
- Ultrasonic cleaners (loosens enamel)
- Toothpaste, baking soda paste on enamel, nail polish remover
Quick Reference: Clean Enamel Pins by Enamel Type
| Pin Type | Cleaning Method | Drying & Precautions |
|---|---|---|
| Soft Enamel | Soapy water + soft toothbrush (gentle circles in recesses) | Blot with cloth, then air dry 30 min – trapped moisture causes rust |
| Hard Enamel | Damp microfiber cloth, wipe in one direction; no scrubbing | Dry immediately; use jewelry cloth on metal edges only |
| Glitter Enamel | Dry dusting only or barely damp cloth – no soaking | Glitter can dislodge; never use toothbrush |
| Glow-in-the-Dark | Soft cloth with water only (no soap) | Glow pigments may react to chemicals; store away from moisture |
| Epoxy Dome | Microfiber cloth with water; avoid alcohol | Epoxy can cloud with harsh cleaners; dry thoroughly |
| Screen-Printed / UV Printed | Very gentle damp wipe; no rubbing | Print layers can scratch; test on back first |
Deep Dive: Soft vs Hard Enamel + Special Finishes
1. Soft Enamel Pins (Most Common)
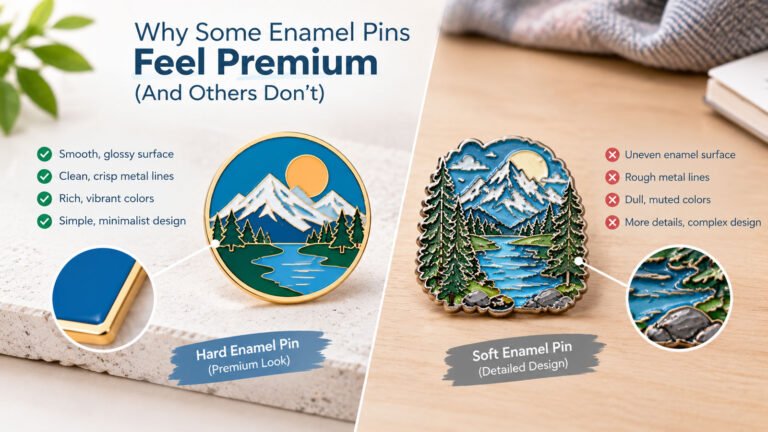
How to identify: Raised metal lines with recessed enamel (textured feel).
Step-by-step deep clean:
- Mix a few drops of mild dish soap with warm (not hot) water.
- Dip a soft toothbrush, tap off excess to avoid over-saturating.
- Gently scrub in small circles, following the metal lines – this lifts dirt from recesses.
- For stubborn grime (e.g., foundation or ink), use a cotton swab dipped in soapy water and twist into tight corners.
- Rinse by wiping with a clean damp cloth (never run under a tap – water pressure forces moisture into the backing).
- Pat dry with microfiber, then use a dry cotton swab to absorb moisture between metal lines.
- Air dry on a soft towel for 30 minutes before storing.
Pro tip: After cleaning, use a hairdryer on COOL setting from a distance to blow out residual moisture from the pin post and clutch area.
2. Hard Enamel Pins (Polished & Smooth)
How to identify: Glass-smooth surface, enamel flush with metal lines.
Cleaning + shine restoration:
- Start with a dry microfiber cloth to remove loose dust.
- Lightly dampen a separate cloth with distilled water (tap water may leave mineral spots).
- Wipe in one direction (not circular) to avoid micro-scratches.
- For fingerprints or oil, add one drop of mild soap to the damp cloth, then wipe again with clean damp cloth.
- Polish metal rims using a jewelry polishing cloth – but keep it away from enamel.
Extra tip: Hard enamel pins benefit from occasional “buffing” with a clean, dry eyeglass cloth for extra gloss.
3. Glitter & Glow-in-the-Dark Pins (Delicate)
Why special care is needed: Glitter particles are mixed with resin and can be dislodged by scrubbing. Glow pigments are photosensitive and can degrade with chemical exposure.
Cleaning protocol:
- Never soak or submerge. Use a soft paintbrush to dust off loose dirt.
- If sticky residue is present, dab with a barely damp cloth (water only).
- For glow pins: avoid any soap – just a dry microfiber wipe. Store away from humidity to maintain glow intensity.
- Dry immediately and let air rest for 1 hour before storing.
4. Epoxy Dome & Screen-Printed Pins
Epoxy coating provides a protective layer, but it is softer than enamel. Alcohol-based cleaners will turn epoxy cloudy. Screen-printed designs sit on top of the metal and can scratch off.
Safe method: Use only a damp microfiber cloth with plain water. Gently pat, never rub. For screen-printed pins, test a small area on the back or edge first.
Common Cleaning Risks & Prevention (Expanded)
| Risk | Why It Happens | How to Prevent |
|---|---|---|
| Rust Formation | Moisture trapped under clutch or in post threads | Dry immediately, use silica gel packets, store in low-humidity environment |
| Surface Scratches | Paper towels, abrasive cloths, or pins rubbing together | Only microfiber; store pins in individual pouches or separated compartments |
| Enamel Cracks | Excessive pressure, especially on soft enamel recesses | Use light pressure; toothbrush bristles should barely bend |
| Plating Wear (gold, rose gold) | Chemical cleaners or frequent polishing | Avoid vinegar, baking soda, and commercial dips. Clean plated pins less often (every 4-6 months) |
| Cloudy Epoxy | Alcohol, hand sanitizer, or ammonia exposure | Water-only cleaning; if clouding occurs, it’s permanent – prevention is key |
| Color Fading | Direct sunlight during drying or long-term UV exposure | Dry in shade; store display pins away from windows or use UV-filter glass |
| Loose Pin Post | Water seeping into the post joint over time | Never submerge; always wipe with a damp cloth instead of running water |
How to Clean Pin Backs & Clutches Separately
Pin backs (butterfly clutches, rubber clutches, locking backs) collect grime and can become loose. Clean them separately:
- Metal clutches: Wipe with a cloth slightly dampened with isopropyl alcohol (70% max) – but keep alcohol away from the pin itself. Let dry completely before reattaching.
- Rubber clutches: Wash with soapy water using a cotton swab, rinse, and air dry. Replace if they feel loose – worn clutches are the #1 cause of lost pins.
- Locking pin backs (screw style): Use a toothpick to clean threads; apply a tiny drop of sewing machine oil if they become stiff.
If you wear a pin daily, replace rubber clutches every 3–4 months. They lose grip over time. Metal butterfly clutches can be gently squeezed with pliers to tighten.
Optimal Cleaning Frequency & Signs You’re Over-Cleaning
- Worn daily – Clean every 2–4 weeks (or after exposure to rain, sweat, lotions).
- Occasionally worn – Clean every 2–3 months or when visibly dirty.
- Displayed only – Light dusting monthly, thorough cleaning every 6 months.
- Stored collectibles – Clean before storage, then check annually.
Signs of over-cleaning: dulled enamel, worn metal plating, loosened pin post. If you notice these, reduce cleaning frequency and use gentler methods.
Advanced Storage Tips to Minimize Cleaning
💧 Humidity Control
Store with silica gel packets (rechargeable type). Ideal humidity: 30–50%. Avoid basements and bathrooms.
🛡️ Anti-Tarnish Protection
Place anti-tarnish strips (e.g., 3M) in storage boxes – they absorb sulfur compounds that darken silver/gold plating.
📦 Individual Wrapping
Use acid-free tissue paper or soft cotton pouches for each pin. Never let pins touch each other – they will scratch.
🚫 Avoid PVC/Vinyl
Some PVC storage pages contain plasticizers that can react with pin finishes over years. Choose archival-quality polyester sleeves.
🌡️ Temperature Stability
Avoid attics or garages – extreme heat can soften epoxy; cold can make enamel brittle.
Pro Manufacturer Tips (From CreatePins)
- Test first: Before cleaning a large collection, test any new method on a cheap or duplicate pin.
- Water quality matters: Use distilled water for final rinse to prevent mineral spots on hard enamel.
- Don’t forget the edges: Dirt accumulates around the pin’s rim. Clean with a cotton swab dampened with soapy water.
- Revive tarnished metal: For antique silver or brass pins, use a dedicated metal polish like Flitz, but apply with a toothpick only on metal, then wipe off immediately.
- Store with chalk: A piece of chalk in your pin box absorbs moisture naturally – an old collector’s trick.
- Never use WD-40: It leaves oily residue that attracts dust and may damage enamel.
Ready to Start Your Pin Project?
Now that you know how to care for enamel pins, why not create your own? Join thousands of creators who trust us for custom pins.
Get a Free Quote →Free design support · Factory-direct · Worldwide shipping
Final Thoughts: Clean Gently, Preserve Permanently
Enamel pins are more durable than they appear but certainly not indestructible. The key to successful cleaning is understanding your pin type, using gentle tools, minimizing moisture exposure, and following proper drying techniques.
Whether you’re a casual wearer, serious collector, pin designer, or brand owner, proper cleaning and storage practices will keep your enamel pins looking vibrant, professional, and valuable for years—or even decades—to come.
When in doubt: less cleaning is safer than aggressive cleaning. When you do clean, patience and gentleness yield the best results. And always, always dry completely.