Common Enamel Pin Defects & How CreatePins Prevent Them
A beginner-friendly deep dive into enamel pin quality control — from fill issues to plating flaws, with pro tips and prevention strategies at every stage.
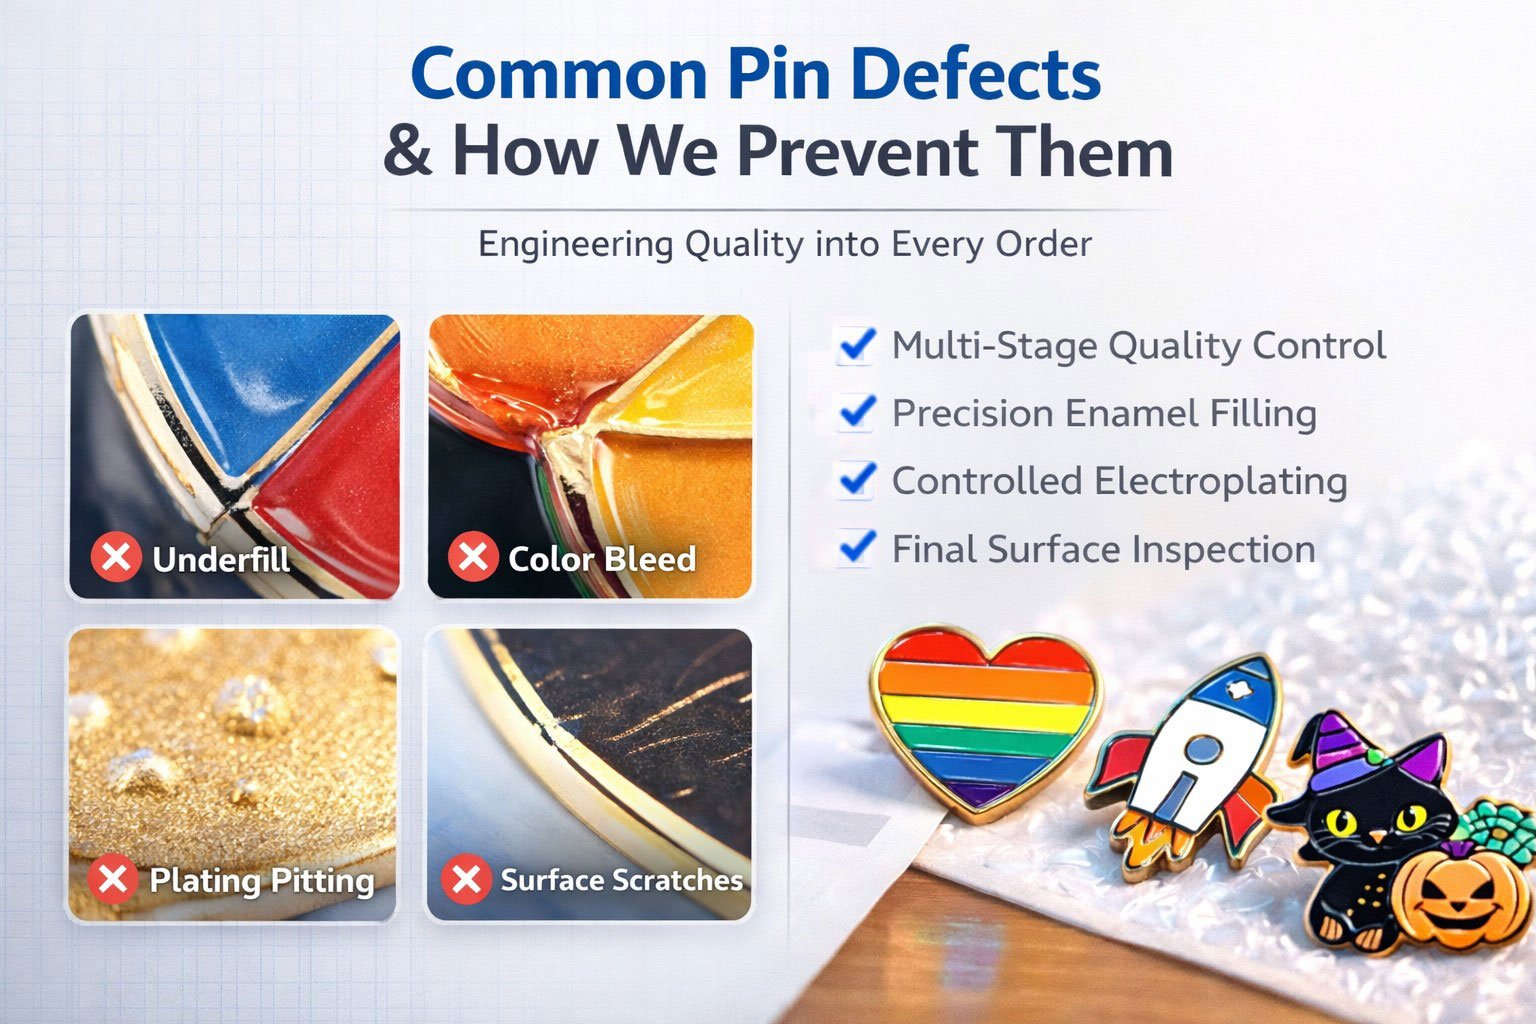
Understanding common enamel pin defects is one of the most important things you can do as a pin creator — whether you’re producing your first order of 100 pins or scaling to thousands. Defective pins don’t just affect your customers’ experience; they damage your brand reputation, drain profit through replacements, and cause delays that hurt your business.
At CreatePins, quality isn’t a final inspection step — it’s engineered into every stage of production. In this guide we break down every significant enamel pin defect: what causes it, what it looks like, and exactly how we prevent it. Each section also includes beginner-friendly tips to help you design smarter, communicate better with your manufacturer, and protect your brand from the start.
Whether you’re producing collectible hard enamel pins, soft enamel merch, or bulk promotional badges, this guide gives you the quality knowledge you need.
Hard enamel: enamel is baked and polished completely smooth — colours sit flush with the metal, giving a flat, jewelry-quality surface. Soft enamel: slightly recessed, textured enamel fill — usually more vibrant-looking and more cost-effective. Both types can have defects, and both benefit from a pre-production sample review. This guide tells you exactly what to watch for and how a quality manufacturer prevents each problem.
Why Enamel Pin Defects Happen
Enamel pins go through a multi-stage manufacturing process: metal stamping or casting, surface polishing, electroplating, enamel filling (or printing), baking, additional polishing (hard enamel only), post attachment, and final packaging. Each stage introduces its own risk of defects — which is why quality control at every checkpoint, not just at the end, is non-negotiable.
The 4 Root Causes of Most Pin Defects
- Design issues: Artwork with lines that are too thin, colors too close together, or details too small to reproduce accurately in metal and enamel
- Material issues: Inconsistent enamel viscosity, poor base metal quality, or unstable plating bath chemistry
- Process issues: Incorrect curing temperatures, rushed filling, poor polishing, or insufficient deburring after stamping
- Handling issues: Pins scratched during internal transport, assembly, or packaging — especially in bulk-bin production environments
Understanding these root causes helps you make better design decisions and ask the right questions when selecting a manufacturer. Let’s go through each major defect type in detail.
1️⃣ Underfilled or Overfilled Enamel
One of the most visually obvious defects — and one of the most common. Getting the enamel fill volume exactly right requires calibrated equipment, experienced technicians, and controlled curing conditions.
❌ The Problem
- Low fill leaves visible gaps, bare metal patches, or recessed color areas in finished pins
- Overfill causes uneven surface bumps, color bleed into adjacent areas, or enamel overflowing metal lines
- Poor or inconsistent curing temperatures cause enamel to shrink after baking, leaving depressions
- Hard enamel requires especially precise fill — too little and polishing reveals bare metal; too much and polishing can’t flatten the surface
✅ How We Prevent It
- Precision color fill calibration with measured dispense volumes
- Controlled curing temperature monitoring with oven calibration checks
- Multi-stage fill inspection before baking — technicians check each pin
- Final surface polishing for hard enamel to achieve a perfectly flush, jewelry-grade finish
- Soft enamel fill inspected post-bake for consistency and color depth
For hard enamel pins, we polish after baking to ensure a completely smooth, flush surface. Any pin showing uneven fill at this stage is flagged for rework or rejection before it moves to the next production step.
2️⃣ Color Bleeding or Contamination
Color bleeding — where one enamel color flows into an adjacent area — is a design and process defect that significantly reduces the visual quality of your pin. It’s most common in designs with thin separating lines or very small color areas placed close together.
❌ The Problem
- Enamel flows over thin or shallow metal dividing lines and mixes with adjacent colors
- Colors appear muddy, undefined, or blended where they should be clean and sharp
- Complex artwork with many small color sections significantly increases bleeding risk
- Enamel viscosity that is too low (too runny) causes spreading before it sets during baking
- Design elements smaller than 0.3mm lines cannot be reliably separated during filling
✅ How We Prevent It
- Enforce minimum metal line thickness standards — at least 0.3mm between adjacent colors
- Pre-production artwork manufacturability review — we check every design before mold creation
- Pantone color matching with controlled, consistent viscosity per batch
- Experienced manual fill technicians who know where bleed risk is highest
- Staged filling: darker colors first, lighter colors after partial set, in multi-color sections
If your artwork has sections that risk bleeding, our team will proactively recommend minor design adjustments — slightly thickening lines, simplifying adjacent color sections, or increasing the size of small detail areas — before mold production begins. Catching this before the mold is made saves significant cost and production time.
3️⃣ Plating Defects (Pitting, Peeling, Oxidation)
The metal plating of your pin — whether gold, silver, black nickel, antique brass, or rose gold — sets the visual tone for the entire design. Plating defects are immediately noticeable and can make even a great design look cheap or poorly made.
❌ The Problem
- Pitting: small craters or rough patches in the plating surface caused by gas bubbles or contamination in the plating bath
- Peeling or flaking: plating separates from the base metal due to poor adhesion — typically caused by insufficient pre-plating polishing or surface contamination
- Uneven tone: patchy or inconsistent metal color across the pin surface
- Oxidation or tarnishing: discoloration over time, especially on gold and silver finishes, caused by insufficient sealing
- Dull or matte finish: where a gloss finish was specified — caused by incorrect bath temperature or timing
✅ How We Prevent It
- Multi-step mechanical polishing of the base metal before any plating begins
- Thorough surface degreasing to remove oils and contaminants that cause adhesion failure
- Controlled electroplating bath calibration — temperature, current density, and immersion time are monitored
- Salt spray corrosion testing available for select orders requiring durability certification
- Protective topcoat sealing options available to slow oxidation on gold and silver finishes
- Post-plating visual inspection under magnification before enamel filling begins
We offer gold, silver, black nickel, antique gold, antique silver, rose gold, copper, and matte finishes — all produced under the same strict plating quality standards and inspected before moving to the enamel fill stage.
4️⃣ Scratches & Surface Damage
Surface scratches are one of the most frustrating defects because they can occur after all other production steps are completed — during polishing, assembly, packaging, or bulk transport. Even small scratches on a hard enamel surface can significantly impact resale value and customer satisfaction for collectible pins.
❌ The Problem
- Polishing abrasives leave fine scratches on soft plating finishes if grit selection is incorrect
- Pins scratching each other when loose in bulk bins during production stages
- Assembly jigs or metal tools causing contact marks during post attachment
- Packaging without individual protection allows pins to rub against each other in transit
- Long-distance shipping increases vibration exposure, worsening surface abrasion
✅ How We Prevent It
- Protective film application on delicate hard enamel and metallic finishes
- Individual polybag packaging for each pin as a standard option
- Soft foam or cloth padding during internal transport between production stages
- Non-contact assembly jigs where possible during post attachment
- Final QC surface inspection under controlled lighting before packaging
- Upgraded packaging available for premium or retail-ready orders
Order Buffer Tip: Always order 5–10% more pins than your actual requirement. This accounts for minor handling imperfections that pass QC but don’t meet your personal standard, any units lost to shipping damage, and pins you set aside for giveaways, samples, or your own collection. This buffer is standard practice for professional pin sellers.
5️⃣ Misaligned Back Posts
The back post (or butterfly clasp post) is the functional component of every wearable pin. Misaligned posts aren’t just aesthetically problematic — they affect wearability, backing card fit, and structural stability of the pin when worn.
❌ The Problem
- Off-center posts cause the pin to tilt or hang at an angle when worn — instead of sitting flat
- Misaligned posts mean backing cards don’t sit flush or fall off the pin
- Incorrectly positioned posts on tall or wide pins make them spin or rotate freely
- Posts not welded or soldered correctly can detach under minimal pulling force
- For pins requiring two posts, mismatched post spacing causes the same problems
✅ How We Prevent It
- CNC mold precision with post position specified in the design file
- Alignment jig fixtures that hold each pin in position during post attachment
- Manual placement verification by a QC technician after every batch
- Pull-strength testing on sample units from each production run
- Double-post mold adjustment available for larger pins at no additional design cost
6️⃣ Sharp Edges or Burrs
Sharp edges or metal burrs left over from the die-striking or casting process are both a safety concern and a clear indicator of low-quality manufacturing. Any pin that feels sharp to the touch — on its perimeter or in its detail areas — has not been properly finished.
❌ The Problem
- Die-striking or casting leaves rough, sharp metal edges at the pin perimeter
- Detail cutouts and internal recesses can trap burrs that the plating process doesn’t fully cover
- Sharp edges scratch hands, fingers, and fabric — a real safety and liability issue
- Burrs catch on clothing fibres and cause snags, damaging garments
- Pins with visible burrs appear low-quality to customers and damage brand trust
✅ How We Prevent It
- Barrel tumbling or vibratory edge grinding after initial metal stamping
- Manual deburring with fine tools for complex shapes and cutout details
- Pre-plating polishing that removes residual surface roughness
- Tactile QC checks — technicians physically run their fingers around pin edges
- Random batch inspection sampling for burr detection throughout production
- Every batch undergoes a final edge inspection before packaging
7️⃣ Incorrect Colors vs. Digital Artwork
This is the defect that surprises beginners most — and causes the most disappointment when a pin order arrives. The root cause is a fundamental technical difference between how colors work on screens versus in physical enamel pigments.
❌ The Problem
- RGB vs. Pantone: Screens display color using light (RGB) — a completely different system from the physical pigments used in enamel (Pantone-based)
- Colors that look vivid or neon on screen often appear more muted in physical enamel
- Very saturated blues and greens are particularly prone to looking darker in enamel than on screen
- Colors from different enamel batches can vary slightly — causing consistency issues in repeat orders
- Skin tones, complex gradient areas, and subtle color differences are especially difficult to match
✅ How We Prevent It
- Pantone Matching System (PMS) color specifications as the production standard
- Digital mockup approval before production begins — you see the adjusted colors first
- Physical pre-production sample option for orders where color accuracy is critical
- Controlled pigment mixing with documented Pantone recipes for batch consistency
- Color swatch references matched against approved samples for repeat orders
- Transparent communication if a specified color cannot be reliably reproduced in enamel
The best protection against color mismatch is a pre-production physical sample. Once you hold the actual pin and approve it, bulk production matches that approved sample — not your screen.
Get a Free Artwork Review with Your Quote
Our team checks every design for defect risks — thin lines, color bleed risk, post placement, edge issues — before production begins. Catch problems before they become expensive mistakes.
Get Your Free Quote & Artwork Review →No obligation • Free artwork manufacturability check • Sample pins available
Our Full Quality Control Process
Quality assurance at CreatePins doesn’t happen at one moment at the end of production — it’s a layered system of checks at every major stage. Here’s how every order is protected:
- Artwork review & manufacturability check — before any mold is made, we review your design for thin lines, small details, color bleed risk, post placement, and any features that could cause defects. We’ll flag issues and suggest adjustments before you’re committed to production costs.
- Mold inspection after engraving — once the metal mold (die) is created, it’s inspected under magnification for accuracy against your approved artwork. Any mismatch is corrected before the first pin is struck.
- Pre-plating base metal inspection — finished raw pins are inspected for sharp edges, burrs, structural defects, and surface quality before entering the plating stage.
- In-process plating checks — bath chemistry, temperature, and timing are monitored continuously. Sample pins are pulled and inspected mid-run to catch plating issues early.
- Post-plating inspection — each batch is checked for pitting, uneven tone, peeling, and finish consistency before enamel filling begins. Defective units are rejected at this stage.
- In-process enamel fill inspection — fill technicians check for underfill, overfill, and color bleed during the filling process, before baking, when corrections are still possible.
- Post-bake & polishing inspection (hard enamel) — after kiln baking and surface polishing, hard enamel pins are checked for flush surface, fill completeness, and color accuracy.
- Final packaging inspection — before any pin is bagged and boxed, it undergoes a complete final visual and tactile check under controlled lighting. This is the last line of defence before your order ships.
Production Transparency: Each quality checkpoint is documented during production. You can request in-progress photos of your pins at specific production stages — useful for large orders, first-time productions, or when color accuracy is critical to your brand.
Why Quality Control Matters for Your Brand
Pin defects aren’t just a manufacturing inconvenience — they have real business consequences. Here’s what’s at stake when quality slips:
When you sell pins on Etsy, Shopify, or at conventions; include them in subscription boxes; or distribute them at events, consistent quality is what protects your reputation and earns repeat customers. A single bad batch shared on social media — especially in niche collector communities where word travels fast — can do lasting damage to a small brand.
⚠️ The Hidden Cost of Defective Pins
Ordering replacement units for defective pins doesn’t just cost money — it costs time. A replacement production run and shipping cycle can take 3–6 weeks, potentially missing an event, a launch date, or a seasonal sales window. The most cost-effective quality control investment you can make is requesting a pre-production sample before bulk production begins. One sample approval can save an entire order.
📊 Quick Reference: Defect Summary & Risk Levels
Use this table to quickly assess which defects are most relevant to your specific project type:
| Defect Type | Risk Level | Most Common In | Primary Prevention |
|---|---|---|---|
| Underfill / Overfill | High | Hard enamel (polishing-dependent) | Calibrated fill + curing control |
| Color Bleeding | High | Complex, multi-color soft enamel designs | 0.3mm+ line thickness + artwork review |
| Plating Defects | Medium | All types — especially gold & silver finishes | Polishing + bath calibration + sealing |
| Surface Scratches | Medium | Hard enamel, polished metallic finishes | Individual bags + protective film + padding |
| Misaligned Posts | Low–Medium | Large or wide pins (1 inch+) | CNC molds + alignment jigs + double posts |
| Sharp Edges / Burrs | Low | Die-cut complex shapes & cutouts | Tumbling + manual deburring + tactile QC |
| Color Mismatch | High | All types — especially first orders | Pantone codes + digital proof + physical sample |
✅ Your Pre-Order Quality Checklist
Before approving your pin design for production, run through this checklist to dramatically reduce the risk of defects in your order:
📋 Quality Protection Checklist
Have all metal lines between colors been checked for 0.3mm minimum width?
Thinner lines are the primary cause of color bleeding. Ask for a manufacturability review if unsure.
Have I provided Pantone color codes alongside my artwork?
Pantone codes are the most reliable way to communicate your exact color expectations to the factory.
Have I approved a digital proof or mockup before production begins?
A digital proof lets you see color adjustments before any enamel is mixed.
Have I requested a physical pre-production sample for new designs?
A sample approval is the single most powerful quality protection step available to you.
Is my pin wider than 2.5cm? Have I requested double back posts?
Wide pins need two posts to prevent spinning and tilting when worn.
Have I physically checked my sample’s edges for sharpness?
Run your fingertip around every edge. It should be completely smooth — never sharp or rough.
Have I ordered 5–10% extra pins as a production buffer?
This covers minor handling imperfections and gives you spares for giveaways, samples, and your own collection.
Have I requested individual polybag packaging for each pin?
Pins packed loose in bags or boxes will scratch each other during shipping — individual bags prevent this.
Do I understand my manufacturer’s defect replacement policy?
Know in advance what counts as a manufacturing defect versus expected production tolerance, and what the remedy process is.
What We Produce at CreatePins
Every product we make goes through the same structured quality control process described in this guide:
Every order is produced with professional-grade equipment, experienced technicians, and a documented quality control system — not a single-stage end-of-line check. If you’re planning a new design, get a free quote and let our team review your artwork for manufacturability before production begins. It costs nothing and can save significant time and money.
❓ Frequently Asked Questions
What are the most common enamel pin defects?
How does CreatePins prevent enamel color bleeding?
Why do enamel pins sometimes have plating defects?
How are scratches prevented during enamel pin production?
Can I request a pre-production sample before my full order is made?
Why do my enamel pins look different in color from my digital artwork?
How do I know if my design has lines that are too thin?
What causes misaligned back posts on enamel pins?
Do larger enamel pins need two back posts?
How many extra pins should I order to account for production defects?
Let’s Produce Your Pins the Right Way
Every CreatePins order includes a free artwork manufacturability review — we check for thin lines, bleed risk, post placement, and edge issues before a single mold is made. Get a quote and let’s make sure your pins are perfect from the start.
📋 Get Your Free Quote →Free artwork review included • Pre-production samples available • No obligation • Expert guidance