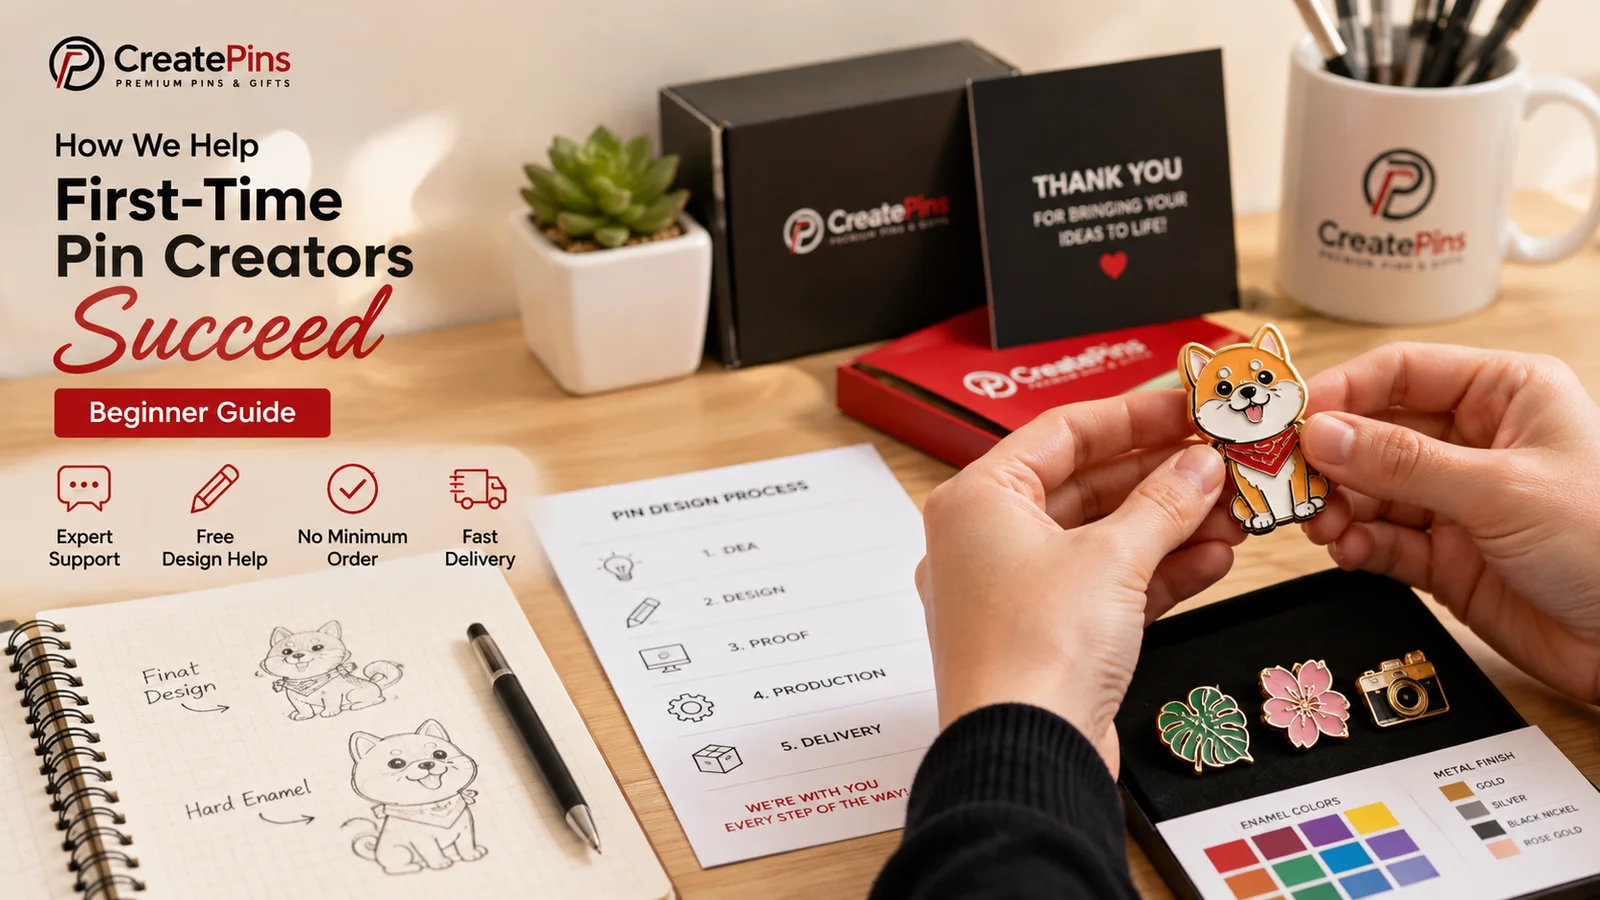
How We Help First-Time Pin Creators Succeed: A Complete Beginner’s Guide to Creating Enamel Pins
Everything a beginner needs to know before making their first enamel pin — from choosing a size to reviewing your proof, step by step.
📖 Table of Contents
- Step One: Start With Your Idea
- Turning Artwork Into a Manufacturable Pin
- Choosing the Right Enamel Type
- Understanding Plating and Finishes
- What Can — and Can’t — Be Manufactured
- Your Digital Proof: The Most Important Step
- Common Beginner Mistakes (and How to Avoid Them)
- No Minimum Order Quantity Makes Testing Easier
- Thinking Through the Business Side
- Packaging: Small Detail, Big Impact on Perceived Value
- Production Timeline: What to Expect
- Staying Updated Throughout the Process
- Quality Control Matters Most on Your First Order
- Protecting Your Artwork
- A Simple First-Time Enamel Pin Workflow
- Your First Enamel Pin Doesn’t Have to Be Perfect
- Build Your First Enamel Pin Around Your Audience
- Frequently Asked Questions
- First-Time Pin Creator Checklist
- Ready to Create Your First Enamel Pin Design?
Creating your first enamel pin should be exciting — not confusing. But if you’ve never made a pin before, the process can feel overwhelming. What size should you choose? Will your artwork actually work as a pin? What’s the difference between soft and hard enamel? How much does it cost, and do you really need to order hundreds of them?
This guide is built specifically for first-time pin creators — independent artists, illustrators, small businesses, clothing brands, fandom creators, clubs, event organizers, and anyone with an idea they want to turn into a real product. Our goal isn’t just to manufacture your pins; it’s to walk you through custom enamel pins for beginners so you can make informed decisions with confidence, from your very first sketch to a finished, wearable product.
Step One for First-Time Pin Creators: Start With Your Idea
Every project in this enamel pin design guide starts the same way: with an idea. It could be an original character, a logo, a mascot, a band design, a clothing brand graphic, a club emblem, a fandom-inspired piece, a Kickstarter product, or a personal artwork you just want to hold in your hands. Your first enamel pin design does not need to be perfect — many first-time creators reach out before their artwork is even finished, and that’s completely okay.
Before submitting anything, it helps to think through a short checklist:
- What is the purpose of the pin? Collectible, promotional item, merchandise, event souvenir, or personal keepsake?
- Who will wear or collect it? Your audience influences size, style, packaging, and price.
- What is your target size? Roughly 0.75″–2″ is a practical range for most designs, though custom sizes are possible.
- How many do you need? Quantity affects total project cost and the most economical production approach.
You don’t need every answer right away — these are simply useful starting points. For a deeper dive into planning your very first design, see our Complete Enamel Pin Design Guide.
Turning Artwork Into a Manufacturable Pin
Artwork designed for a screen isn’t automatically ready for metal manufacturing — this is one of the most important lessons for anyone making their first enamel pin. A digital illustration can contain extremely thin lines, tiny text, subtle gradients, and overlapping details that simply can’t be reproduced with traditional enamel at a small physical size. Your design needs to work with metal, enamel, plating, and manufacturing tolerances all at once.
Line thickness matters
We generally recommend keeping important metal lines at approximately 0.2 mm (0.008″) or thicker. Very thin lines can become difficult to manufacture consistently, especially once a detailed illustration is reduced down to a 1-inch pin.
Small text can be a problem
Text that reads perfectly on your monitor may become illegible on a physical pin. As a general rule, simpler typography works better, and important lettering should stay around 6 pt or larger as a practical starting point, depending on the font and final pin size.
Choosing the Right Enamel Type
One of the very first decisions beginners face is soft enamel vs. hard enamel — and if you’ve never made pins before, the difference can be genuinely confusing.
| Type | Look & Feel | Best For |
|---|---|---|
| Soft Enamel | Recessed enamel, raised metal borders, textured surface, strong contrast | Bold designs where visible metal lines are part of the style; generally lower cost |
| Hard Enamel | Filled and polished, smooth level surface, refined collectible feel | Premium merchandise, logos, designs needing a smooth finish |
There isn’t one universally “correct” choice — it depends on your artwork, desired appearance, budget, quantity, and audience. The best pin isn’t necessarily the most expensive option; it’s the one that fits your goals. Our full Hard Enamel vs Soft Enamel Pins guide breaks this down further.
Understanding Plating and Finishes
Metal plating isn’t just a manufacturing detail — it changes the entire look of your design. Common options include gold, silver, black nickel, copper, and antique finishes. A dark plating can create a dramatic, premium look, while bright silver feels cleaner and more contemporary. Instead of picking a color because it looked nice in a sample photo, think about how it interacts with your artwork, enamel colors, and brand identity. Our Beginner’s Guide to Enamel Pin Plating Colors covers every finish in detail.
What Can — and Can’t — Be Manufactured
A common beginner mistake is assuming every digital effect can be reproduced in enamel. Traditional soft enamel does not reproduce smooth gradients the way a screen does — a blue-to-purple-to-pink digital gradient won’t translate directly into standard enamel fills. Depending on the design, alternatives may include multiple enamel colors, translucent enamel, printed details, or UV printing. See our Translucent Enamel Pin Design Guide for one popular workaround.
Your Digital Proof: The Most Important Step
Before production begins, you’ll receive a digital proof showing exactly how your artwork will be translated into a physical pin — pin shape, metal borders, enamel areas, colors, plating, size, and backing placement. This is your chance to catch problems before they become finished inventory. Discovering that a line is too thin, text is too small, or a color needs adjusting is far easier to fix on a proof than after production. You can always request revisions — a different plating color, thicker lines, simplified details, or adjusted text — before approving the final version. Learn more in our Sample Approval Process guide.
Common Beginner Mistakes (and How to Avoid Them)
- Making the design too complicated — a highly detailed illustration may look fantastic at 3000px wide but fail at 1 inch. Simplify anything non-essential.
- Using extremely thin lines — thin lines create manufacturing difficulties. Use stronger outlines and simplify fragile details.
- Making text too small — tiny lettering may become unreadable after production. Increase size or trim wording.
- Choosing size based only on price — a smaller pin costs less but may not fit your artwork. Balance size against complexity and use case.
- Assuming screen colors equal enamel colors — digital RGB isn’t physical enamel. Discuss important color requirements before production.
- Ordering too much inventory for a first launch — test demand before committing to a large run.
For more detail, see The Biggest Enamel Pin Design Mistakes.
No Minimum Order Quantity Makes Testing Easier
A major concern for anyone exploring custom enamel pins for beginners is minimum order quantity — what if you don’t know whether a design will sell? CreatePins offers no minimum order quantity, which means first-time artists, small Etsy shops, new brands, and test launches can start small instead of automatically committing to a large inventory. Starting small helps you learn which designs, sizes, and finishes people actually prefer before you scale up. Read more in No Minimum Order Custom Pins.
Thinking Through the Business Side
Making a pin isn’t only a design project — if you plan to sell it, you need to think about economics too. Your total project cost can include manufacturing, packaging, backing cards, shipping, taxes or import costs, marketing, marketplace fees, and fulfillment. Don’t calculate your selling price from manufacturing cost alone. A simple starting formula is:
Example: $10 selling price − $3.50 total cost = $6.50 gross profit
Understanding your complete cost structure before ordering can prevent unpleasant surprises later. Our Pricing Custom Enamel Pins for Profit guide includes a full cost breakdown and calculator, and Are Custom Enamel Pins Worth It for Small Business? is worth reading before you launch.
Packaging: Small Detail, Big Impact on Perceived Value
A basic poly bag is perfectly fine for some projects, but for a collectible or premium brand you may prefer custom backing cards, velvet pouches, or gift boxes. A good backing card can include your logo, artist name, social handle, product name, edition information, and care instructions — a standard card is often approximately 90 × 54 mm with 2 mm bleed. Packaging should support your product without unnecessarily increasing your cost. See our Backing Cards Design Guide and Complete Packaging Guide for more ideas.
Production Timeline: What to Expect
A typical timeline runs: proof approval → 10–15 business days of production → shipping. Shipping time depends on the method — Express is typically 3–6 business days, and Economy is typically 7–14 business days. These are general estimates, not guarantees. If you’re planning a launch, Kickstarter campaign, convention, or seasonal release, build in extra time for artwork prep, proof revisions, quality inspection, and unexpected delays. Our advice: don’t schedule your public launch for the same week your inventory is due to arrive. See Custom Enamel Pin Production Timeline Explained for a full breakdown, or Can You Get Custom Pins in 7 Days? if you’re on a tight deadline.
Staying Updated Throughout the Process
Waiting for your first physical product can be stressful, so clear communication matters. A typical workflow looks like this: artwork submitted → quote confirmed → proof created → proof reviewed → revisions completed → proof approved → production begins → quality inspection → order ships → tracking provided → delivery. CreatePins also provides an order tracking system so you can follow your project every step of the way — visibility makes the whole experience far less intimidating for a first-timer.
Quality Control Matters Most on Your First Enamel Pin Order
Before accepting your finished pins, inspect samples for correct shape and size, plating consistency, enamel color, scratches, bubbles, missing enamel, metal defects, backing attachment, and packaging accuracy. If you’re selling the pins, quality control protects your brand — a customer doesn’t know whether a defect came from the factory; they simply see your product.
Protecting Your Artwork
If you’re sharing unreleased artwork, new characters, or brand designs you haven’t publicly launched yet, it’s reasonable to ask about an NDA (Non-Disclosure Agreement) before sharing sensitive files. An NDA establishes confidentiality expectations between you and your manufacturer, which can offer peace of mind for pre-launch projects.
A Simple First-Time Enamel Pin Workflow
- Develop your concept — decide what your pin represents.
- Prepare your artwork — use the best quality you have; it doesn’t need to be production-ready yet.
- Request a quote — share your artwork, desired size, quantity, and any known preferences.
- Review your proof — inspect the design carefully before approving it.
- Request revisions — ask questions and make changes if needed.
- Approve production — only once you’re fully comfortable.
- Production — the factory manufactures according to the approved specs.
- Quality control and shipping — the order is inspected and shipped.
- Receive your first enamel pins — evaluate the physical product and gather feedback.
- Learn and improve — your first order is research for your next collection.
Want the fully detailed version of this process? See How to Order Enamel Pins (Step-by-Step Guide) and Custom Enamel Pin Order Process Explained.
Your First Enamel Pin Doesn’t Have to Be Perfect
This may be the most important advice for anyone making their first enamel pin: it’s a learning experience. You might discover the design should have been larger, a different plating would look better, your audience prefers hard enamel, or that you actually want an entire pin collection. That’s completely normal — successful creators rarely start with a perfect product line. They test, learn, improve, and create again. If you’re thinking bigger from the start, our guides on Planning a Successful Enamel Pin Crowdfunding Campaign and How to Launch a Successful Enamel Pin Kickstarter are great next steps.
Build Your First Enamel Pin Around Your Audience
If you plan to sell your pin, don’t only ask “what do I like?” — also ask “what will my audience want to own?” Understanding which character gets the most engagement, which colors attract attention, what size customers prefer, and what price they’ll accept turns your first enamel pin into both a product and a market test.
Ready to Create Your First Enamel Pin?
Bring us your idea, ask your questions, and we’ll help you turn the concept into a real custom enamel pin — no experience required.
Frequently Asked Questions
How much artwork experience do I need?
None. You can start with an illustration, sketch, logo, or concept and discuss the manufacturing requirements with our production team from there.
Is my artwork automatically suitable for an enamel pin?
Not necessarily. Some artwork needs to be simplified or adjusted — thin lines, tiny text, and gradients often need adapting for physical manufacturing.
Should I choose soft or hard enamel for my first pin?
It depends on your design, budget, and desired appearance. Soft enamel gives a raised metal, textured finish, while hard enamel gives a smoother, more polished surface.
What size should my first pin be?
Most pins are produced between approximately 0.75 and 2 inches. Your ideal size depends on how much detail your artwork has and how the pin will be used.
Do I need to order hundreds of pins for my first run?
Not necessarily. CreatePins offers no minimum order quantity, so first-time creators can start with a smaller test order before scaling up.
How long does production take?
Typical production is approximately 10–15 business days after proof approval, with shipping time added on top depending on the method and destination selected.
Can I request changes after seeing my proof?
Yes. The proof-review stage exists specifically so you can catch and correct issues — like line thickness, text size, or color — before production begins.
First-Time Pin Creator Checklist
Before you place your first order, make sure you’ve thought through:
- What the pin represents and who your target audience is
- Final or draft artwork, ready to share
- Desired pin size and soft vs. hard enamel
- Plating color and backing type
- Number of pins and packaging requirements
- Target selling price, if you plan to sell them
- Production timeline and shipping deadline
- Whether you need an NDA for unreleased artwork
You don’t need every answer before requesting a quote — the checklist is just there to help you identify the decisions you’ll eventually need to make.
Ready to Create Your First Enamel Pin Design?
Creating your first enamel pin can seem complicated from the outside, but once you break it into stages, it becomes much easier: start with an idea, prepare your artwork, choose the right specifications, review your proof, approve production, inspect the finished product, and learn from the experience. Whether you want to create custom enamel pins for a personal project or launch an entire brand, at CreatePins we want every first-time creator to feel supported throughout that process — you don’t need to know everything before you start.
Related Guides You Might Like
- Complete Enamel Pin Design Guide (2026)
- Enamel Pin Production Specifications
- Hard Enamel vs Soft Enamel Pins
- The Beginner’s Guide to Enamel Pin Plating Colors
- How to Order Enamel Pins (Step-by-Step Guide)
- Custom Enamel Pin Order Process Explained
- Custom Enamel Pin Sample Approval Process Explained
- No Minimum Order Custom Pins
- Pricing Custom Enamel Pins for Profit
- Are Custom Enamel Pins Worth It for Small Business?
- Enamel Pin Backing Cards Design Guide
- Complete Enamel Pin Packaging Guide
- Custom Enamel Pin Production Timeline Explained
- Enamel Pin Order Tracking
- How to Launch a Successful Enamel Pin Kickstarter
Get Your First Enamel Pin Quote Today
Whether you have finished artwork or just an idea, share it with us and we’ll help you plan your first pin from size to shipping.