How to Design Jewelry Inspired Enamel Pins
From elegant shape and premium plating to movement, gemstone effects, and presentation — the complete guide to designing enamel pins that sparkle like treasured accessories
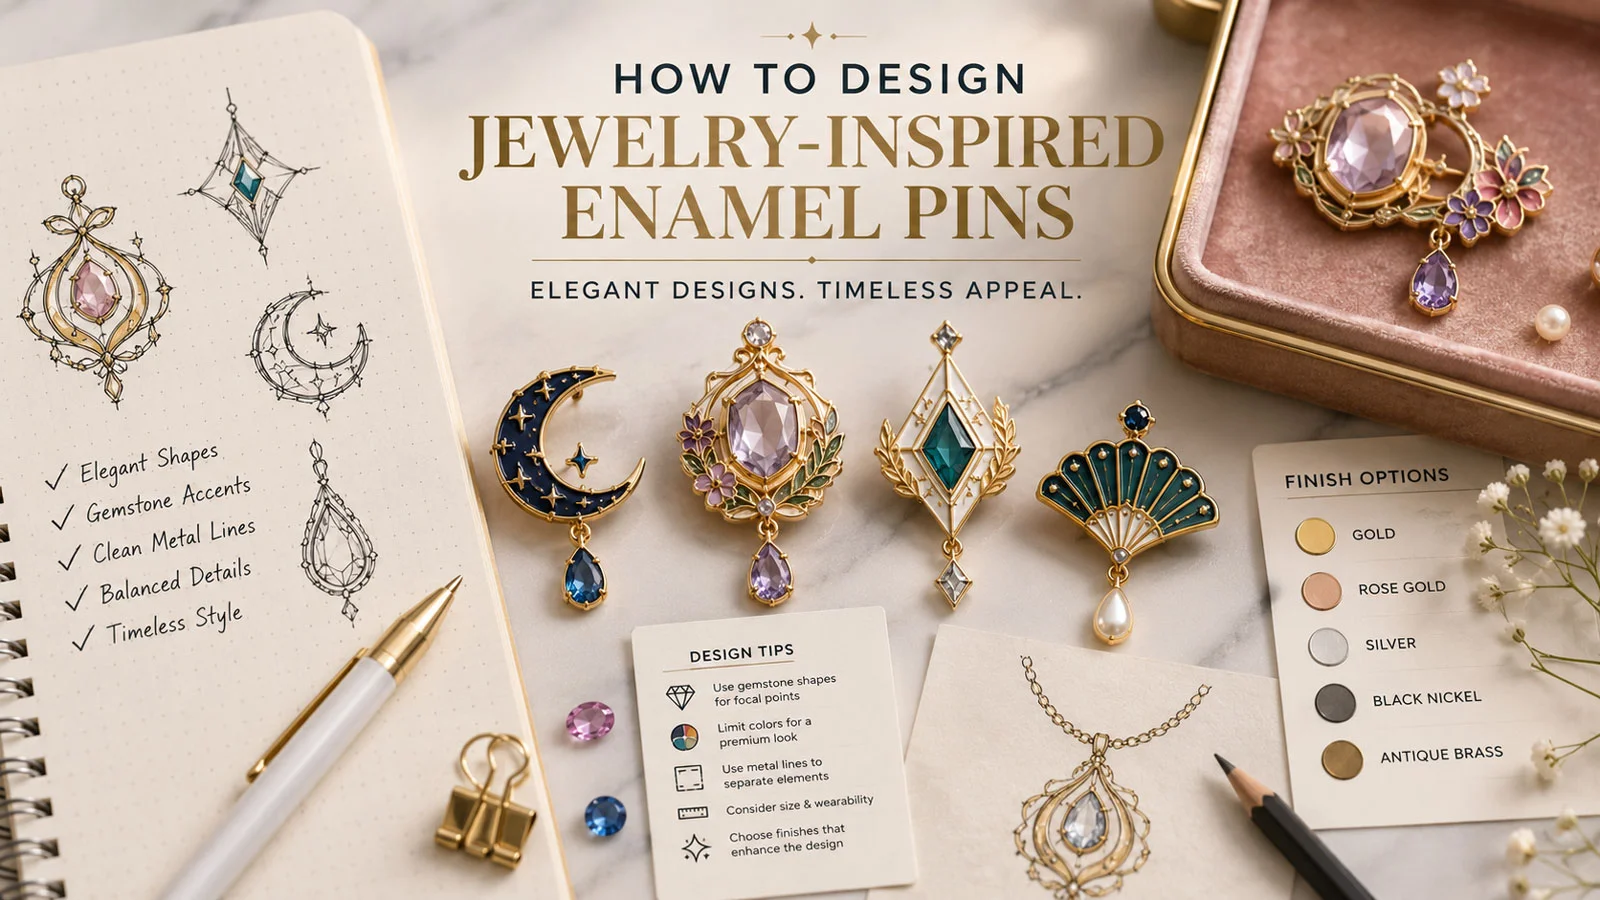
Custom enamel pins have evolved far beyond their roots as collectible items or brand merchandise. Today, many designers are taking creative inspiration from fine jewelry — transforming simple pin designs into elegant pieces that resemble earrings, bracelets, pendants, or brooches. The result is a product category that sits at the intersection of wearable art and accessible luxury.
This guide walks through everything you need to design enamel pins that genuinely feel like treasured jewelry — from the initial mindset shift to shape decisions, plating choices, movement elements, production limits, and presentation packaging.
✨ The key insight: The difference between an ordinary enamel pin and one that looks like jewelry isn’t about cost — it’s about deliberate design decisions at every stage of the process.
The 9 Steps to Jewelry-Inspired Enamel Pin Design
Think Like a Jewelry Designer
Before diving into technical details, make a fundamental mindset shift. Traditional enamel pins are built for simplicity and durability. Jewelry-inspired pins prioritize elegance, subtlety, and the sensation of wearable art.
Does your design evoke the feel of gold, silver, gemstones, or pearls?
Can it function beautifully as a single piece and as part of a coordinated set?
Does it convey refinement — subtlety and elegance over bold graphic impact?
Successful jewelry-inspired pins often begin by reimagining small jewelry motifs — flowers, hearts, wings, stars, lockets, or monogram initials — then applying the color and plating techniques used in fine jewelry rather than conventional pin design.
Refine the Shape and Form
Jewelry-inspired pins use softer curves, delicate outlines, and strategic negative space. The silhouette alone should communicate elegance before any color or plating is considered.
- Die-cut (cutout) areas give the design lightness and depth, mimicking the filigree or latticework seen in traditional jewelry settings
- Raised metal lines can imitate gemstone settings, beaded rims, or the claws that hold stones in place
- Asymmetric balance adds visual interest — one earring-style pin with a hanging charm while the other remains static creates a coordinated, intentional set
- Organic flowing curves rather than sharp geometric corners communicate softness and femininity associated with fine jewelry
Design Tip
Upload your sketch or vector concept with cutout areas clearly indicated — CreatePins can refine the metal outlines so die-cut areas maintain structural integrity while achieving the delicate, jewelry-like appearance you’re after.
Choose Elegant Plating & Materials
Plating is where jewelry character is most powerfully established. The right metal finish can make an enamel pin look genuinely precious — the wrong one makes it look like a promotional item.
Gold / Antique Gold
Rose Gold
Silver / Nickel
Black Nickel
Matte / Satin Gold
| Plating | Effect | Best Paired With |
|---|---|---|
| Gold (Polished or Antique) | Classic luxury | White, red, or navy enamel for maximum contrast |
| Rose Gold | Romantic, feminine warmth | Pastel enamel tones — blush, lavender, soft mint |
| Silver / Nickel | Modern, sleek, contemporary | Crystal-like translucent or cool-toned enamel |
| Black Nickel | Contemporary sophistication | Minimalist outlines, neon accents, stark contrast |
| Matte Gold / Satin Silver | Soft vintage glow | Earthy, antique, or dusty palette tones |
Adding clear epoxy or glitter enamel enhances the gemstone sparkle effect significantly. For ultra-premium results, you can embed rhinestones, crystals, or small pearl elements during production — just keep spacing and pin balance in mind when planning the placement.
Select the Right Fixing for Jewelry-Style Wear
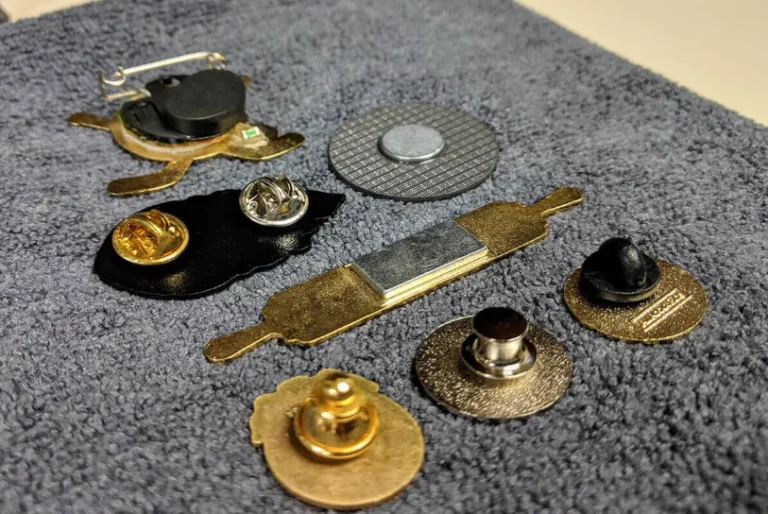
Jewelry-inspired pins often require different attachment hardware than standard butterfly clutches — the fixing method affects both the visual appearance from behind and the functional experience of wearing the piece.
| Fixing Type | Ideal For | Benefit |
|---|---|---|
| Magnet Backing | Clothing, scarves, fine fabric | Prevents fabric damage; gives a clean, seamless jewelry-like fit |
| Safety Pin Bar | Brooch-style statement pieces | Strong, stable, allows precise horizontal alignment on lapels |
| Double Post | Large or heavy statement pins | Prevents rotation and drooping — essential for pins over 1.5″ |
| Chain Connector | Dual-pin or “dangle” designs | Creates natural movement like earring drops or bracelet charms |
| Butterfly / Rubber Clutch | Small, lightweight designs | Classic and reliable for delicate pieces under 1.25″ |
If your design includes dangling elements or chain connections, ask your manufacturer to test the balance, weight distribution, and connection point stress before approving the production run. This prevents the most common failure point in jewelry-style pin designs.
Work Within Production Limits
The most elegant jewelry-inspired designs must still be physically producible. Understanding these limits lets you push the aesthetic as far as possible without crossing into structural failure territory.
Metal Line Thickness
Lines thinner than 0.3 mm may snap during stamping or polishing. Delicate filigree-style work must be carefully sized to meet this threshold.
Minimum Enamel Area
Tiny color zones under 0.2 mm trap air bubbles and fill unevenly. Simplify complex shading into 2–3 bold, clean enamel tones.
Attachment Clearance
Leave at least 5 mm between design edges and fixing attachment points. For chain or charm connections, have your manufacturer test tension and swing range.
Ideal Size Range
This range provides the ideal balance of jewelry-like presence and comfortable wearability. Heavy designs should use reinforced posts or double fixings.
Add Movement and Dimension
What distinguishes jewelry from a static accessory is often movement and depth — the gentle sway of a pendant, the catch of light from a faceted stone. These elements can be replicated in enamel pin design.
- Hinged elements and swinging charms on jump rings that move naturally when worn, mimicking earring or bracelet charms
- Linked pairs — two complementary pins connected by a delicate chain, worn as a set like coordinated earrings
- 3D molded metal that adds physical curvature and catches light from multiple angles
- Transparent enamel over recessed metal to simulate polished gemstones or stained-glass windows — the light-through effect is uniquely jewelry-like
- Layered multi-piece construction where elements overlap at different physical depths
These elements elevate an enamel pin from accessory to art — and from a product into a piece someone genuinely treasures.
Package Like Jewelry
Presentation plays a disproportionate role in how customers perceive jewelry-inspired pins. The same pin in a standard polybag versus a velvet-lined box creates a completely different experience — and commands a significantly different price point.
Velvet Backing Cards
Black or ivory velvet inserts add immediate premium feel, similar to jeweler presentation
Kraft Jewelry Boxes
Rigid gift-style boxes with foam inserts protect and present the pin as a collectible
Metal Tins
Custom-printed metal tins add lasting collectible value and reusability
Silk Pouches
Soft fabric pouches give a tactile luxury experience that reinforces the jewelry positioning
Foil Stamping
Gold or silver foil stamping on backing cards or boxes creates a premium branded presentation
Custom Inserts
Tissue paper, ribbon, or custom-cut foam inserts complete the unboxing experience
Optional Upgrade
CreatePins offers custom packaging services — backing cards and boxes tailored to your design aesthetic. Consistent packaging reinforces the jewelry positioning at every customer touchpoint.
Test, Adjust, and Evolve
Jewelry-quality enamel pins are rarely perfected in a single production run. The best designs are developed over multiple iterations that balance beauty with durability.
- Evaluate color accuracy under different lighting conditions — indoor warm light, cool white light, and natural daylight
- Check metal polish and enamel surface smoothness — jewelry-like pins should feel as premium as they look
- Test fixing stability — does the pin stay correctly aligned and upright when worn throughout a full day?
- For designs with movement elements, test swinging range, connection stress, and whether the weight distribution feels natural
Collect real feedback from the first run before scaling. The refinements that come from user experience are often the details that transform a good pin into a genuinely beloved piece.
Where to Start
If you have an idea for a jewelry-inspired enamel pin but aren’t yet sure how to bring it to life technically, here’s how to begin:
- Sketch or photograph your concept — even a rough drawing communicates the key shape, cutout areas, and overall aesthetic direction
- Choose a plating direction — gold, rose gold, or silver — before finalizing any enamel colors, since plating significantly affects which colors read best
- Request a free digital proof — our design team can review your concept for structural integrity, recommend adjustments to achieve the jewelry aesthetic, and flag any production constraints before the mold is created
You’ll receive professional production guidance before any commitment — ensuring your design shines like real jewelry, at a fraction of the cost of traditional precious metal fabrication.
✨ Final Thoughts
Turning enamel pins into jewelry-inspired art pieces isn’t just a trend — it’s a way to blend creativity with wearability and elevate a mass-produced format into something genuinely personal and precious.
Whether you’re crafting a dainty heart brooch, a chain-linked moon-and-star duo, or a translucent gemstone statement piece — remember that great design lies in the balance between imagination and production reality. With the right guidance and deliberate decisions at every stage, your pin can truly sparkle.
💎 Ready to design a jewelry-inspired enamel pin? Upload your concept for a free design review — our team provides expert guidance on shape, plating, and structural details before production begins.
Get a Free Design ReviewReady to Make Pins That Sparkle Like Jewelry?
Get expert design support from CreatePins — we help you choose the right shape, plating, fixing, and packaging to create pins that look and feel truly premium.
Start Your Custom Quote →Free design review · Expert plating advice · Digital proof before production
Frequently Asked Questions
Common questions about designing jewelry-inspired enamel pins.
Several design elements combine to create a jewelry-like appearance: polished or antique metal plating instead of standard finishes; translucent or gemstone-effect enamel; die-cut negative spaces that mimic filigree or latticework; raised metal lines resembling gemstone settings; added movement through chain connectors or dangling charms; and jewelry-grade packaging such as velvet backing cards or gift boxes. The combination of these elements — not any single one — creates the genuine jewelry impression.
The most jewelry-authentic plating options are: polished gold or antique gold (classic luxury, pairs beautifully with white or red enamel); rose gold (romantic and feminine, ideal with pastels); matte gold or satin silver (vintage glow that mimics brushed jewelry metal); silver/nickel (modern, excellent for crystal-like designs); and black nickel (contemporary sophistication for minimalist outlines). Adding clear epoxy coating or rhinestones further enhances the gemstone effect.
Jewelry-inspired pins often benefit from: magnet backing — prevents fabric damage and gives a clean, seamless fit on clothing and scarves; safety pin bars — for brooch-style stability and horizontal alignment; double posts — prevent rotation and drooping on larger statement pieces; chain connectors — create earring-like or bracelet-like movement in dual-pin designs. Standard butterfly clutches still work well for small, lightweight jewelry-style designs under 1.25 inches.
Key production limits: metal lines must be at least 0.3 mm thick; enamel fill areas at least 0.2 mm wide; leave at least 5 mm clearance between design edges and fixing attachment points; the sweet spot size for jewelry-style pins is 1.25–2.0 inches; heavy designs need reinforced posts or dual fixings. These limits apply equally to jewelry-inspired designs — working elegantly within them is what separates great design from failed production.
Movement elements that give jewelry character include: chain connectors linking two coordinated pins as a set; hinged or swinging charm elements attached below the main pin body on jump rings; dangling components that swing freely; and layered multi-piece designs with physical depth. For any dangling or hinged elements, ask your manufacturer to test balance, weight distribution, and connection strength before approving production.
References & Further Reading
- CreatePins — The Beginner’s Guide to Enamel Pin Plating Colors
- CreatePins — Translucent Enamel Pin Design Guide
- CreatePins — Pearl Swirl Enamel Pin Design Guide: Limits, Risks & Pro Tips
- CreatePins — How to Store Enamel Pins & Display Tips
- CreatePins — How to Choose the Perfect Size & Thickness for Your Enamel Pin Design (Expert Size Guide 2026)
- CreatePins — Enamel Pin Backing Cards: Complete Design, Size, Printing & Finish Guide (2026)
- CreatePins — Complete Enamel Pin Packaging Guide Types, Costs & Best Practices (2026)
- CreatePins — Enamel Pin Production Specifications (Beginner Guide)
- CreatePins — Pin Collecting Trends 2026: What’s Hot Right Now
- CreatePins — What Brands Get Wrong About Promotional Pins
- CreatePins — How to Turn Enamel Pin Design into Jewelry — Earrings, Necklaces, Rings & Bracelets
- CreatePins — Want More Than Just Custom Pins?