Custom Enamel Pin Hidden Costs You Should Know Before Ordering
Think enamel pin pricing is just unit cost × quantity? Once you move into production, hidden variables start adding up fast. Understanding enamel pin hidden costs is essential — here's every cost factor you need to account for before you commit to an order and request your enamel pin quote.
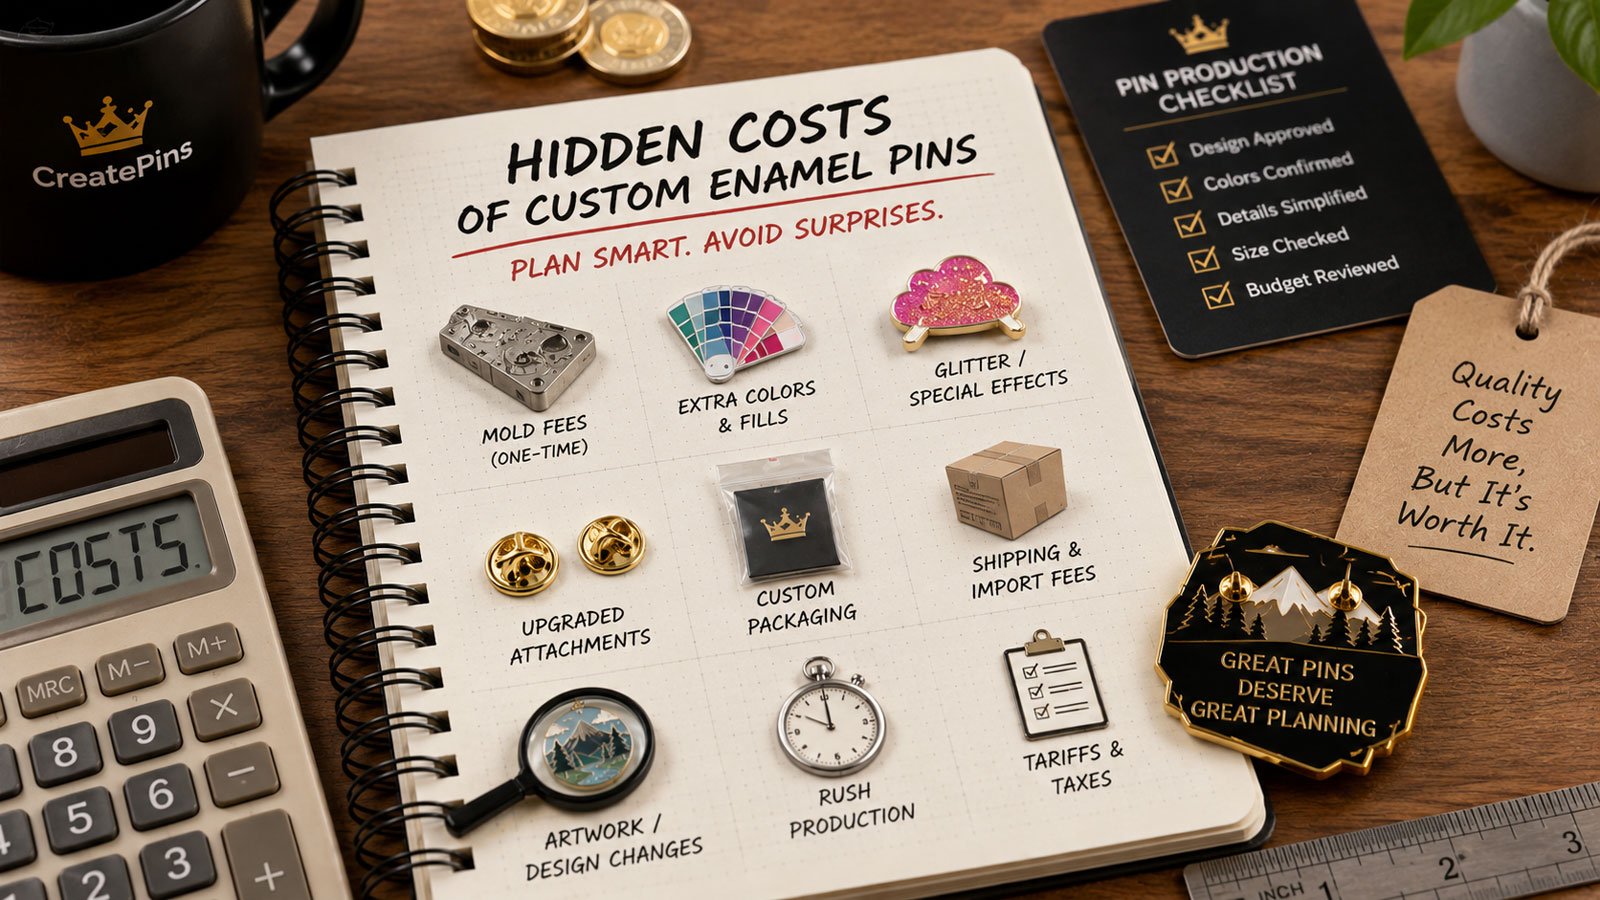
When you first request a quote for custom enamel pins, the price might seem simple — unit cost × quantity. But once you move deeper into production, unexpected costs start creeping in. Understanding these enamel pin hidden costs before you commit can help you budget more accurately, avoid frustrating surprises, and make smarter design decisions from the very start.
This guide covers every cost variable you're likely to encounter — from the obvious to the easily overlooked — so you can confidently evaluate any enamel pin pricing quote you receive.
1 Mold (Setup) Fees
One-Time Upfront Cost Per Design
High ImpactOne of the most commonly overlooked enamel pin hidden costs is the mold — also called a die or tooling fee. Before any production can begin, a custom steel mold must be precision-cut based on your design. This mold is what stamps out the shape of each pin and defines all the raised metal lines. When reviewing your enamel pin quote, always confirm whether this fee is included or separate.
What affects the mold cost:
- Design complexity — more intricate line work requires more precision engraving
- Pin size — larger pins need bigger molds, which cost more to produce
- Number of cutouts or layers — negative space and multi-layer construction increase mold difficulty
- Shape deviation — highly irregular die-cut silhouettes cost more than standard shapes
Mold fees typically range from $50 to $200 or more per design. For small orders, this fixed cost significantly inflates your per-unit enamel pin cost. For large orders, it becomes a minor line item.
If you plan to reorder the same design, most manufacturers will reuse the existing mold — saving you the fee entirely on future runs. This is one of the best long-term cost advantages of sticking with one manufacturer.
2 Design Complexity
Intricate Artwork Costs More to Produce
High ImpactNot all designs cost the same to produce — even at the same size and quantity. This is one of the enamel pin hidden costs that catches many first-time creators off guard. The more intricate your artwork, the more expensive your final enamel pin pricing becomes due to increased labor, more detailed mold engraving, and a higher risk of production errors that need correction.
What adds complexity cost:
- Tiny text — very small lettering is difficult to fill cleanly and may bleed
- Fine lines — thin raised metal lines are harder to cut precisely and more prone to damage
- Complex shapes or die cuts — irregular silhouettes require more involved mold fabrication
- Multiple depth levels — layered or 3D construction adds assembly steps
- Gradients — not achievable in standard enamel; typically requires screen printing at added enamel pin cost
Minimalist designs with bold, clean lines consistently cost less to produce — and often look more striking at pin scale. A simple, well-executed design beats a complex one that loses detail in production.
3 Number of Colors
Each Color Is Filled by Hand — One at a Time
Medium ImpactUnlike digital printing, enamel colors are applied individually by hand during production. Every additional color adds labor time, increases the chance of fill errors, and extends production duration — all of which translate into higher enamel pin cost. When comparing enamel pin pricing across suppliers, pay close attention to how each quote handles color counts.
| Color Count | Cost Impact | Notes |
|---|---|---|
| 1–4 colors | Base Rate | Included in standard enamel pin pricing at most factories |
| 5–6 colors | Low Addition | Minor incremental fee per color |
| 7–9 colors | Moderate Addition | Each color adds noticeable per-unit enamel pin cost |
| 10+ colors | High Addition | Significantly higher cost; consider screen printing |
Simplifying your color palette — even from 8 colors down to 5 — can meaningfully reduce your total enamel pin cost without sacrificing design impact. Solid colors always look stronger on a pin than complex multi-color schemes that lose definition at small scale.
4 Plating Options
Your Metal Finish Affects Both Look and Price
Medium ImpactThe metal finish you choose affects both the final aesthetic of your pin and your enamel pin pricing. Standard finishes are priced similarly; specialty finishes require additional processing steps that add labor and material costs — an enamel pin hidden cost that's easy to overlook.
| Finish | Cost Level | Best For |
|---|---|---|
| Gold (standard) | Standard | Warm, classic — works with most color palettes |
| Silver (standard) | Standard | Clean, modern, versatile |
| Black Nickel (standard) | Standard | Bold, edgy — looks premium at no extra enamel pin cost |
| Rose Gold | +Moderate | Trendy, feminine aesthetics |
| Antique / Matte | +Moderate | Vintage, heritage vibes |
| Dual Plating | +Higher | Two-tone metal; requires extra plating pass |
| Rainbow / Holographic | +Highest | Specialty effects; premium enamel pin pricing |
Black nickel is one of the best value choices in plating — it looks high-end and contemporary at the same price as standard gold or silver. It pairs especially well with dark or vibrant color palettes.
Want a fully itemized enamel pin quote that breaks down every cost before you commit?
Get Your Free Custom Quote →5 Pin Size and Thickness
Bigger Pins Require More Material and Longer Production
Medium ImpactPin size has a direct relationship with material usage, mold cost, and shipping weight. Even a modest size increase can add meaningfully to your per-unit enamel pin cost — especially for large orders. When requesting an enamel pin quote, consider whether the size you've chosen is truly necessary for your design.
| Size | Cost Level | Typical Use Case |
|---|---|---|
| 0.75 – 1 inch | Cheapest | Logos, simple icons, minimal designs |
| 1 – 1.5 inch | Sweet Spot ⭐ | Most popular range — great detail, manageable enamel pin cost |
| 1.75 – 2 inch | Mid–High | Character art, illustrated designs |
| 2.5 – 3 inch | Highest | Statement pieces, limited editions |
Thicker pins — which some creators choose for a more premium, substantial feel — also increase base metal usage and production time. If you're on a budget, a standard thickness at 1–1.5 inches is almost always the right call.
The 1–1.5 inch range is the sweet spot for balancing visual impact with enamel pin cost efficiency. It's large enough to appreciate fine detail, small enough to wear comfortably, and keeps both mold and material costs manageable.
6 Backing Options
Upgrade Your Clutch, Upgrade Your Cost
Lower ImpactThe standard butterfly clutch backing is typically included in base enamel pin pricing. Upgrading to a different backing type adds a small per-unit cost — but for the right audience, it can meaningfully enhance perceived value.
| Backing Type | Cost | Best For |
|---|---|---|
| Butterfly clutch | Included | Classic, secure — most widely used |
| Rubber clutch | Low Add | Comfortable for daily wear, very popular |
| Deluxe locking back | Moderate Add | Extra secure, good for heavier pins |
| Magnetic back | Higher Add | No needle holes — premium option for corporate gifts |
For most merch, event, and collectible pins, a rubber clutch is the ideal upgrade — it's more comfortable than a butterfly clutch, costs very little to add, and is what many pin buyers now prefer.
7 Packaging and Presentation
Presentation Add-Ons Are Easy to Forget
Medium ImpactMany buyers receive their initial enamel pin quote and feel satisfied — only to realize later that packaging wasn't included. Custom packaging can transform how your pin is received, but it adds meaningful enamel pin cost per unit. This is one of the most common enamel pin hidden costs in the industry.
Common packaging add-ons:
- Custom backing cards — branded display cards showing your design, logo, and social links; popular for retail and Etsy
- Poly bags — clear protective bags to keep pins scratch-free; often low cost
- Velvet pouches — premium feel; suited to luxury or gift-oriented pins
- Retail-ready packaging — hang-sell headers, branded boxes, or display cases for wholesale or boutique retail
- Individual foam inserts — protects pins during shipping; adds to box weight and enamel pin cost
Backing cards can cost anywhere from a few cents to over $0.50 per card depending on print quality, die-cutting, and quantity. For retail pins, they're usually worth it — for giveaways or internal use, they're easy to skip.
8 Shipping and Logistics
One of the Biggest — and Most Overlooked — Hidden Costs
High ImpactShipping is one of the most significant enamel pin hidden costs in custom pin production — particularly for overseas manufacturing. Many enamel pin quote documents are production-only and don't include freight. When you add it in, the final landed enamel pin cost can be noticeably higher than expected.
What affects your shipping cost:
- Order weight and dimensions — more pins, more weight; bulky packaging inflates dimensional weight
- Shipping method — air freight is fast (7–15 days) but expensive; sea freight is cheap but slow (4–6 weeks)
- Destination country — international destinations vary widely in freight rates
- Customs duties and import taxes — often not included in quotes; can add 5–20%+ depending on your country
- Insurance and tracking — optional but worth it on larger orders
Before approving any order, ask for a quote that includes production, shipping, and any applicable import duties or customs fees. What looks like a cheap unit price can become expensive once freight and taxes are added. Manufacturers offering DDP (Delivered Duty Paid) shipping can make costs fully predictable.
Sea shipping is ideal for orders of 500+ pins where you have adequate lead time. For urgent orders or smaller quantities, air freight is often the only practical option — so factor it into your timeline and budget from the start.
9 Sample and Revision Costs
Pre-Production Samples Are Optional — but Valuable
Lower ImpactBefore the full production run, many manufacturers offer a pre-production sample (PP sample) — a physical pin made to your specifications for your approval. While often optional, samples come with their own enamel pin cost line items.
Sample-related costs include:
- Sample production fee — a small charge to produce 1–3 sample pieces outside the main run
- Sample shipping — express air shipping for a physical sample delivery, often $20–$50+
- Revision rounds — if the sample doesn't match expectations, additional adjustments may incur fees
- Time cost — the sample process adds 1–2 weeks to your overall production timeline
Skipping the sample stage saves money and time upfront — but significantly increases the risk of receiving an entire production batch that doesn't meet your expectations. For large or high-stakes orders, the sample fee is almost always worth it.
For first-time orders or orders above 300 pins, always request a physical sample before approving full production. For simple reorders of a previously approved design, a digital proof review is often sufficient.
10 Special Features and Add-Ons
Premium Effects Are Tempting — and Cumulative
Medium ImpactSpecial features and effects can make your pin genuinely stand out — but they require additional materials, labor, and sometimes entirely different production steps. Stacking multiple effects quickly inflates your total enamel pin cost. Always review these line items carefully in your enamel pin quote.
| Add-On | Cost Impact | Worth It? |
|---|---|---|
| Epoxy (dome) coating | Low | ✅ Best value — protects enamel, adds gloss, affordable enamel pin cost |
| Custom back stamp | Low | ✅ Great for branding at minimal added enamel pin cost |
| Translucent enamel | Moderate | ⚠️ Use selectively — works best as an accent |
| Glitter enamel | Moderate | ⚠️ Effective when central to the design concept |
| Glow-in-the-dark enamel | Moderate–High | ⚠️ Only if it's your core hook |
| Screen printing | Moderate | ⚠️ Needed for gradients or fine text beyond enamel limits |
| Spinner / sliding elements | High | ⚠️ Mechanical complexity — adds significantly to enamel pin cost |
| Intricate cut-out designs | High | ⚠️ Increases mold cost and fragility risk |
The golden rule: choose one standout feature per design and execute it well. Stacking effects rarely improves the result and always increases enamel pin cost. Epoxy coating + custom back stamp is the most cost-effective combination for a polished, branded finish.
11 Minimum Order Quantities (MOQs)
Quantity Is the Single Biggest Lever on Per-Unit Price
High ImpactEven if a manufacturer advertises "no minimum order," enamel pin pricing is always influenced by how many pins you order. Fixed setup costs — the mold fee, machine setup, and production labor allocation — are spread across the total quantity. The fewer pins you order, the higher each one's enamel pin cost.
| Order Quantity | Per-Unit Cost | Best For |
|---|---|---|
| 50 pins | Highest | Prototypes, personal use |
| 100–200 pins | High | Testing designs, small launches |
| 300–500 pins | Mid | Small businesses, Etsy sellers |
| 500–1,000 pins | Low | Merch brands, events, promotions |
| 1,000+ pins | Lowest ⭐ | Large brands, wholesale, retail distribution |
Increasing your order by even 20–30% can significantly lower your per-unit enamel pin cost. Run the numbers before ordering — a slightly larger batch often costs only marginally more in total while delivering dramatically better per-pin value.
12 Revisions and Artwork Adjustments
Late Changes Are the Most Avoidable Hidden Cost
Medium ImpactMost manufacturers include a limited number of free artwork revision rounds before production begins. Beyond that — or once production is underway — changes can become costly enamel pin hidden costs.
When revision costs apply:
- Mold redesign — structural changes to the design after mold creation require a new or modified mold
- Production mid-changes — any changes once the full run has started may require scrapping in-progress inventory
- Excessive artwork rounds — going beyond the included free revision limit often incurs a per-round fee
- Rush changes — urgent adjustments after sign-off may involve expedited fees
The vast majority of revision costs are entirely preventable. Thoroughly reviewing every detail of the artwork approval form — colors, line weights, proportions, text — before signing off eliminates almost all revision risk and keeps your enamel pin cost under control.
Once you approve the digital proof and the mold is created, structural changes become very expensive. Take the extra time upfront — review colors against Pantone references, check line weights at actual size, and confirm all text is legible before you give the green light.
Clear, detailed communication at the design stage eliminates nearly all unexpected enamel pin hidden costs. Provide complete specifications upfront: Pantone codes for every color, preferred metal finish, exact size, and any special requirements.
How to Keep Your Hidden Costs Under Control
Custom enamel pin enamel pin pricing isn't just about the base quote — it's a combination of design choices, production details, and logistics. The good news is that most enamel pin hidden costs are predictable and manageable once you know where to look. Use this guide whenever you review an enamel pin quote to ensure you're seeing the full picture.
Simplify Your Design
Fewer colors, cleaner lines, standard shapes — lower complexity means lower enamel pin cost at every stage.
Order More Upfront
Quantity is the single biggest lever on per-unit enamel pin cost. A slightly larger order often delivers much better value.
Choose Standard Options
Standard sizes (1–1.5"), standard finishes, rubber clutch. Save premium options for when they really matter.
Ask for Landed Cost
Always request a quote that includes shipping, duties, and taxes — not just production enamel pin pricing.
Finalize Before Approving
Review every detail in your digital proof. Late-stage changes are the most avoidable enamel pin hidden cost of all.
Stick With One Manufacturer
Reusing molds, locked specs, and loyalty pricing save significantly over multiple orders.
✅ A well-optimized design — simple, bold, standard specs, ordered in sufficient quantity — can cost 40–60% less per unit than a complex order of the same size. Smart decisions at the design stage are your most powerful enamel pin pricing tool.
Pre-Order Cost Checklist
- Have I confirmed whether the mold fee is included or separate in my enamel pin quote?
- Is my design as simple as it can be — 6 or fewer solid colors, clean lines, no unnecessary complexity?
- Have I chosen a standard size (1–1.5 inch) and standard metal finish?
- Am I ordering enough quantity to take advantage of volume enamel pin pricing?
- Did I request a fully landed enamel pin cost including shipping, duties, and import taxes?
- Have I limited add-ons to only the ones that genuinely enhance my design?
- Did I review and finalize my artwork before approving the digital proof?
- Have I asked about mold storage policy for future reorders?
Get a Fully Transparent Pin Quote
No hidden fees, no surprise charges. Get an itemized enamel pin quote from CreatePins that covers every enamel pin hidden cost before you commit.
Frequently Asked Questions
Enamel pin hidden costs include: mold or setup fees, design complexity charges, per-color fees beyond the base count, premium plating surcharges, larger pin sizes, upgraded backings, custom packaging, shipping and import duties, pre-production sample fees, special effects like glow-in-the-dark or epoxy, and revision charges after production begins. Always ask for an itemized enamel pin quote that breaks down every cost line.
Mold fees typically range from $50 to $200 or more depending on the complexity of your design, the pin size, and the number of cutouts or layers. The mold fee is a one-time enamel pin cost per design. Reordering the same design later typically means the mold is reused at no additional charge — which is one of the best long-term cost advantages of staying with one manufacturer.
Yes. Each enamel color is filled by hand during production, so more colors mean more labor time and higher enamel pin cost. Most manufacturers include a base number of colors (typically 4–6) in their standard enamel pin pricing, then charge an incremental fee per additional color beyond that. Simplifying your palette — even dropping from 8 to 5 colors — can meaningfully reduce your total cost.
Not always. Many enamel pin quote documents are for manufacturing only and do not include freight, customs duties, or import taxes. Shipping costs depend on order weight and size, method (air vs. sea freight), and your destination country. Always request a fully landed cost quote — including all shipping and applicable taxes — before approving an order to avoid surprise enamel pin hidden costs.
Pre-production samples are usually optional but highly recommended for larger or first-time orders. They may involve a sample production fee and a separate shipping cost for the physical delivery (typically $20–$50+). While skipping samples saves money and time upfront, it increases the risk of receiving a full batch that doesn't meet your standards — which is far more costly to resolve.
Common add-ons that increase enamel pin cost include glow-in-the-dark enamel, glitter or translucent colors, epoxy dome coating, spinner or sliding mechanical elements, intricate cut-out shapes, custom backing cards, premium packaging, upgraded backings (magnetic or locking), and screen printing for fine details or gradients. Limit yourself to one standout feature per design for the best cost-to-impact ratio.
The most effective strategies: simplify your design and limit colors; choose standard sizes (1–1.5 inches) and standard finishes; use a rubber or butterfly clutch backing; skip unnecessary add-ons; order a larger quantity to reduce per-unit enamel pin cost; always ask for a fully itemized enamel pin quote including shipping and mold fees; and finalize your design before approving production to avoid revision charges.
Yes — switching manufacturers effectively resets your cost structure. Molds are proprietary to each factory, so you'll pay a new mold fee even if you provide the same artwork. Color matching will also need to be re-established from scratch. Staying with one trusted manufacturer across multiple orders allows you to reuse molds, leverage your approved specs, and often negotiate better enamel pin pricing over time.
References & Further Reading
- CreatePins — Pricing Custom Enamel Pins for Profit: Cost Breakdown, Calculator & Pricing Tips
- CreatePins — Complete Enamel Pin Hidden Costs Guide
- CreatePins — Custom Enamel Pin Production Expectations & Tolerances
- CreatePins — What Affects the Cost of Custom Enamel Pins? | Pricing Guide
- CreatePins — Import Enamel Pins: Complete Customs Clearance Guide
- CreatePins — No Minimum Order Custom Pins: What You Need to Know Before You Buy
- CreatePins — What Enamel Pin Manufacturers Don't Tell You Before Ordering
- CreatePins — How to Order Enamel Pins (Step-by-Step Guide)
- CreatePins — Common Enamel Pin Defects & How CreatePins Prevent Them
- CreatePins — How to Create a Pin Collection Theme (That People Actually Love)
- CreatePins — Why Cheap Hard Enamel Pins Turn Black Fast: Plating Problem
- CreatePins — How to Get The Cheapest Enamel Pins Made Without Losing Quality
- CreatePins — Why Custom Pin Prices Vary by Manufacturer?
- CreatePins — Why Enamel Pin Colors Look Slightly Different From Your Screen Mockup
- CreatePins — Want More Than Just Custom Pins?