Essential Criteria for Grading Enamel Pins: Complete Quality Standards & Inspection Guide (2026)
Everything collectors, sellers, and manufacturers need to grade enamel pins consistently — inspection criteria, the A–D grading scale, AQL batch sampling, and a printable checklist.
Enamel pins — tiny, wearable works of art — are beloved by artists, collectors, and brands worldwide. As the pin market grows, standardised grading gives every participant a shared language for quality. Whether you’re a manufacturer running a production quality check, a seller listing inventory, or a collector verifying a purchase, a clear and consistent grading framework protects value and builds trust.
This guide covers every inspection criterion, the full five-tier grading scale, a step-by-step inspection process, AQL batch sampling standards, and actionable tips for sellers, manufacturers, and collectors alike. Use the printable checklist at the end on every order you receive.
Why Grading Enamel Pins Matters
A clear, standardised grading system isn’t just technical bureaucracy — it’s the foundation of a healthy, trustworthy pin marketplace. Here’s why grading consistently is non-negotiable:
Fair Pricing
Buyers pay prices that accurately reflect real condition and quality — not guesswork or over-optimistic seller descriptions.
Collector Confidence
Transparent grades reduce purchase uncertainty. Collectors can buy from unknown sellers with far greater confidence when grades are standardised.
Seller Reputation
Accurate, honest grading minimises disputes, refund requests, and negative reviews. It builds long-term customer loyalty.
Market Value
Standardised grading creates consistent value metrics — especially important for limited-edition and investment-grade collector pins.
Production QC
Manufacturers use grading criteria to set and enforce quality standards throughout production, reducing defect rates and reorder costs.
Community Trust
A shared grading language elevates the entire pin community — protecting investment, fostering honest trade, and rewarding quality craftsmanship.
Pro Tip for Manufacturers: Share a detailed grading checklist and acceptable tolerance ranges with your manufacturer before production begins. Clear, pre-agreed standards dramatically reduce disputes about what counts as a defect in the finished order.
Grading Criteria: The 6 Areas to Inspect
When grading an enamel pin, systematically evaluate all six areas below. Use bright neutral daylight-temperature lighting (5000–6500K recommended) and a 5–10x magnifying loupe for fine detail inspection. Place the pin on a clean white surface to maximise contrast.
- Alignment: Artwork and metal lines positioned correctly with no visible shifts from the approved design.
- Detail Clarity: Fine lines, text, and small elements are crisp and sharp — not blurred, filled in, or broken.
- Outline Precision: Metal separating lines between enamel colors are clean, consistent in width, and properly defined.
- Design Completeness: All design elements present — no missing lines, skipped details, or merged sections.
- Surface Smoothness: Enamel areas are completely even — no dips, bumps, ridges, or textural inconsistencies (hard enamel must be fully flush).
- Color Integrity: Colors match the approved design with no bleeding, streaking, fading, or contamination from adjacent pigments.
- Fill Completeness: All enamel sections fully filled — no bare metal patches, thin spots, or partial fills.
- Air Bubbles: Absence of trapped air pockets, particularly in larger enamel fill areas.
- Color Consistency: Uniform color saturation across the full area — no gradient effect within a solid-color zone.
- Polish Consistency: Metal areas free of scratches, tarnish, swirl marks, or uneven buffing patterns.
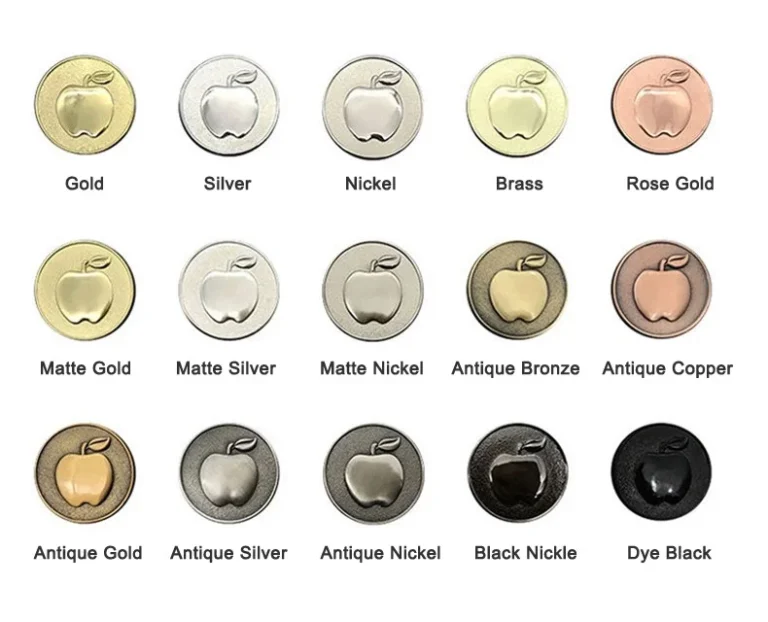
- Plating Evenness: Gold, silver, black nickel, antique, or other finishes applied uniformly with no patchiness, thin areas, or colour variation.
- Adhesion Integrity: Plating shows no flaking, peeling, or lifting at edges or high-contact areas.
- Edge Smoothness: All pin perimeter edges smooth — no sharp points, metal burrs, or rough grinding marks.
- Oxidation: Absence of premature tarnishing, dark spots, or surface oxidation on newer pins.
- Post Security: Back posts firmly soldered or fastened — no wobble, rotation, or movement when tested with a gentle pull.
- Post Alignment: Posts correctly centred (or double-positioned for wide pins) — pin sits flat when worn, not tilting.
- Clasp Function: Butterfly or locking clasp operates smoothly, holds securely, and releases without excessive force.
- Safety Check: No dangerously sharp post tips, edges, or protrusions that could snag fabric or injure skin.
- Post Count: Pins wider than 2.5cm should have two posts — verify correct quantity.
- Chips & Cracks: Examine enamel fill for chips, hairline cracks, or fractures — particularly at thin metal dividing lines.
- Foreign Particles: Look for dust, fibres, or debris trapped beneath the enamel surface or embedded in plating.
- Plating Flakes: Check for sections where metal plating has peeled, lifted, or flaked away from the base metal.
- Mold Imperfections: Seam lines from casting, sink marks, or surface irregularities from the original die.
- Scratches & Abrasions: Surface marks from polishing tools, assembly fixtures, or transit handling.
- Original Packaging: Backer card, sleeve, or gift box present and in good condition — no tears, creases, water damage, or significant wear.
- Cleanliness: Packaging free of stains, price sticker residue, writing, or excessive scuffing.
- Completeness: All original elements present — including any additional inserts, certificates of authenticity, or edition labels.
- Pin Condition in Package: Pin correctly positioned on backer card — not fallen off, crooked, or stored loose.
The Enamel Pin Grading Scale: A to D
Use this standardised five-tier grading scale consistently when listing, selling, or documenting pins. Clear, honest grade communication is the foundation of every positive buyer–seller relationship in the pin community.
Standard
Perfect or Near-Perfect — Premium Collector Quality
Meets all grading criteria without exception. Any flaws are entirely negligible and imperceptible even under close magnified inspection. The pin appears exactly as designed and intended, with no visible defects under normal viewing conditions.
This is the highest commercial grade — suitable for display, gifting, investment collecting, and limited-edition releases. Manufacturers target this grade for all standard production output.
Mint
Excellent with Microscopic Imperfections
Excellent overall condition with very minor imperfections that require magnification or very close inspection to notice. May include: microscopic trapped air bubbles (1–2 maximum, <0.3mm), extremely slight color variance within acceptable Pantone tolerance, or tiny plating inconsistencies invisible at arm’s length.
Still considered high quality for most collectors and buyers. The difference between A and A- is generally perceptible only to very experienced graders under ideal lighting conditions.
Noticeable but Minor Flaws — Fully Functional
Noticeable imperfections visible to the naked eye under normal lighting — no magnification required. May include: small but visible surface scratches on plating or enamel, air bubbles clearly visible without a loupe, slight color bleeding at 1–2 enamel boundary lines, minor design misalignment, or subtle plating tone inconsistency.
Fully functional, wearable, and presentable — just not perfect. Popular with budget-conscious buyers and casual wearers who prioritise affordability. Most “seconds” sales from pin artists and manufacturers fall into this category.
Clear Manufacturing or Cosmetic Issues — Discounted
Clear and obvious manufacturing defects or cosmetic issues immediately visible at normal viewing distance. May include: visible enamel chips or cracks, larger surface scratches, significant design misalignment, multiple color bleed points, notable plating inconsistencies across large areas, or significant air bubbles.
Must always be clearly disclosed at the time of sale. Suitable for: craft or customisation projects, “beater” pins for daily high-wear use, art materials (resin-cast projects, upcycling), or as inexpensive learning samples for pin collectors new to grading.
Major Functional or Structural Defects — Not for Standard Sale
Major functional or aesthetic failures that make the pin unsuitable for standard commercial sale. Includes: broken or completely missing back posts, large missing enamel sections (more than a single small chip), severe plating failure across multiple areas, large chips or structural cracks through the metal, significant bending or warping, or major manufacturing errors that distort the design.
Grade D pins are generally not sold as collectibles. Possible uses include: sold as-is at deep discount for parts harvesting or artistic repurposing; retained as manufacturing defect samples for quality control training; or documented and submitted to the manufacturer as evidence for defect replacement claims.
📋 Grading Scale at a Glance
| Grade | Name | Visible Flaws? | Functional? | Typical Price | Best For |
|---|---|---|---|---|---|
| A | Mint | None / negligible under loupe | ✅ Yes | 100% retail | Collectors, gifts, display |
| A- | Near Mint | Microscopic only — needs loupe | ✅ Yes | 95–100% retail | Most standard sales |
| B | Seconds | Yes — visible to naked eye | ✅ Yes | 50–80% retail | Budget buyers, casual wear |
| C | Thirds | Yes — obvious at distance | ✅ Yes | 20–50% retail | Craft projects, customisation |
| D | Defective | Major structural / functional | ⚠️ Impaired | Deep discount / N/A | Parts, QC samples |
Want A-Grade Pins Every Time?
CreatePins builds quality control into every production stage — from artwork review and mold inspection to post-plating checks and final packaging. Get a free quote and tell us your grade requirement.
Get Your Free Custom Pin Quote →Free artwork review • Pre-production samples • No obligation
Practical Grading Process: Step by Step
Follow this systematic process for consistent, defensible, and reproducible grading results — whether you’re inspecting a single pin or an entire production batch:
Set Up Your Inspection Environment
Examine pins under bright neutral light — ideally 5000–6500K (daylight temperature) LED or CFL bulbs. Use a 5–10x magnifying loupe for fine detail areas, and a plain white surface as a backdrop to maximise contrast with metal finishes. Prepare your documentation materials: grading labels, a note-taking form, and a camera or phone for photographs.
Initial Visual Sort & Grouping
Quickly scan all pins and sort them by obvious defect type and apparent severity. Create initial groups for each grade tier based on first impressions. This pre-sorting step streamlines the detailed inspection that follows — you spend the most time on borderline cases, not on clear Grade A or Grade D pins. Handle pins with cotton gloves or from the edges to avoid adding fingerprints.
Systematic Detailed Inspection
Inspect each pin methodically through all six criteria areas: design and craftsmanship, enamel quality, metal finish, backings and attachments, defect scan, and packaging. Use the loupe for enamel surfaces, plating transitions, and edge areas. Test post security with a gentle manual pull. Test clasp function. Check edges by carefully running a fingertip along the full perimeter.
Photograph & Document Each Pin
Photograph every pin from the front, back, and close-up of any defects. Use consistent lighting setup for all photos — macro mode helps for enamel surface detail. Record a brief note for each pin including: assigned grade, specific defect types and locations, inspector initials, and inspection date.
Grade: A | Inspector: J. Lee | Date: 2026-06-01 | Notes: None
Grade: B | Inspector: J. Lee | Date: 2026-06-01 | Notes: Small scratch NE corner plating, minor air bubble left wing enamel
AQL Sampling for Large Batches (100+ pins)
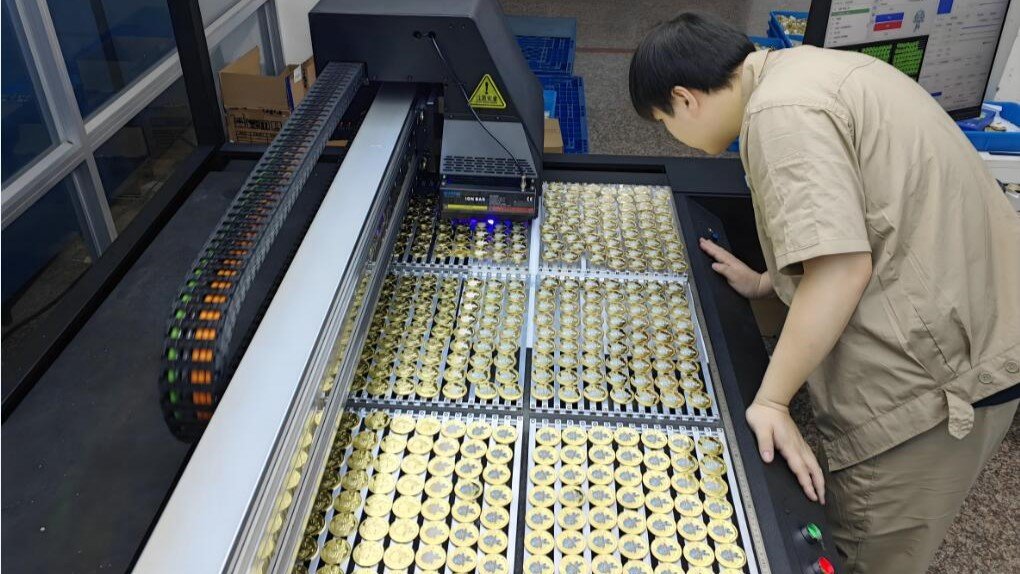
For production runs of 100 or more pins, use statistical batch sampling rather than inspecting every unit. The AQL (Acceptable Quality Level) standard — used internationally in manufacturing QC — defines how many defects are tolerable in a batch before the whole batch is rejected:
(Broken posts, missing enamel)
(Plating failure, large chips)
(Small scratches, slight variance)
Inspect a minimum 5–10% sample (or as per your contractual terms) from the batch. If systemic defects appear beyond these AQL thresholds, flag the entire batch for full inspection or rejection — don’t accept partial lots.
Assign Final Grades & Physically Separate
Confirm all grade assignments, apply grading labels or update your batch inspection report, and physically separate pins by grade for appropriate handling: A/A- for sale, B for seconds sale, C for discounted or craft lots, D for return to manufacturer or retirement. Ensure all documentation is completed and archived for future reference or dispute resolution.
⚠️ Never Downgrade Without Documentation
If you’re reporting defects to a manufacturer for replacement, always photograph the specific defect clearly before removing the pin from its packaging. Timestamped photos with the defect clearly visible (ideally with a ruler or coin for scale) are the most effective evidence for defect replacement claims. Keep copies of all inspection reports for at least 12 months.
Tips for Sellers, Manufacturers & Collectors
🏭 Sellers & Manufacturers
- Pre-shipment QC: Perform grading inspection before shipping from factory — problems caught early cost far less to fix than after delivery.
- Share your standards: Give your manufacturer a detailed grading checklist with acceptable tolerances for each defect type before production begins.
- Batch sampling: For large orders, inspect a representative 5–10% minimum sample before accepting the full shipment.
- Photo records: Maintain high-quality photographs of each inspected batch for dispute resolution and ongoing quality trend tracking.
- Transparent listings: Clearly state grading standards, what each grade means in your store, and your return or dispute policy. Ambiguity is the enemy of trust.
- Grade consistency: Apply the same grading criteria to every batch and every product line — inconsistency is what loses customers long-term.
- Seconds strategy: Consider offering a dedicated “seconds sale” with clear disclosure rather than discarding B-grade pins — it’s good for margins and appreciated by budget-conscious fans.
👑 Collectors & Buyers
- Request detailed photos: Ask for high-resolution close-up images of enamel surfaces, plating transitions, edge areas, and back posts before buying.
- Verify documentation: For higher-value or limited-edition pins, request grading reports or batch inspection certificates from the seller.
- Inspect in person when possible: Photos can conceal subtle flaws — verify plating sheen and enamel surface texture directly if purchasing at a convention or local shop.
- Understand grade implications: B and C grade pins aren’t failures — they offer real value for the right buyer. Know what you’re buying and price expectations accordingly.
- Buy from transparent sellers: Prioritise sellers who provide clear grade descriptions, specific defect notes, and fair return policies. If a listing says “A-grade” without any inspection detail, ask questions.
- Check original packaging: Original backer cards and sleeves in good condition add significant resale value for future transactions.
Printable Grading Inspection Checklist
Use this checklist on every pin you receive, inspect, or sell. Print it, save it to your phone, or adapt it into your own grading form. Work through each item in order for consistent results:
📋 Complete Enamel Pin Grading Checklist
Inspection Setup: Bright neutral light (5000–6500K)? Clean white surface? 5–10x loupe ready? Documentation prepared?
Design Alignment: Artwork correctly positioned with no visible shifts or misregistration from the approved design?
Detail Crispness: Fine lines, text, and small design elements sharp and clear — not blurred, merged, or missing?
Enamel Smoothness: Surface completely even with no dips, bumps, ridges, or air bubbles visible under raking light?
Fill Completeness: All enamel areas fully filled with no bare metal patches, thin spots, or underfill visible?
Color Accuracy: Colors match approved design with no bleeding between adjacent sections, streaking, fading, or contamination?
Plating Consistency: Metal finish even and consistent across the entire pin with no patchiness, bare spots, or tone variation?
Plating Adhesion: Plating firmly adhered with no flaking, lifting, peeling, or visible separation at edges?
Edge Safety: All perimeter edges and internal cutouts completely smooth — no sharp points, metal burrs, or rough areas detectable by fingertip?
Post Security: Back post(s) firmly fastened with no wobble, loose movement, or rotation under gentle manual pull test?
Post Alignment: Post(s) correctly positioned — pin sits flat and level when worn, not tilting or rotating? Wide pins (2.5cm+) have two posts?
Clasp Function: Butterfly or locking clasp operates smoothly, holds the pin securely, and releases cleanly without jamming?
Defect Scan: No chips, cracks, foreign particles, trapped debris, plating flakes, or structural damage visible under loupe inspection?
Packaging Condition: Original backer card, sleeve, or box present and in good condition — no significant tears, stains, or missing elements?
Documentation: Grade assigned, defects noted with location and type, inspector initials recorded, photos taken and archived?
🏆 Final Thoughts: Grade with Confidence, Build with Trust
Grading enamel pins is both an art and a science — it requires careful inspection, systematic documentation, and consistent application of clear standards. Done well, it protects value for collectors, builds enduring reputations for sellers, and maintains integrity across the entire marketplace.
Whether you’re a manufacturer preparing a production run quality report, a seller evaluating new inventory, or a collector verifying a significant purchase, applying these criteria consistently makes grading straightforward, transparent, and defensible. Remember: quality isn’t solely about achieving perfection — it’s about accurately representing what you have, and communicating it clearly to the person on the other side of the transaction.
In a growing pin market, consistent grading standards elevate the entire community — protecting investments, building reputations, and fostering lasting trust between creators and collectors. 🧷
Frequently Asked Questions
What are the enamel pin grading tiers?
What should I inspect when grading an enamel pin?
What is the difference between Grade A and Grade A- enamel pins?
What is a B-grade or “seconds” enamel pin?
How do I inspect enamel pins for grading at home?
What is AQL sampling and how does it apply to enamel pin grading?
Can Grade B or C enamel pins be resold?
How do manufacturers ensure enamel pins reach Grade A quality?
What causes enamel pins to be graded B or lower?
Should I request a pre-production sample to avoid receiving B-grade pins?
Need Professional Quality Control for Your Pin Order?
CreatePins provides pre-shipment inspections, detailed batch documentation, grading support, and pre-production sample approval as standard services. Let our team ensure every pin you receive meets your grade requirement.
Request a Quote & QC Consultation →Free checklist • Pre-production samples • Manufacturer QC support • No obligation