Enamel Pin Production Specifications: Line Thickness, Text, Colors & File Requirements
Essential enamel pin design tips for beginners — factory-tested specifications, file preparation, plating choices, and a copy-ready production checklist to help you design custom enamel pins that actually get made.
Designing an enamel pin that looks great on screen is one challenge. Designing one that actually survives the manufacturing process — and arrives looking exactly how you imagined — is another. The gap between the two is technical knowledge: understanding the constraints that factories work within, the file requirements that prevent production errors, and the specification numbers that distinguish a clean enamel pin design from one that fails during stamping or enameling.
This enamel pin design guide is built around the exact specifications and processes used at CreatePins. Every number, file requirement, and workflow step here is factory-tested. Whether you’re designing your first custom enamel pin or preparing a production-ready file after a rough first attempt, these enamel pin design tips will help you avoid costly mistakes. This is the reference guide to work from when you need to know how to design an enamel pin that manufacturers can actually produce.
What Makes a Good Enamel Pin Design?
A good enamel pin design balances creativity with manufacturability. The best pin design tutorial advice we can give is this: always design with the production process in mind. A beautiful illustration means nothing if it can’t be translated into metal and enamel. Successful custom enamel pin design requires understanding the physical limitations of the medium.
When learning how to design an enamel pin, focus on these core principles:
- Simplicity: Clean, bold shapes reproduce better than complex, muddy compositions.
- Contrast: High contrast between colors and metal lines ensures legibility.
- Scalability: Test your design at the actual pin dimensions — if it’s hard to read at 1.25 inches, it needs simplification.
- Manufacturability: Every design element must meet minimum thickness and size requirements. Following proper enamel pin specifications is essential for production success.
These enamel pin design rules apply whether you’re creating a simple logo or an intricate character illustration. The best enamel pin design tips emphasize working with the medium, not against it.
Start with the Right Pin Size
Pin dimensions are the foundation of your enamel pin design. The size you choose determines how much detail you can include and affects both cost and wearability. When you design custom enamel pins, size is your most important decision.
| Pin Size | Best For | Level of Detail | Approx. Weight |
|---|---|---|---|
| 0.75″ (19 mm) | Simple logos, icons, mini pins | Very limited — 1–3 colors, bold shapes only | ~2 g |
| 1.25″ (32 mm) | Standard pins, character designs | Good — 4–6 colors, moderate detail | ~5 g |
| 1.5″ (38 mm) | Detailed illustrations, text-heavy designs | Excellent — 6–8 colors, fine detail | ~6 g |
| 2.0″ (50 mm) or larger | Collector pieces, high-detail artwork | Maximum — 8+ colors, small text, complex layouts | ~12 g |
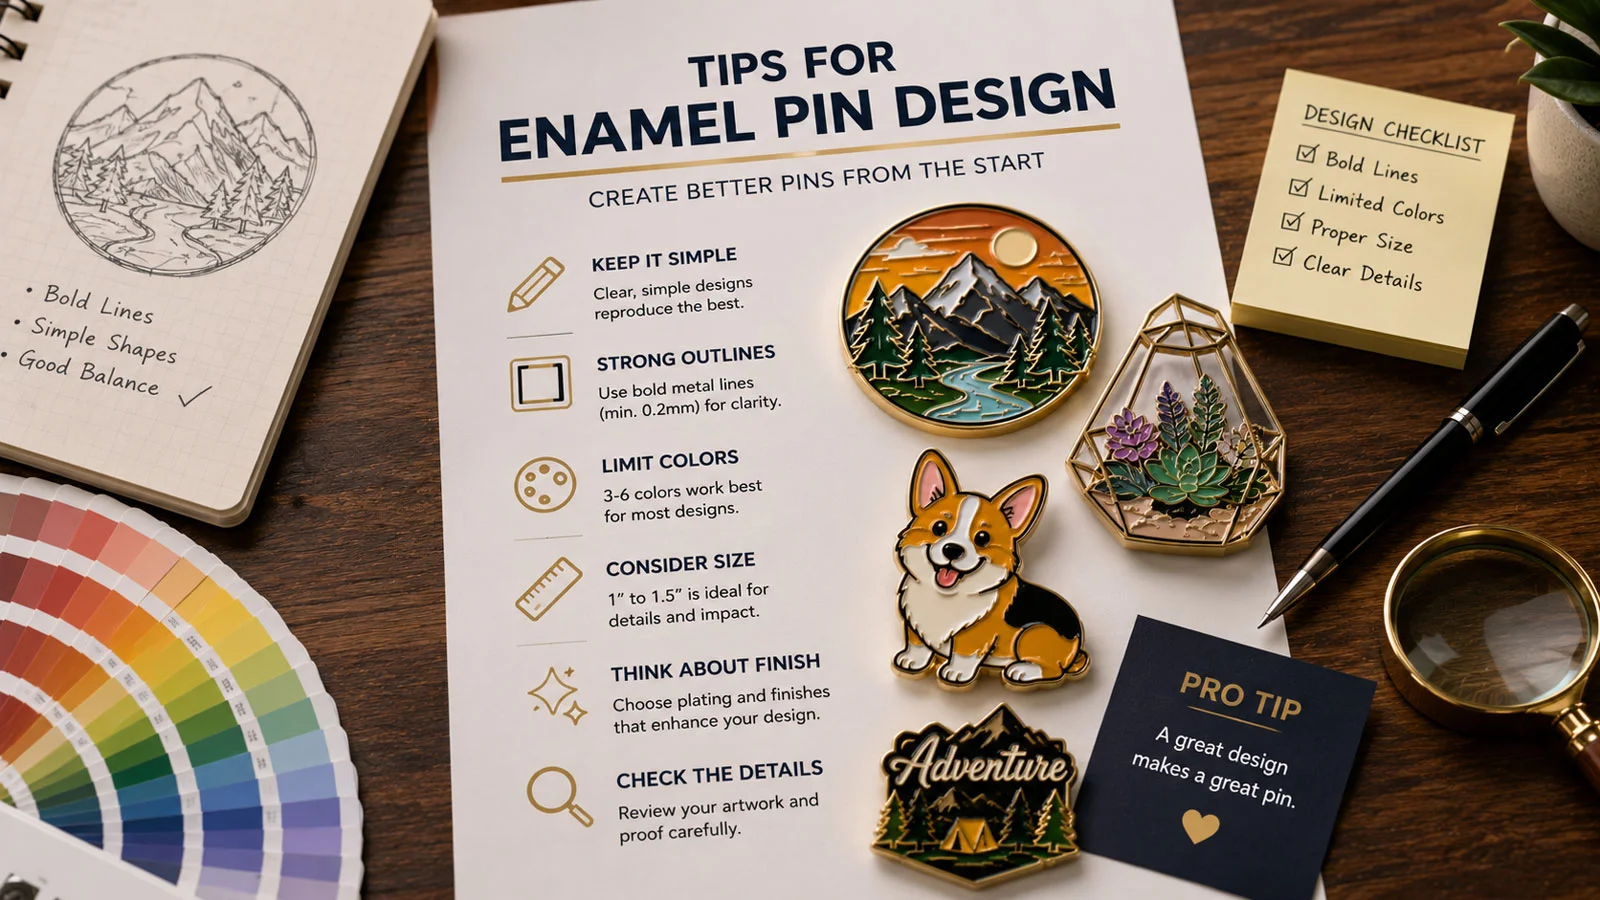
For beginners, 1.25″ to 1.5″ (32–38 mm) is the sweet spot. It’s large enough to show detail but small enough to keep production costs reasonable. This is one of the most practical enamel pin design tips for first-time creators.
Use Clear Metal Lines and Borders
The metal lines (also called die lines) separate the enamel colors in your pin. They’re not just visual borders — they’re structural elements that hold the enamel in place. Understanding minimum line thickness for enamel pins is critical to successful production.
Here are the factory-tested enamel pin specifications for metal lines:
| Specification | Recommended | Absolute Minimum | Why It Matters |
|---|---|---|---|
| Metal (die) line thickness | 0.20 mm | 0.10 mm | Hard enamel polishing requires ≥0.20 mm to avoid polishing through the metal border. Soft enamel can use 0.10–0.15 mm but risks inconsistency. |
| Minimum enamel fill area width | 0.35 mm | 0.30 mm | Smaller color pools may not flow properly during filling or may chip. Increase to ≥0.40 mm for glitter or glow-in-the-dark fills. |
| Minimum fragile protrusion width | 2.0 mm | 1.5 mm | Any thin connection under 1.5 mm risks bending or snapping during stamping or finishing — redesign or thicken. |
In practice, 0.20 mm is the safest minimum line thickness for enamel pins across both soft enamel and hard enamel types. Following these enamel pin specifications ensures your design survives the production process.
No gradients in enamel fills. Standard soft enamel and hard enamel uses solid, opaque, Pantone-specified colors only. For photographic gradients, you’ll need a printed pin (CMYK with epoxy dome) — a different pin manufacturing category entirely. This is one of the most important enamel pin design rules to remember.
Keep Text Readable
Text is one of the most common failure points in custom enamel pin design. Many designers add text that looks clear on screen but becomes illegible at pin scale. This is one of the most frequently overlooked enamel pin design tips.
Follow these enamel pin design rules for text:
- Minimum text size: 6 pt, with an absolute minimum of 5 pt
- Typeface: Always use simple sans-serif fonts (Arial, Helvetica, Nunito Sans)
- Avoid serifs: The decorative strokes of serif fonts become muddy at small sizes
- Convert to outlines: Always convert text to vector paths before submitting your file
- Test at final size: View your artwork at 100% scale — not zoomed in or out
If your enamel pin design requires text, consider whether it can be simplified to a bold abbreviation or icon instead. This is one of the most practical enamel pin design tips for beginners.
Avoid Tiny Details
When you’re learning how to design an enamel pin, it’s natural to want to include every detail from your original illustration. However, custom enamel pins have physical limitations that your artwork must respect.
Details that cause problems in enamel pin production:
- Individual eyelashes or strands of hair
- Multiple small stars or dots
- Narrow stripes or patterns
- Complex facial features
- Fine-line textures
As a general rule: if a detail is smaller than 0.35 mm in the final design, it may not reproduce properly. Simplify — bold, clean designs always look better as physical pins. This is one of the most valuable enamel pin design tips for creating manufacturable artwork.
Choose Pantone Colors for Accuracy
Color matching is one of the most critical steps in enamel pin production. RGB and CMYK color values are for screens and printers — they don’t translate to enamel. When you design custom enamel pins, using the right color system is essential.
For accurate color reproduction, you must use Pantone Solid Coated (PMS) colors. Here’s why:
- Pantone is a physical color matching system used globally in manufacturing
- Pantone numbers correspond to specific enamel pigment mixes
- Providing PMS numbers eliminates guesswork at the factory
Invest in a physical Pantone swatch book. Screen colors are never 100% accurate, and having a physical reference is the only way to know exactly what color you’re specifying for your enamel pin colors. This is one of the most important enamel pin design tips for achieving accurate results.
Understand Soft vs. Hard Enamel Design Differences
The soft enamel vs hard enamel choice affects not just aesthetics but also your design requirements. Understanding these differences is essential for anyone learning how to design an enamel pin.
Hard Enamel
- Enamel fill polished flush with metal lines
- Smooth, flat, glass-like surface — no texture
- Very durable and scratch-resistant
- Premium, jewelry-quality feel
- Requires thicker die lines (≥0.20 mm) — polishing removes thin borders
- Best for: collector pins, small high-value runs, premium brand merchandise
Soft Enamel
- Enamel fill sits recessed below raised metal lines
- Tactile, dimensional texture — metal ridges felt by touch
- Slightly more affordable than hard enamel
- Better suited for fine visual detail on small pins
- Die lines can be slightly thinner (0.10–0.15 mm minimum)
- Best for: illustrations, cartoons, budget-conscious projects, event giveaways
Hard enamel = smooth like glass, raised metal and enamel level. Soft enamel = textured, metal ridges you can feel, enamel recessed. Both can look stunning — your enamel pin design choice depends on the aesthetic and budget. These are the two main options when you design custom enamel pins.
Prepare Vector Artwork
Vector artwork for enamel pins is the industry standard. Here’s how to prepare your enamel pin file step by step. Following these enamel pin file requirements will ensure smooth production.
Create in vector format
Use Adobe Illustrator (.AI), .EPS, or a print-quality PDF. Vectors provide the precise, scalable die paths that factories work from. Raster images (PNG, JPG) are acceptable as a secondary reference but not as primary production files. For proper enamel pin artwork preparation, vector is essential.
Set artwork to final size (1:1 scale)
Your artwork must be at 100% of the intended final pin size. Example: if the pin is 32 mm, the artwork should be exactly 32 mm in document units. State the final size clearly in your order form regardless — never leave it implied. This is a critical enamel pin design rule.
Separate and label layers precisely
Factories rely on layer names to interpret artwork. Name your layers clearly: Metal-Line, Color-Fill, Cut-Line, Back-Stamp. Every zone must be on the correct layer. This is part of proper enamel pin file requirements.
Specify die line stroke and thickness
Use a hairline stroke visually, but include a written note stating the stroke should be treated as 0.20 mm in production (or your chosen thickness). Many factories prefer a named spot color such as DIELINE for the die layer.
Convert all text to outlines
In Adobe Illustrator: Type → Create Outlines. This converts fonts to vector paths, preventing font substitution errors at the factory. After outlining, verify all text still reads legibly at final print size.
Specify colors as Pantone Solid Coated
Provide Pantone Solid Coated numbers for all enamel fill colors where accuracy matters. Do not rely on RGB or CMYK values — these are screen/print color spaces and will not translate accurately to enamel pin production. For printed pins, provide CMYK values separately.
Remove all gradients from enamel areas
Replace gradients with solid Pantone colors. If gradient simulation is needed, create multiple adjacent solid-color zones with slight color progression. Remember: each zone counts as one enamel color.
Export in multiple formats
Save and submit: the original .AI or .EPS file, a 1:1 PDF, and a flattened PNG at 300 DPI for quick visual reference. Include a plain-text notes file listing final size, Pantone colors, plating choice, and any special instructions.
If you can’t create vector artwork, upload a high-resolution PNG (minimum 3000 px on the longest side) and request vectorization. CreatePins includes a free vectorization check in the quote process — our design team will flag any issues and return a production-ready file for approval. This service helps you meet all enamel pin file requirements.
Review the Digital Proof Carefully
The enamel pin proofing process is your final opportunity to catch issues before production begins. Approving a proof means you’re giving the factory permission to create your mold — changes after this stage are expensive. This is one of the most critical enamel pin design tips.
When reviewing your proof:
- View at 100% scale — not zoomed in or zoomed out. Hold a ruler up to your screen to verify size.
- Check every color — ensure each enamel area has the correct Pantone number.
- Verify text legibility — if you can’t read it clearly, the factory won’t be able to produce it.
- Check fragile areas — look for thin connections, sharp points, and narrow protrusions.
- Confirm plating and hardware — gold, silver, black nickel, or other plating colors; butterfly clutch, rubber clutch, or locking back.
Small design changes before die creation cost very little. Fixes after molds are made — especially if they require a new die — can be as expensive as the original order. Approve the digital proof with extreme care. Review at 100% scale, not zoomed out. This is the most important enamel pin design tip we can give you.
Common Enamel Pin Design Mistakes
These are the most frequent technical issues that cause production delays, re-dos, or pins that don’t look as expected. Each one is preventable with the right knowledge upfront. Learning about common enamel pin design mistakes will save you time and money.
Metal lines too thin
Lines under 0.15 mm risk being polished away (hard enamel) or producing inconsistent results (soft enamel). The factory may need to thicken them, which can alter your enamel pin design.
✓ Fix: Increase all die lines to at least 0.15–0.20 mm — 0.20 mm recommended for hard enamelUnreadable micro-text
Text under 5–6 pt, especially serif fonts with fine strokes, will be illegible or produce jagged edges at pin scale. Factories may simplify or omit text that can’t be cleanly produced.
✓ Fix: Use ≥6 pt sans-serif, convert to outlines, and preview at actual final pin sizeTiny isolated enamel islands
Small color zones under 0.30 mm may not fill properly, may chip after production, or may be impossible to fill accurately. This is especially common in detailed character designs with fine highlights.
✓ Fix: Merge very small zones with adjacent colors, or outline them with metal; ensure all fills ≥0.30–0.35 mm wideFragile protrusions or thin neck connections
Antenna-like protrusions, star points, thin tails, and narrow connecting elements under 1.5 mm are vulnerable to bending during metal stamping and risk breaking off during shipping or wear.
✓ Fix: Thicken narrow joins to ≥1.5–2.0 mm, or redesign the shape to be sturdier at the connection pointArtwork submitted at the wrong scale
If your file is designed at 2x or 3x scale and submitted without a note, the factory may produce the pin at the wrong size — or ask for clarification, adding production delays.
✓ Fix: Always submit artwork at 1:1 final size, or note clearly “design shown at 2x — final size = 32 mm”Using RGB or CMYK color values instead of Pantone
RGB is a screen color space; CMYK is for print. Neither translates accurately to enamel pin production. Submitting RGB colors and expecting Pantone-accurate results is one of the most common sources of color disappointment.
✓ Fix: Specify every enamel fill color as a Pantone Solid Coated number — use a physical Pantone swatch book to verify before orderingChecklist of Enamel Pin Production Specifications
Copy and paste this enamel pin design checklist into your order form or notes when submitting your project to CreatePins. Fill in every field before submitting to avoid clarification delays. This enamel pin production requirements checklist ensures nothing is overlooked.
📋 CreatePins Production Checklist
📁 Ready to submit your file? Get a free artwork review with every quote — our team flags thin lines, tiny islands, and fragile shapes before production. We’ll help you meet all enamel pin production requirements.
Submit Your File for a Free ReviewFrequently Asked Questions
The most common technical questions from first-time enamel pin designers. These enamel pin design tips address the most frequently asked questions.
Designing an enamel pin starts with a clear concept, followed by creating a vector artwork file (AI, EPS, or PDF) at 100% final size. You must define the metal die lines, choose Pantone Solid Coated colors for the enamel fills, and ensure all design elements meet minimum thickness and size requirements. Finally, the artwork is submitted to a manufacturer for proofing and production. Following proper enamel pin design rules ensures manufacturability.
The recommended metal (die) line thickness is 0.20 mm, with an absolute minimum of 0.10 mm. For hard enamel specifically, 0.20 mm is essential because the polishing step can remove thinner metal borders. For soft enamel you may use 0.10–0.15 mm, but this risks inconsistency. When in doubt, design to 0.20 mm — it’s the safest enamel pin specification across both enamel types.
Vector files are strongly preferred: Adobe Illustrator (.AI), .EPS, or a print-quality PDF. If you can’t create vector art, upload a high-resolution PNG (at least 3000 px on the longest side) and request vectorization — CreatePins includes a free vectorization check in the quote process. Always set artwork to 100% final size and label layers clearly: Metal-Line, Color-Fill, Cut-Line, Back-Stamp. These are the essential enamel pin file requirements.
No — gradients cannot be reproduced in standard hard or soft enamel fills. Enamel uses solid, opaque Pantone colors separated by metal lines. To simulate a gradient, use multiple adjacent solid-color enamel zones with progressive color shifts. For full photographic gradients, switch to a printed pin (CMYK offset printing with epoxy dome) — a different product with different pricing. This is one of the most important enamel pin design rules to remember.
Recommended minimum is 6pt using a simple sans-serif font, with an absolute minimum of 5pt. Serif fonts are significantly harder to read at small sizes. All text must be converted to outlines before submitting to the factory. Always test legibility by viewing the artwork at the exact final pin size before approving. This is a critical enamel pin design tip for text-heavy designs.
The primary difference is the final surface finish. Hard enamel is polished smooth and flush with the metal lines, requiring thicker die lines (≥0.20 mm) to survive the polishing process. Soft enamel is recessed below raised metal borders, allowing for slightly thinner lines (0.10–0.15 mm) and a textured, dimensional feel. Hard enamel is more durable and premium, while soft enamel is more affordable and better for fine detail. Understanding these differences helps you design custom enamel pins that match your vision.
You should use Pantone Solid Coated colors for enamel pin designs. RGB and CMYK are screen and print color spaces that do not translate accurately to enamel production. Providing specific Pantone (PMS) numbers is the only way to ensure the factory matches your desired enamel pin colors precisely.
The recommended maximum is 8–10 colors. Each separate enamel color requires an individual fill operation. More colors increase production cost and complexity. It’s best to group similar shades and focus on a clean, concise color palette. This is an important consideration in enamel pin production planning.
Yes. Reputable manufacturers like CreatePins offer a free artwork review as part of the quoting process. Our design team checks for thin lines, tiny enamel islands, fragile shapes, and other potential production issues. We provide feedback and can help adjust your artwork to ensure it is manufacturable. This service helps you avoid common enamel pin design mistakes and meet all enamel pin production requirements.
References & Further Reading
Continue learning with these related resources for custom enamel pin design, file preparation, and production specifications:
- Complete Enamel Pin Design Guide (2026) — the full end-to-end reference for designing manufacturable pins
- Best File Formats for Custom Enamel Pins (AI vs PSD vs PNG) — vector vs raster file requirements explained
- How to Choose the Perfect Size & Thickness for Your Enamel Pin Design — expert size guide 2026
- Enamel Pin Typography Guide: How to Make Text Readable on Small Enamel Pins — minimum text sizes and font choices
- How to Choose Enamel Pin Colors: A Complete Color Palette Guide — Pantone matching and enamel color accuracy
- Hard Enamel vs Soft Enamel Pins: The Ultimate Guide (2026) — design requirements, line thickness, and finish differences
- 20 Common Enamel Pin Design Mistakes That Can Ruin Your Order — preventable production errors
- Custom Enamel Pin Production Expectations & Tolerances — what factories can and cannot hold
- Enamel Pin Thickness Explained: How It Affects Quality, Durability, and Cost — thickness specs and tradeoffs
- Custom Enamel Pin Sample Approval Process Explained — proofing, samples, and pre-production approval
- Common Enamel Pin Defects & How CreatePins Prevent Them — quality control and defect prevention