Best File Formats for Custom Enamel Pins (AI, PSD, PNG)
A beginner-friendly guide to choosing and preparing the right design file — so your pins come out with clean lines, accurate colours, and no production delays.
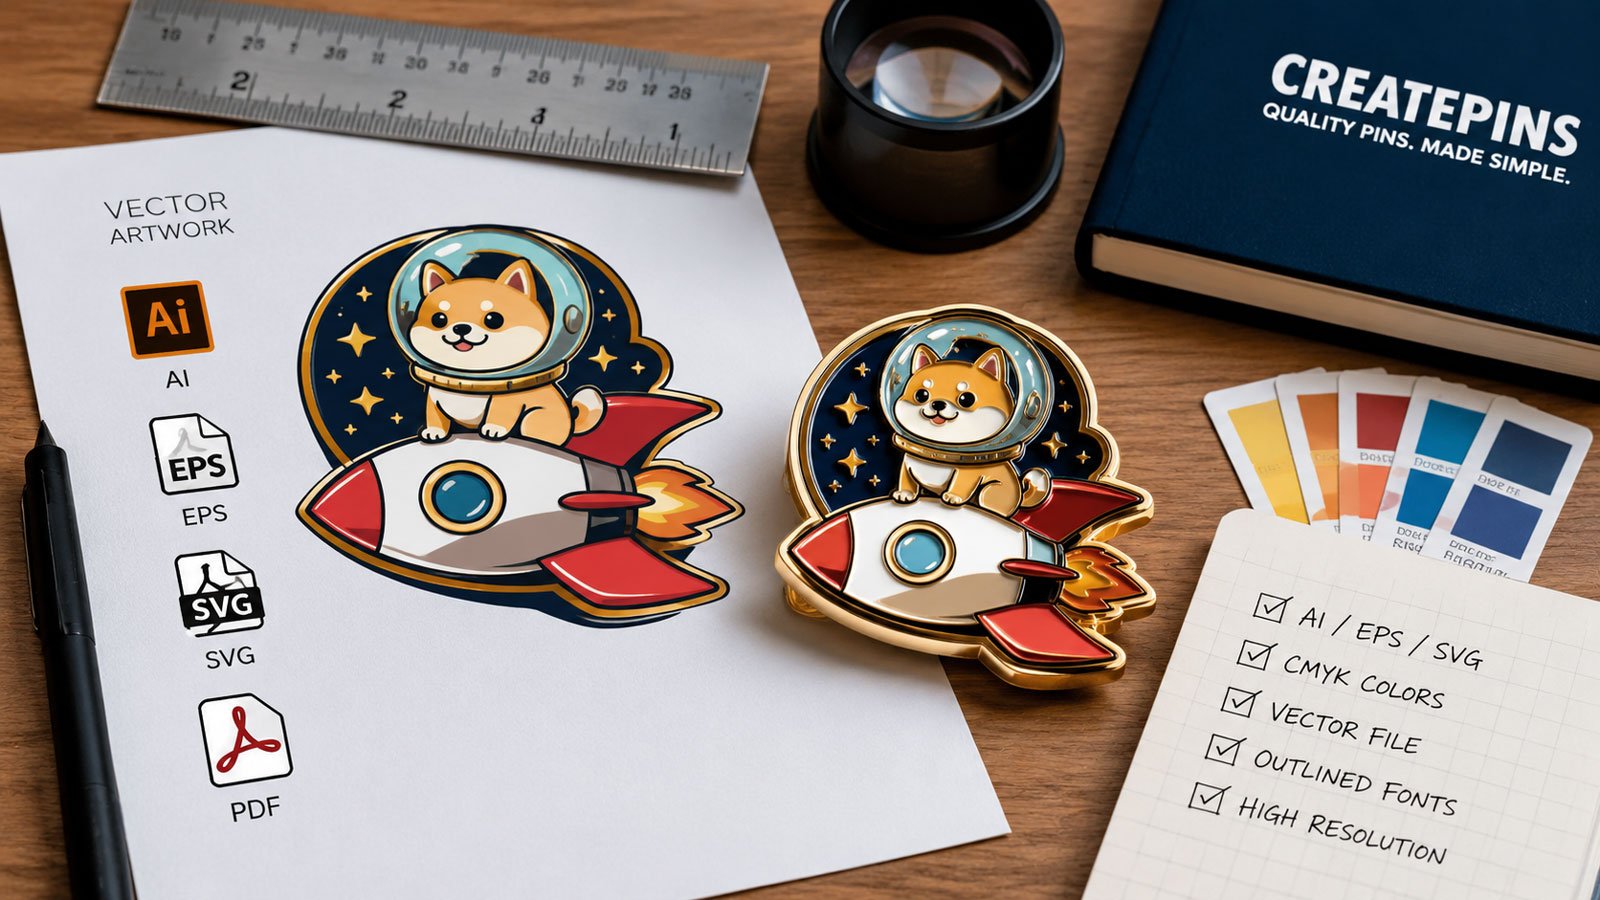
Designing a custom enamel pin starts long before production — it begins with the right file format. Sending correctly formatted artwork ensures cleaner lines, more accurate colours, smoother production, and far fewer revision rounds.
At CreatePins.com, one of the most common causes of production delays is improperly formatted artwork. This guide breaks down the three main file formats — AI, PSD, and PNG — explains when to use each, covers alternatives like SVG and EPS, and gives you practical export settings and design rules to follow regardless of which software you use.
👋 Beginner-Friendly Note: Think of your pin design like a colouring book page. Each colour needs its own clearly defined area, and outlines need to be thick enough to hold up as physical metal. The file format determines how well those details are preserved when the manufacturing team creates your metal mold.
Why File Format Matters for Enamel Pin Production
Enamel pins are manufactured using physical metal molds, not printed images. A laser or CNC machine carves your design into a die, enamel paint is filled into the recessed areas, and the pin is then polished and plated. This manufacturing process has very specific requirements that directly dictate what makes a good design file.
What the Manufacturing Process Demands
- Precise, closed lines — Any gap in an outline will cause liquid enamel to bleed between colour areas during filling, ruining the definition of your design
- Clearly separated colours — Each colour must occupy its own distinct, clearly bounded area; gradients and blends cannot be reproduced in standard enamel fills
- Minimum detail sizes — Very fine lines (under 0.3mm) or tiny text may simply not survive the mold-cutting process and will be lost in the final pin
- Scalable artwork — Designs must work perfectly at small pin size (25–50mm is typical) and may also need to be resized during the proofing process without losing quality
What Your File Format Directly Affects
- Mold accuracy — How precisely the metal mold captures every edge and curve in your design
- Colour matching — How reliably enamel colours match your original artwork (vector files allow exact Pantone-matching; raster files require interpretation)
- Production speed — Production-ready AI files can move straight to mold creation; PNG files may add days of conversion work
- Revision count — Clean files typically need zero or one revision round; poorly prepared files can require many back-and-forth cycles
- Final pin quality — The crispness, clarity, and colour vibrancy of your finished pins
📌 The Short Version: Vector files (AI, SVG, EPS) are the gold standard because they define shapes mathematically — they stay perfectly sharp at any size. Raster files (PNG, PSD, JPG) are made of pixels — they look fine on screen but can’t scale cleanly for metal mold production.
Best for: Professional, production-ready enamel pin designs of any complexity
Why AI Is One of the Best file Formats for Custom Enamel Pins
AI files are vector-based, meaning shapes are defined by mathematical equations rather than pixels. This allows them to be scaled to any size — from a 20mm enamel pin to a 2-metre banner — without any loss of quality whatsoever. Vector artwork maps directly to the CNC mold-cutting process, making it the fastest path from design to finished pin.
- Crisp, clean line work at any scale
- Infinitely scalable without quality loss
- Easy, accurate colour separation for enamel fills
- Ideal for hard enamel, soft enamel, and die-struck pins
- Fastest approval and production turnaround
- Easy to edit individual elements and colours
- Can include Pantone colour references directly
- Requires Adobe Illustrator (paid) or a free alternative like Inkscape or Affinity Designer
- Learning curve for beginners unfamiliar with vector tools
- Not ideal for photorealistic or painterly artwork styles
Best Practices for AI Files
- Convert all text to outlines — prevents font substitution issues when the file is opened on a different machine (Type > Create Outlines)
- Keep minimum stroke width at 0.3–0.4mm at actual pin production size — thinner lines will be lost in the mold
- Use solid, flat colours only — avoid gradients, transparencies, and soft blends, which cannot be reproduced in enamel
- Ensure all paths are closed — open paths create gaps where enamel can bleed between colour areas
- Separate colours into distinct, clearly bounded shapes — each enamel colour needs its own enclosed area
- Avoid embedding raster images inside the AI file — keep everything as native vector art
- Include Pantone (PMS) colour codes in the file or in your notes if you have specific colour matching requirements
- Save as .AI or export as .EPS — both are accepted by most manufacturers
💡 CreatePins Tip: If you have an AI file prepared following these guidelines, your design is already very close to production-ready. This is our #1 recommended format and the fastest route to finished pins. If you’re new to vector design, free tools like Inkscape or Vectr can create AI-compatible SVG files without any subscription cost.
Best for: Detailed illustrations, digital paintings, layered character artwork
When PSD Files Work Well
PSD files are raster-based (pixel-based), but their layered structure makes them useful — especially if your design includes complex illustrations, character artwork, or digital paintings that started as hand-drawn or tablet-based art. The ability to keep every element on a separate layer makes it easier for the production team to extract, adjust, and vectorise your design.
- Preserves layers for easy editing and adjustments
- Great for detailed character illustrations
- Familiar format for digital painters and illustrators
- Supports high-resolution artwork
- Can include colour notes and guides on separate layers
- Raster-based — becomes pixelated when enlarged beyond original resolution
- Almost always requires vector conversion before mold creation
- Lines may need cleanup to be production-ready
- Gradients and soft shading cannot translate to enamel fills
- Large file sizes with high-resolution artwork
Best Practices for PSD Files of Enamel Pin Designs
- Use 300 DPI minimum — ideally 600 DPI for small, detailed designs to preserve line quality during vectorisation
- Work at 3–5× the intended final pin size — if the pin will be 30mm, design at 90–150mm to maintain detail
- Keep layers clearly named and organised — name each layer by its colour or element (e.g., “outline”, “skin”, “hair”, “background”)
- Avoid gradients and soft blends — these cannot be reproduced in standard enamel and will need to be replaced with solid fills
- Use solid, flat colours wherever possible — even if your overall style is painterly, simplify colours to distinct flat fills
- Provide a flattened JPEG or PNG preview alongside the PSD so the team can see your intended final result
- Note your colour intentions — include HEX or Pantone references so the team understands which enamel colour each area should match
💡 CreatePins Tip: If you submit a PSD for enanel pin project, our design team will review it and may redraw elements into vector format to ensure production accuracy. To minimise back-and-forth, use hard-edged brushes, clearly defined colour areas, and a strong, visible outline on all shapes. Think “graphic novel” rather than “oil painting” in your approach.
Best for: Concept art, initial references, Procreate exports, simple flat designs
When PNG Files Are Useful for Custom Enamel Pin Production
PNG files are the most common format for everyday digital images and are easy to export from almost any tool — from Procreate and Canva to Clip Studio Paint and even phone apps. While they are not suitable for direct production, they are perfectly useful as visual references when paired with colour notes and size information.
- Easy to export from almost any design tool
- Supports transparent backgrounds
- Good for quick mockups and concept previews
- Universal — opens on any device or operating system
- Smaller file size than PSD
- No special software needed to view
- Raster-based — blurry when scaled up
- Lines soften when enlarged for mold production
- Almost always requires a full vector redraw for production
- No editable layers
- Colour areas may not be cleanly separated at pixel level
- Cannot carry Pantone or CMYK colour data natively
Best Practices for PNG Files of Custom Pins
- Export at the highest resolution available — minimum 300 DPI, ideally 600 DPI or higher
- Use a transparent background, not white — this makes it easier to distinguish the design from the background during vectorisation
- Avoid compression artefacts — save as PNG (lossless), never JPG, which introduces compression noise that makes clean vectorisation harder
- Use hard edges and defined outlines — avoid anti-aliasing or feathering on outlines if your software allows it
- Include your intended pin size and a note about the number of colours in your design
- Attach HEX, RGB, or Pantone colour codes in a separate note or colour swatch alongside the file
💡 CreatePins Tip: If PNG is all you have, don’t worry — we can work with it. Just make sure it is as high quality as possible and include as much colour reference information as you can. Be prepared for a brief additional review period while our team vectorises your design. A digital proof will be sent for your approval before any production begins.
Other Formats: SVG, EPS, PDF & Procreate
Beyond the three main formats, several other file types are commonly used by pin designers. Here is how each one fares in production:
SVG — Scalable Vector Graphics
SVG is an open-standard vector format that works almost as well as AI for pin production. It is the native export format from tools like Canva, Inkscape, Vectr, and Figma. If you cannot produce an AI file, a well-prepared SVG is an excellent alternative. Follow the same best practices as AI: flat colours, closed paths, minimum 0.3mm stroke weight.
EPS — Encapsulated PostScript
EPS is an older vector format still widely accepted by manufacturers. If your design software can export EPS but not AI, this is a fully production-ready option. EPS files are especially reliable because they were the standard manufacturing format for decades.
PDF — Portable Document Format
PDFs can contain either vector or raster content depending on how they were created. A PDF exported from Illustrator or InDesign will contain vector data and work well for production. A PDF created by scanning a drawing or exporting from Canva’s basic tier will be raster — treat it like a PNG and expect conversion to be needed.
Procreate (.PROCREATE) Files for Custom Pins
Procreate’s native format cannot be opened directly by most manufacturers. Export your Procreate artwork as a PNG at maximum resolution, or — for better results — use Procreate’s built-in vector-style tools and export as a PDF. If your design uses clearly defined colour zones and a visible outline layer, it will vectorise cleanly. Alternatively, use Procreate to create your concept, then have it professionally redrawn in Illustrator before submitting.
✅ Format Priority Order: AI = EPS = SVG (vector) → PDF (check if vector) → PSD (high-res) → PNG (high-res) → anything else. Move as far left on this scale as your tools allow.
Design Software Comparison for Custom Enamel Pin Creators
The tool you use directly determines the file format you can export. Here is a quick reference for the most popular design apps used by pin makers, from beginners to professionals.
💡 Budget Recommendation: If you’re just starting out and don’t want to pay for Adobe Creative Cloud, Inkscape (free, open source) or Affinity Designer (one-time purchase, no subscription) are excellent alternatives that output production-quality vector files. Canva Pro’s SVG export is a great entry point for beginners with simpler enamel pin designs.
Quick Comparison: AI vs PSD vs PNG
| Format | Type | Best Use Case | Production Ready | Editable | Recommended |
|---|---|---|---|---|---|
| AI / EPS / SVG | Vector | Final pin artwork, any complexity | ✅ Yes | ✅ Fully | ★★★★★ |
| PSD | Raster | Detailed illustrations, character art | ⚠️ Partial — needs conversion | ✅ With layers | ★★★★ |
| PDF (vector) | Vector | Illustrator or InDesign exports | ✅ Yes | ✅ Yes | ★★★★★ |
| PNG (high-res) | Raster | Concepts, references, Procreate work | ❌ No — needs redraw | ❌ Limited | ★★★ |
| JPG / JPEG | Raster | Last resort reference only | ❌ No | ❌ No | ★★ |
What If I Don’t Have a Vector File for Enamel Pins?
Many custom pin creators don’t start with AI or SVG files — and that is completely fine. Most designers begin with sketches, Procreate drawings, Canva concepts, or even paper sketches photographed on a phone. The important thing is getting started with the clearest representation of your vision, and letting the production team handle the technical conversion.
🎨 Simple Path for Complete Custom Enamel Pin Beginners
-
Sketch your idea on paper
Don’t overthink it — a rough pencil sketch that communicates the shapes, layout, and colour zones is a great starting point.
-
Scan or photograph your sketch
A phone camera in good lighting works fine. Make sure the sketch fills the frame and the lines are clearly visible.
-
Trace or refine digitally
Use a free tool like Inkscape, Vectr, or Canva to trace over your sketch and build clean shapes. Or use Procreate or Photoshop to draw a clean digital version with defined colour areas.
-
Export in the best format your tool offers
SVG from Inkscape/Canva Pro, PNG at maximum resolution from Procreate/Photoshop, or PSD with organised layers from Photoshop.
-
Submit to CreatePins.com for professional refinement
Our design team will review your file, convert it to a production-ready vector, and send you a digital proof for approval before manufacturing begins.
What CreatePins.com Offers at No Extra Cost
- ✓ Free design review — we evaluate your file and flag any issues before production
- ✓ Artwork cleanup — fixing lines, closing gaps, and preparing colour separations
- ✓ Vector redraws from PNG or PSD — converting raster images to crisp, mold-ready vectors
- ✓ Digital proof approval — you sign off on the final design before a single pin is manufactured
- ✓ Colour guidance — we help match your intended colours to available enamel options
You can submit whatever file format you have, and we’ll guide you from there. We regularly work with first-time creators and have helped hundreds of beginners bring their first pin idea to life.
Ready to Turn Your Design Into a Custom Enamel Pin?
Whatever file format you have — AI, PSD, PNG, or even a paper sketch — our team at CreatePins.com will guide you from artwork to finished pin. Free design review and digital proof included with every order.
Get a free quote today and see how easy it is to create your first (or next) custom pin.
Recommended Export Settings (Quick Checklist)
Use these checklists when preparing your file for submission. Following these settings will minimise review time and get your pins into production faster.
📁 AI / SVG / EPS Export Settings
- Save as .AI, export as .EPS, or save as .SVG
- Convert all text to outlines / paths before saving
- Expand all strokes to filled shapes
- Use CMYK colour mode where possible
- Include Pantone (PMS) colour references in a notes layer or accompanying document
- Ensure all paths are closed — no open anchor points
- Remove any linked images; embed everything or keep fully vector
- Include a flattened PNG preview of the intended final result
📁 PSD Export Settings
- Minimum 300 DPI — preferably 600 DPI for small designs with fine detail
- Work at 3–5× the intended final pin size
- Colour mode: RGB or CMYK (either is acceptable)
- Keep all layers — do not flatten before submitting
- Name layers clearly by colour or design element
- Avoid soft brushes or gradients on outline layers
- Include a flattened JPEG or PNG preview alongside the PSD
- Note your colour intentions using HEX codes or Pantone references
📁 PNG Export Settings
- Export at the maximum resolution available (300 DPI minimum)
- Use a transparent background — not white or coloured
- Save as PNG (lossless) — never JPG, which introduces compression artefacts
- Disable anti-aliasing on outlines if your software allows it
- Include intended pin dimensions in your submission notes
- Attach a colour reference document with HEX, RGB, or Pantone codes for each colour area
- Note the number of distinct colours in your design
Universal Design Rules for Any File Format
Regardless of which file format or software you use, these design principles apply to every custom enamel pin. Following them will dramatically improve your chances of a smooth first production run.
Line Weight & Minimum Sizes
- Minimum outline stroke: 0.3–0.4mm at actual production size — thinner lines will be lost in the mold
- Minimum text size: approximately 4pt at pin size — smaller text will become illegible in enamel
- Minimum gap between colours: 0.3mm — gaps smaller than this risk enamel colours bleeding together
- Minimum detail size: 0.5mm for any isolated shape or detail you want to clearly show in the finished pin
Colour Guidelines
- Use flat, solid colours — enamel is a solid material; gradients, watercolour washes, and blends cannot be reproduced
- Limit your colour count for cost efficiency — each colour is a separate enamel fill; more colours means more complexity and higher cost
- Reference Pantone colours where possible — enamel colours are matched from Pantone’s Solid Coated palette, so PMS references give the most accurate colour matching
- Account for the metal outline — the raised metal lines (called “cloisonné walls”) that separate enamel areas are a visual part of the design; plan your colour layout with these borders in mind
Design Complexity
- Start with simpler designs for your first pin — fewer colours and less fine detail means more predictable results
- Avoid very thin isolated shapes that may break off during production
- Consider how the design will look at its actual small physical size, not just on screen
- Test your design by printing it at actual pin size before submitting — what looks detailed on screen can look cluttered at 30mm
✅ Quick Self-Check: Print your design at actual pin size on plain paper. Can you clearly read any text? Are all colour areas clearly distinguishable? Are the outlines bold enough to see? If yes to all three, your design is likely in good shape for production.
FAQ: File Formats for Custom Enamel Pins
The most common file format questions from pin creators at every experience level. Click any question to expand the full answer.
- What is the best file format for custom enamel pins?
AI (Adobe Illustrator) vector files are the gold standard for custom enamel pin production because they allow perfect scaling, clean line work, accurate colour separation, and the most direct path to metal mold creation. EPS and SVG files from other vector tools like Affinity Designer or Inkscape are equally suitable. If you cannot produce a vector file, a high-resolution PSD is the next best option, followed by a high-resolution PNG as a last resort reference file.
- Can I submit a PNG file for enamel pin production?
Yes, PNG files can be submitted as starting points or visual references, but they are raster-based and almost always require conversion into a vector format before production can begin. To give your design the best chance of a clean conversion: export at maximum resolution (300 DPI minimum, 600 DPI preferred), use a transparent background rather than white, save as PNG (not JPG) to avoid compression artefacts, and include colour references alongside your file. CreatePins.com can handle the conversion process — just be prepared for a brief additional review period.
- Are PSD files good for enamel pin designs?
PSD files work well when prepared correctly. The layered structure is genuinely helpful — keeping each design element or colour on a separate named layer makes vectorisation significantly easier. Use a minimum of 300 DPI, avoid gradients and soft shading (which cannot be reproduced in enamel), use solid flat colours, and provide a flattened preview image alongside the PSD. Our production team will review the file and vectorise elements as needed before sending you a proof.
- Do enamel pin designs need to be vector files?
Vector files are strongly recommended and are the fastest route to production, but they are not the only option. Pins are manufactured using metal molds that require clean, precise outlines and scalable artwork — which is exactly what vector files provide natively. Raster files like PNG and PSD can be used as references or starting points, but they will need to be converted to vector before the mold can be created. This conversion adds time and sometimes cost, depending on the complexity of the artwork.
- What happens if I don’t have a vector file?
No problem at all. CreatePins.com regularly works with creators who have only sketches, Procreate exports, or PNG files. Submit your highest-quality file and our design team will assess it, handle any necessary vectorisation or cleanup, and send you a digital proof for approval before manufacturing begins. The key is submitting the clearest, highest-resolution version of your design possible, along with colour references and any specific notes about your vision.
- What colour mode should I use for enamel pin artwork?
Use CMYK colour mode for AI and EPS files where possible — this is closer to how physical enamel pigments are mixed and will result in more accurate colour translation. For PSD files, either RGB or CMYK is acceptable. Regardless of colour mode, the most accurate way to specify enamel colours is by Pantone (PMS) Solid Coated reference numbers, as enamel manufacturers match from the Pantone palette. Include PMS numbers in your submission notes if you have specific colour matching requirements.
- Can I design an enamel pin in Canva or Procreate?
Yes, both are valid tools with different caveats. Canva Pro can export SVG files — a vector format that works well for production — making it one of the best beginner-friendly options for simple, graphic designs. Procreate exports PNG, PDF, or PSD files (all raster), which will need vectorisation. For the cleanest Procreate results: use hard brushes and no soft blending, keep colour areas clearly separated, use a dedicated solid outline layer, and export at maximum resolution. Then submit to CreatePins for professional vectorisation.
- What is the minimum line thickness for an enamel pin design?
The minimum recommended stroke or outline width is 0.3–0.4mm at actual production pin size. Lines thinner than this may not hold up during the metal mold cutting process and could result in fine details being lost or lines merging together in the finished pin. For text, a minimum of approximately 4pt at pin size is recommended for legibility. For any isolated small detail or shape, aim for a minimum of 0.5mm. These guidelines apply regardless of what file format you use.
Final Thoughts: Choose the Right Format, Get Better Pins
If you want the best results with the least back-and-forth, vector files (AI, SVG, EPS) are the clear winner. They work directly with the manufacturing process, allow perfect colour separation, and get your order into production fastest. PSD files work well with the right preparation, and PNG files are a perfectly valid starting point for beginners.
Remember: the better your file, the smoother your production — and the better your finished pins will look. Quality files mean:
- Faster turnaround — less time in design review means quicker production and delivery
- More accurate colours — clean colour separation ensures vibrant, true-to-design enamel fills
- Crisper details — sharp lines and clean edges make every element of your design pop
- Lower overall costs — fewer revision rounds mean no unexpected design fees and less waiting
- Greater confidence — knowing your file is right means you can approve your proof quickly and trust the result
Whatever stage you’re at — from first sketch to polished Illustrator file — CreatePins.com is here to help you get from artwork to finished pin as smoothly as possible.
Start Your Pin Project Today
Upload your artwork — in any format — and our team will handle the rest, from file optimisation and vector conversion to production and worldwide delivery.
📚 Further Reading & Resources
- Adobe Illustrator — Saving and Exporting Artwork — Official guide to saving AI, EPS, and SVG files from Illustrator
- Inkscape Tutorials — Free beginner tutorials for the leading free vector design tool
- Affinity Designer — Professional vector design software with a one-time purchase price (no subscription)
- Pantone Colour Finder — Look up Pantone PMS codes to specify exact enamel colours for your pin
- Canva — How to Download SVG Files — Official Canva guide to exporting vector SVG files (requires Canva Pro)
- Procreate Handbook — Official documentation including export settings and resolution guidance
- CreatePins.com Blog — More guides on pin design, file preparation, and ordering custom enamel pins