Common Enamel Pin Types: Differences, Costs & Mistakes (2026)
A complete, beginner-friendly comparison of soft enamel, hard enamel, glitter, epoxy, die-struck, and more — with real pricing ranges, the mistakes that ruin first orders, and tips for choosing the right enamel pin types for your design.
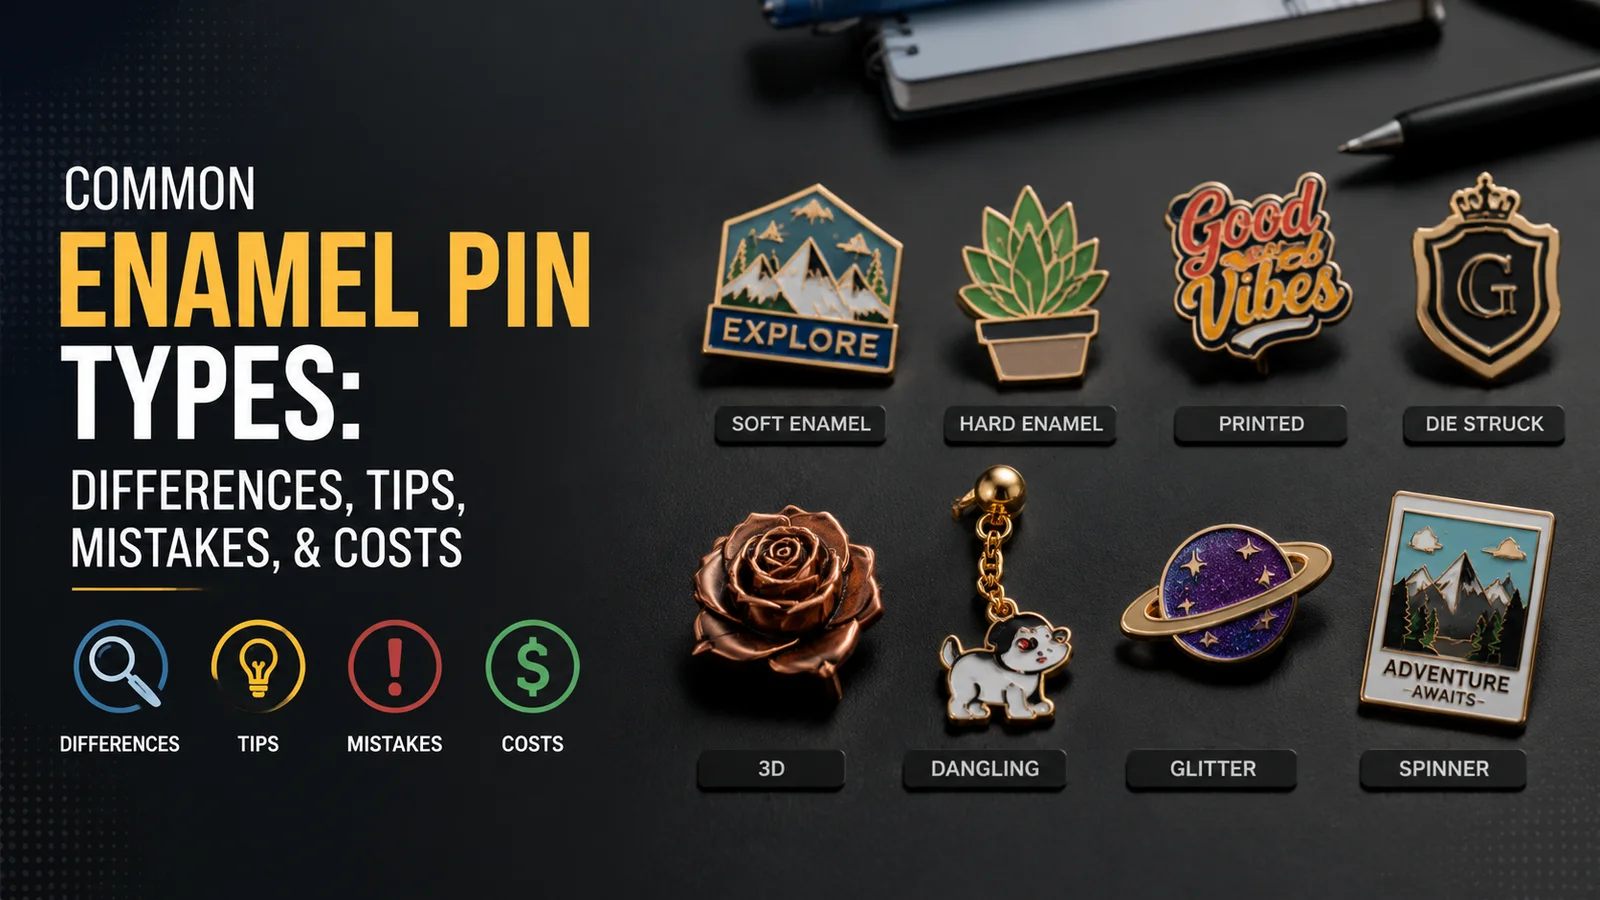
If you’ve never ordered custom enamel pins before, the terminology alone can be overwhelming. “Soft enamel,” “hard enamel,” “die struck,” “epoxy dome” — they sound similar, but they produce very different finished products, at very different price points. This guide breaks down every common enamel pin type in plain language, compares their look, feel, durability, and cost, and flags the mistakes that trip up most first-time buyers.
What Is an Enamel Pin, Exactly?
An enamel pin is a small metal badge, usually made from iron, zinc alloy, or brass, that has a design stamped or etched into it and then filled with colored enamel (either a real fired enamel or a enamel-look epoxy/paint fill, depending on the type). The metal is plated in a finish like gold, silver, black nickel, or copper, and a pin post or clutch is attached to the back so it can be worn on clothing, bags, lanyards, or hats.
Every “type” of enamel pin below is really a different combination of three things: how the design is formed (stamped, etched, or printed), how the color is filled (enamel, paint, epoxy, or ink), and what finishing effects are added on top (glitter, glow powder, sandblasting, or a dome). Once you understand those three variables, every pin type on the market makes a lot more sense.
Quick Comparison Table
Here’s the fast version. Scroll down for a full breakdown of each type, including when to use it and what it typically costs.
| Enamel Pin Types | Texture | Best For | Relative Cost |
|---|---|---|---|
| Soft Enamel | Recessed, textured grooves | Bold logos, streetwear, budget runs | $ |
| Hard Enamel (Cloisonné) | Smooth, glass-like, flush surface | Premium brands, fine detail | $$$ |
| Die Struck | No color fill, raised metal only | Minimalist, monogram, military | $ |
| Offset / Printed | Flat, photographic detail | Photo-realistic art, gradients | $$ |
| Glitter Enamel | Sparkly, textured fill | Fun, whimsical, kids’ brands | $$ |
| Epoxy Dome / Bubble | Rounded, glossy dome | Playful mascots, stickers-look | $$ |
| Sandblasted / Antique | Matte, weathered metal | Vintage, rustic, badge style | $$ |
| Cut-Out (No Fill) | Open silhouette, no enamel | Simple bold icons | $ |
| 3D / Bevel | Sculpted, raised relief | Statues, mascots, collectibles | $$$ |
| Translucent | Light passes through color | Gems, potions, stained-glass art | $$ |
| Glow-in-the-Dark | Glows after light exposure | Space, Halloween, night themes | $$ |
| Digital / UV Printed | Full color, no line limits | Photo art, complex gradients | $$ |
The 12 Most Common Enamel Pin Types
1. Soft Enamel Pins
Soft enamel is the most common pin style you’ll see from independent artists and small brands. The metal is die struck to create recessed grooves along the design’s outlines, then each section is hand-filled with colored enamel. Because the enamel isn’t polished flush with the metal, you can feel the raised metal lines with your fingertip — this texture is actually the main visual signature of soft enamel.
Soft enamel is forgiving on color count and generally the cheapest and fastest option to produce, which is why it’s the default recommendation for a first pin run.
2. Hard Enamel Pins (Cloisonné)
Hard enamel pins go through the same stamping process as soft enamel, but the enamel is filled slightly above the metal lines, then ground and polished down until the entire surface is completely smooth and flush — almost glass-like. This is the traditional “cloisonné” technique used for military and university pins for over a century.
Hard enamel typically costs more than soft enamel because of the extra grinding and hand-polishing labor, but it holds up better to daily wear and looks noticeably more refined.
3. Die Struck Pins (No Enamel Fill)
Die struck pins skip the enamel entirely. The design is stamped into metal to create a raised, sculptural surface, and color comes only from the plating (gold, silver, antique brass, black nickel) or from an optional oxidized “antiquing” wash that settles into the recesses to add contrast.
4. Offset Printed Pins
Instead of filling recessed metal cells with enamel one color at a time, offset printed pins have the artwork printed directly onto a flat metal disc, then sealed with a clear epoxy coating. This process supports unlimited colors, gradients, and photographic detail that enamel simply can’t replicate.
5. Glitter Enamel Pins
Glitter enamel pins use the same soft-enamel process, but fine glitter particles are mixed into the enamel fill for specific sections of the design. They’re popular for whimsical, celestial, or kids’-brand designs where a bit of sparkle adds personality.
For a deeper look at how much glitter to use and where it works best, see the Glitter Enamel Pins design guide.
6. Epoxy Dome (Bubble) Pins
Epoxy dome pins start as a soft or hard enamel base, then a thick clear epoxy resin is poured over the entire face, creating a rounded, glass-like bubble. The dome adds depth, protects the color from scratching, and gives the pin a candy-like shine that reads well in photos.
Read the full Epoxy Dome Pins guide to see when a full dome vs. a partial dome makes more sense for your design.
7. Sandblasted & Antique-Finish Pins
Sandblasted pins skip enamel fill and instead use a matte, sandblasted texture on the recessed areas combined with a shiny raised metal outline, often finished in black nickel, antique gold, or antique copper. The contrast between matte and polished metal gives a rugged, vintage badge aesthetic.
8. Cut-Out (Open) Pins
Cut-out pins remove the background metal entirely, leaving only the silhouette of the design — with or without an enamel fill inside the remaining shape. This creates a lightweight, graphic look that works especially well for icon-style logos or negative-space illustrations.
9. 3D / Bevel (Sculpted) Pins
3D pins are sculpted in multiple depth levels rather than one flat plane, giving certain elements (a character’s head, a raised badge shape) a rounded, statue-like presence. They’re typically finished in a single or dual-tone metal plating rather than full enamel color.
10. Translucent Enamel Pins
Translucent pins use a see-through enamel fill instead of an opaque one, so light passes through the color the way it does through stained glass. Held up to a window or light source, the design glows in a way opaque enamel never can.
Because translucent fills behave differently under studio lighting than they do in real life, it’s worth reading the Translucent Enamel Pin Design Guide before finalizing your palette.
11. Glow-in-the-Dark Pins
Glow-in-the-dark pins mix phosphorescent powder into specific enamel sections, so those areas absorb light and glow softly after the lights go out. They’re a favorite add-on for space, Halloween, or nighttime-themed designs, and can be combined with soft or hard enamel bases.
See the full Glow in the Dark Enamel Pins guide for tips on which colors glow brightest.
12. Digital / UV Printed Pins
UV printing sprays full-color ink directly onto a metal or acrylic base and cures it instantly with UV light, without needing separate enamel cells for each color. This means there’s effectively no limit on the number of colors or gradients, making it the go-to choice for photo-realistic or heavily shaded artwork.
Unsure whether UV printing or traditional screen printing is right for your art? Compare them in UV Printing vs. Screen Printing for Enamel Pins.
How to Choose the Right Type for Your Design
- Lots of small text or fine lines? Choose hard enamel or die struck — soft enamel and glitter tend to blur very thin details.
- Full-color illustration or gradient? Choose offset printing or UV/digital printing — traditional enamel can’t blend colors.
- Want it to feel premium? Hard enamel’s smooth, flush finish reads as higher quality than textured soft enamel.
- On a tight budget or tight deadline? Soft enamel is almost always the fastest and most affordable starting point.
- Want a “wow” factor for social media? Epoxy dome, glitter, or glow-in-the-dark tend to photograph and video the best.
Still not sure which colors will translate well into any of these types? The Enamel Pin Colors Guide and Plating Colors guide both walk through how to pick a palette that survives the manufacturing process.
Cost Breakdown by Enamel Pin Types
Enamel pin pricing depends on size, color count, quantity, and add-ons — not just the base type. As a general rule of thumb for a 1.5-inch pin at moderate order quantities:
| Pin Type | Typical Price Range (per unit) | What Drives the Cost |
|---|---|---|
| Soft Enamel | Lowest baseline | Color count, quantity |
| Hard Enamel | 15–30% above soft enamel | Polishing labor, detail level |
| Die Struck | Similar to or below soft enamel | Plating finish, antiquing |
| Offset / UV Printed | Moderate | Color complexity, coating |
| Glitter / Glow Add-On | +10–20% over base type | Number of glitter/glow sections |
| Epoxy Dome | +10–25% over base type | Dome size, full vs. partial dome |
| 3D / Sculpted | Highest | Custom mold, sculpting complexity |
For a complete, itemized cost calculator including molds, plating, packaging, and shipping, see How Much Do Enamel Pins Cost to Make in 2026? and Pricing Custom Enamel Pins for Profit. Many first-time buyers are also surprised by fees that don’t appear in the base quote — the Hidden Costs guide covers exactly what to ask about upfront.
Common Mistakes First-Time Orderers Make
Choosing soft enamel for a design with fine text
Small letters and thin lines can fill in or blur once enamel is poured into narrow recessed channels. If your design has text under 1.5mm tall, upgrade to hard enamel or die struck, or enlarge the pin.
Ignoring color-to-color spacing
Enamel pins need a thin metal wall between every color to hold the fill in place. Colors that touch directly without a border often bleed into each other during production.
Assuming screen colors will match exactly
Enamel is a physical, hand-poured material, and colors are matched to the closest standard enamel swatch — not calibrated to your monitor. See Why Enamel Pin Colors Look Different From Your Screen Mockup for why this happens and how to minimize surprises.
Not checking file format requirements
Low-resolution PNGs and raster files with jagged edges cause delays and inaccurate proofs. Vector files (AI, EPS, or SVG) are strongly preferred — see Best File Formats for Custom Enamel Pins.
Sizing the pin without accounting for detail
A design that looks fine at 3 inches can lose all its detail once shrunk to a 1-inch pin. Always check the Enamel Pin Size & Thickness Guide before finalizing dimensions.
Forgetting to ask about defect tolerances
Every manufacturer allows a small percentage of minor cosmetic variation per production batch. Understanding what’s considered “acceptable” upfront avoids disputes later — see Common Enamel Pin Defects and Production Expectations & Tolerances.
For a broader look at avoidable errors across the entire design process, read The Biggest Enamel Pin Design Mistakes That Ruin Everything.
Ready to Turn Your Design Into a Real Pin?
Tell us your design, quantity, and enamel pin types — we’ll send back a free, no-obligation quote with pricing for every enamel option covered in this guide.
Pro Tips for New Starters
- Start with soft enamel for your first run. It’s the fastest way to learn the process and test demand before investing in a premium finish.
- Order a physical sample or proof before mass production. Enamel color always looks slightly different in person than on-screen.
- Keep your palette under 6–8 colors for the cleanest results and the most predictable pricing.
- Add a back stamp or sequential number if you’re releasing a limited edition — it adds perceived value and helps with tracking. See Back Stamps & Sequential Numbering.
- Think about packaging early. A backing card can double as a mini business card — see the Backing Cards Design Guide and Packaging Guide.
- Know your quality standards before the pins arrive. Review the Grading Enamel Pins quality guide so you can inspect your batch confidently.
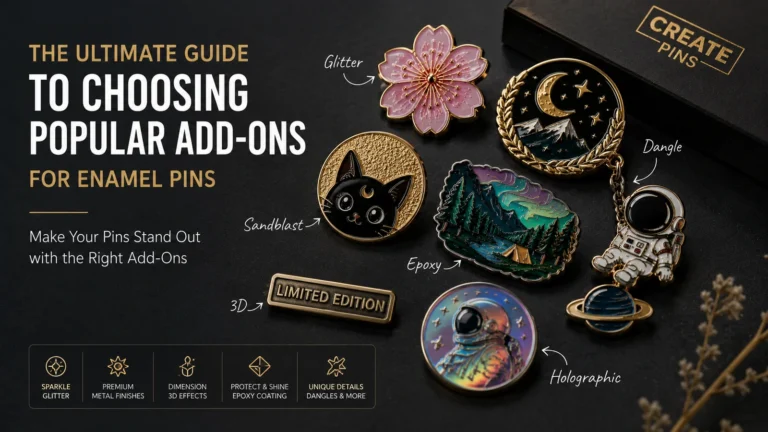
- Consider add-ons that boost perceived value without changing the base type — spinners, glitter, and glow are covered in the Ultimate Guide to Enamel Pin Add-Ons.
- Need inspiration? Browse 15 Enamel Pin Design Ideas That Always Sell before you start sketching.
Frequently Asked Questions
What’s the difference between soft enamel and hard enamel pins?
Soft enamel pins have a textured surface where you can feel the raised metal outlines around each color, while hard enamel pins are ground and polished until the surface is completely smooth and flush. Hard enamel typically costs more and holds fine detail better, but soft enamel is faster and more budget-friendly.
Which enamel pin type is cheapest to produce?
Soft enamel and die struck pins are generally the most affordable options because they require the least labor-intensive finishing. Add-ons like glitter, glow-in-the-dark powder, and epoxy domes typically add 10–25% to the base cost.
Can I combine multiple pin types, like glitter and epoxy dome?
Yes. Most manufacturers can combine effects — for example, a soft enamel base with a glitter fill and a full epoxy dome on top — as long as the design leaves enough space for each technique to render clearly.
Why do enamel pin colors look different from my digital mockup?
Enamel is a physical material matched to the closest standard color swatch rather than a digital color code, and lighting, plating tone, and enamel thickness can all shift the final shade slightly from what you see on a screen.
What pin type works best for very detailed or small designs?
Hard enamel and die struck pins hold fine lines and small text better than soft enamel, glitter, or epoxy dome pins, because there’s no texture or dome distortion obscuring the detail.
How long does it take to produce custom enamel pins?
Soft enamel pins are typically the fastest to produce, while hard enamel, epoxy dome, and 3D sculpted pins take longer due to extra polishing, curing, or mold-making steps. Exact timelines vary by manufacturer and order size.
Do all enamel pin types support glow-in-the-dark or glitter effects?
Glitter and glow-in-the-dark effects work best with soft or hard enamel bases, since both rely on mixing particles into the enamel fill. Printed or UV-based pins typically don’t support these physical additive effects.
Have a question this guide didn’t cover? Reach out for a free quote and our team can recommend the right pin type for your specific design.
Related Guides
- Complete Enamel Pin Design Guide (2026)
- How Much Do Enamel Pins Cost to Make in 2026?
- Pricing Custom Enamel Pins for Profit
- Custom Enamel Pin Hidden Costs
- The Beginner’s Guide to Enamel Pin Plating Colors
- How to Choose Enamel Pin Colors
- Enamel Pin Production Specifications
- The Biggest Enamel Pin Design Mistakes
- Glitter Enamel Pins: Complete Guide
- Epoxy Dome Pins Complete Guide
- Translucent Enamel Pin Design Guide
- Glow in the Dark Enamel Pins Guide
- UV Printing vs Screen Printing
- Best File Formats for Custom Enamel Pins
- Size & Thickness Guide
- Why Colors Look Different From Mockups
- Common Enamel Pin Defects
- Production Expectations & Tolerances
- Grading Enamel Pins: Quality Standards
- Back Stamps & Sequential Numbering
- Enamel Pin Backing Cards Guide
- Enamel Pin Packaging Guide
- Ultimate Guide to Enamel Pin Add-Ons
- 15 Enamel Pin Design Ideas That Always Sell
- Want More Than Just Custom Pins?
Get Your Free Enamel Pin Quote Today
Whether you’re picking soft enamel, hard enamel, or a fully custom epoxy dome pin, our team will help you find the right type, colors, and finish for your budget.