How to Convert Your Enamel Pin Design Into a Custom Keychain (Complete Guide)
Everything you need to know about turning your pin artwork into a profitable keychain product — from file prep and material choices to pricing, MOQs, and launch tips.
📋 Table of Contents
- Why Convert Enamel Pin Design into a Custom Keychain?
- Enamel Pins vs. Keychains: Key Differences
- Design Adjustments You Need to Make
- Keychain Materials & Enamel Types Explained
- Keychain Attachment Types
- File Preparation & Artwork Requirements
- Step-by-Step: From Pin Design to Finished Keychain
- Plating Colors & Finishes
- Sizing Guide for Keychains
- Pricing & Minimum Order Quantities
- Packaging Options
- Choosing the Right Manufacturer
- Frequently Asked Questions
If you already sell or design custom enamel pins, you are sitting on a ready-made product expansion. Your existing pin artwork can be adapted into custom keychains with minimal extra design work — and keychains open up a whole new customer segment: people who want to carry your art every day without pinning it to clothing.
This guide walks you through every stage of the process in plain language. Whether you are a small artist selling at conventions, an online brand scaling your merchandise line, or a first-timer just exploring the idea, you will find everything you need here.
Why Convert Enamel Pin Design into a Custom Keychain?
The practical case for keychains alongside pins is strong:
- New revenue stream with low design cost. Your artwork already exists. The main investment is adapting files and placing a production order.
- Different customer needs. Not everyone wears pins — but almost everyone uses keys. Keychains reach the same audience and then some.
- Higher perceived value. A hard enamel keychain with a lobster clasp can retail for $12–$20, often at a higher margin than a comparably sized pin.
- Great bundling opportunities. Pin + matching keychain bundles are popular gift sets that increase average order value.
- Everyday visibility. A keychain is handled multiple times per day, giving your design ongoing exposure.
- Convention & market appeal. Keychains appeal to shoppers who say “I don’t wear pins” — removing an objection and closing more sales.
Enamel Pins vs. Keychains: Key Differences
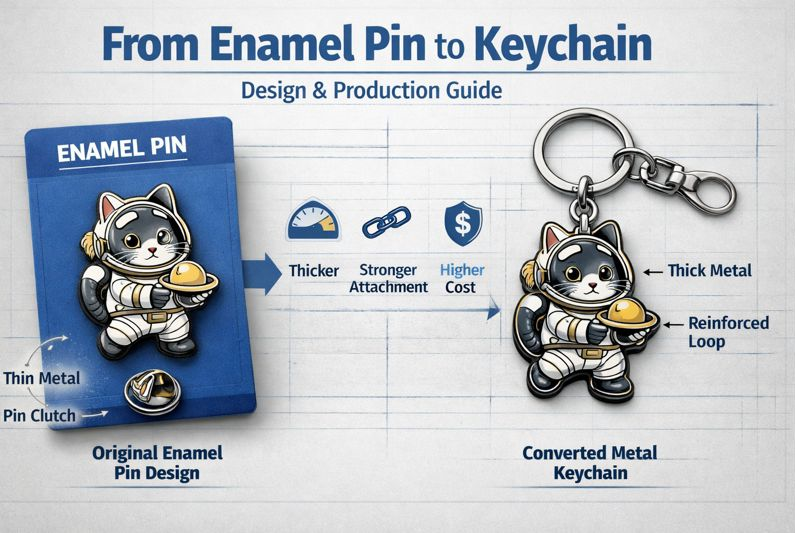
Before you convert anything, understand how the two products differ structurally. The differences affect both your design choices and your production specifications.
| Feature | Enamel Pin | Enamel Keychain |
|---|---|---|
| Attachment method | Butterfly clutch or rubber clutch on reverse | Jump ring + split ring, lobster clasp, or carabiner |
| Backing | Flat back with pin post | Usually the same design reverse, or a flat back with drilled loop hole |
| Typical size range | 25 mm – 75 mm | 35 mm – 80 mm (can go larger) |
| Thickness | 1.0 mm – 1.5 mm standard | 1.2 mm – 2.0 mm (thicker feels more premium) |
| Durability need | Moderate (worn on clothing) | High (dropped, carried in pockets daily) |
| Hard enamel suitability | Yes | Strongly recommended |
| Double-sided design | Uncommon (back is functional) | Optional but popular |
| Retail price range | $8 – $15 | $10 – $22 |
Design Adjustments You Need to Make
You usually cannot take a pin artwork file and send it to production unchanged. Keychains have different structural requirements, and some design elements that work fine on a pin will fail on a keychain. Here is what to review:
1. Remove the Pin Post, Add a Loop Hole
Your enamel pin design file likely does not show the post — it is added by the factory. But for a keychain, you need a drilled hole or an integrated loop at the top of the design (or wherever the attachment ring will go). Tell your manufacturer where you want the attachment point; they will incorporate it into the mold.
2. Simplify Ultra-Fine Details
Fine lines under 1 mm that look sharp on a pin can fill in or break during the keychain production process, especially at smaller sizes. Review your artwork at actual production size and thicken any line that looks fragile. Aim for a minimum line width of 1.2–1.5 mm for keychains.
3. Increase Your Color Margins
Enamel colors need clean metal borders (called “dams”) between them to prevent colors from bleeding together during the baking process. Ensure adjacent color areas are separated by a raised metal line. If two colors in your design share a border with no metal dam, the factory’s artist will need to add one — which can shift your design slightly. Better to address this in your source file first.
4. Consider Whether to Add a Back Design
One advantage keychains have over pins is the option to design both sides. Double-sided keychains cost more (roughly 30–50% more than single-sided), but they add perceived value and give you another branding surface. Popular ideas for a back design include: your logo, a complementary pattern, a quote, or a contrasting color fill with your website.
5. Resize Thoughtfully
Keychains are often sized slightly larger than their pin equivalents to enhance durability and visual impact. If your pin was 30 mm, consider making the keychain 40–50 mm. The extra size also gives you more tolerance for enamel color accuracy and line clarity. See our complete enamel pin design size guide for detailed guidance that applies equally to keychains.
Keychain Materials & Enamel Types Explained
Base Metal Options
The base metal is what the keychain charm itself is made of. The most common options:
- Zinc alloy (zamak): The industry standard. Affordable, holds detail well, available in all plating colors. Slightly heavier than iron.
- Iron/steel: Cheaper than zinc alloy, slightly lighter. Good for simple designs. Less popular for premium keychains.
- Brass: Premium option. Excellent detail retention and a more satisfying weight. Common in high-end jewelry-inspired designs. More expensive.
- Copper: Warm tone. Sometimes left unplated for a raw aesthetic. Less common.
- Acrylic: Not enamel at all — printed or laser-cut plastic. Much cheaper but less durable. Some sellers combine acrylic charms with metal hardware.
For most custom keychain projects, zinc alloy with hard enamel fill is the recommended starting point. It balances quality, cost, and availability.
Soft Enamel vs. Hard Enamel
This is the most important material decision you will make. Both are legitimate — they just look and feel different:
| Property | Soft Enamel | Hard Enamel |
|---|---|---|
| Texture | Recessed, textured — you feel the raised metal lines | Polished flat — completely smooth surface |
| Appearance | Vibrant, slightly matte to semi-gloss | Rich, jewel-like, glass-smooth |
| Durability | Good — enamel can chip on edges over time | Excellent — better for daily carry |
| Cost | Lower | Higher (roughly 20–40% more) |
| Color vibrancy | Very bright — colors can be applied thicker | Slightly muted — colors polished flat |
| Best for keychains? | Yes, suitable | Strongly preferred |
| Glitter enamel option | Yes | Not compatible |
| Glow-in-the-dark option | Yes | Not compatible |
Specialty Enamel Options
- Glitter enamel: Metallic sparkle particles suspended in soft enamel. Great for fantasy and star themes.
- Glow-in-the-dark (GITD): Phosphorescent pigment added to soft enamel. Popular for Halloween and night-themed designs.
- Color-shifting enamel: Changes appearance under different lighting. Rare and more expensive, but a strong differentiator.
- Translucent enamel: Semi-see-through colors. Beautiful on gold or silver plating for a stained-glass effect.
Keychain Attachment Types
The “hardware” part of the keychain — the loop and ring system — affects both the look and the practical use of the finished product. Know your options before placing an order:
- Split ring (key ring): The classic silver coil ring. Sturdy, cheap to produce, instantly recognizable. Almost always included as standard.
- Lobster clasp: A spring-loaded hook. More secure than a split ring, easier to attach to bags and belt loops. Popular for “charm keychain” styles.
- Carabiner clip: Larger, clip-style hardware. Common for outdoor or utility-themed designs. Feels substantial and premium.
- Ball chain: A bead chain, like a military dog tag. Lower-cost, slightly retro look. Common for simpler promotional keychains.
- Wrist strap / lanyard attachment: A short strap loop attached via the jump ring. Adds a different carrying option and extra perceived value.
- Jump ring: The small intermediate ring connecting the charm to the clasp. Usually included by default. Can be specified in gold or silver to match your plating.
File Preparation & Artwork Requirements
Sending the right files saves you revision rounds and speeds up production. Here is what manufacturers need:
Preferred File Formats
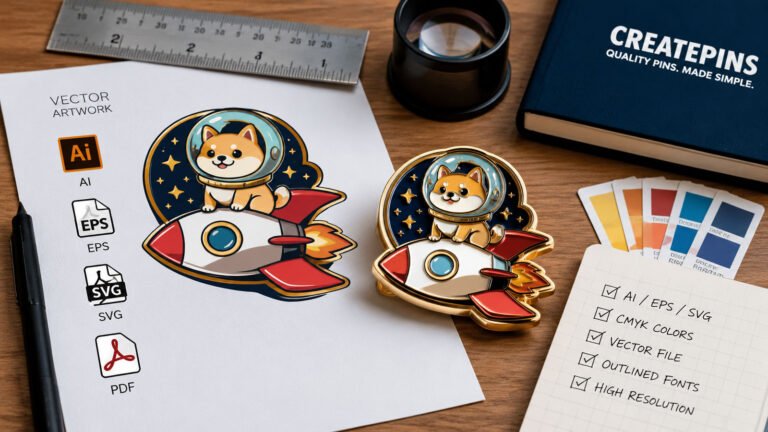
- Adobe Illustrator (.AI): The gold standard. Fully editable vectors, scalable to any size. Always submit if you have it.
- Encapsulated PostScript (.EPS): Equally good for vector artwork. Universally compatible.
- PDF (vector-based): Acceptable if saved from Illustrator or another vector program. Not a scanned or exported raster PDF.
- High-resolution PNG or PSD: Acceptable fallback if you only have raster files. Minimum 300 DPI at actual production size, ideally 600 DPI. The factory will re-trace your design as vectors.
For more detail on choosing between file formats, see our guide on best file formats for custom enamel pins — all of that advice applies directly to keychain orders too.
Color Specification
Enamel colors are matched to Pantone Solid Coated (PMS) color codes, not RGB or hex values. If your design was created for screen, your manufacturer will do their best to match, but screen colors and physical pigments are different — some bright screen colors (electric blues, neon greens) can not be exactly replicated in enamel.
- Label every color area in your file with its Pantone PMS code.
- Request a physical color chart or digital reference from your manufacturer if you are unsure.
- Order a sample before your full production run to verify color accuracy.
Our complete enamel pin color palette guide covers how to choose and communicate colors effectively for production.
File Checklist Before Submission
- ✅ All text converted to outlines/paths
- ✅ All colors labeled with PMS codes
- ✅ Metal dam lines clearly visible between adjacent color areas
- ✅ Attachment loop/hole indicated on the file
- ✅ Design saved at actual production size (or larger)
- ✅ All layers labeled and organized
- ✅ Bleed or edge notes included if design extends to the edge
Step-by-Step: From Pin Design to Finished Keychain
Audit Your Existing Pin Design
Open your original artwork file. Check every line width (minimum 1.2 mm for keychains), look for any text smaller than 6pt at actual size, and note anywhere adjacent color areas share a border without a metal dam. List everything that needs changing before touching the file.
Adapt the Artwork
Make your listed adjustments: thicken thin lines, simplify or enlarge small text, add metal dams where missing, and note the attachment loop position. If you want a double-sided design, create the back artwork now. Save as a new file so your original pin artwork is preserved.
Decide on Specifications
Choose your size (50–65 mm is popular for keychains), enamel type (hard enamel recommended), base metal (zinc alloy), plating color (gold, silver, black nickel, etc.), attachment hardware (split ring, lobster clasp), and whether you want special effects (glitter, GITD). Write these down — you will need them for your quote request.
Request Quotes from Manufacturers
Send your adapted artwork file and specification list to 2–3 manufacturers. Ask for pricing at your target quantity, a sample price, production turnaround time, and their quality control process. Compare not just price but also communication speed and portfolio quality.
Review the Digital Proof (Mockup)
Your chosen manufacturer will send a digital proof — a rendered preview of how your keychain will look. Check every detail: colors, proportions, line widths, text legibility, attachment position. Request revisions if anything is off. Do not approve a proof you are not fully happy with — changes after production approval are expensive or impossible.
Order a Physical Sample
Before committing to a full production run, request a physical sample (also called a pre-production sample or PPS). Expect to pay $20–$60 for this, which is usually credited toward your production order. Hold the sample in your hand, check the enamel fill, plating quality, and hardware. This is your last chance to catch problems before mass production.
Place Your Production Order
Approve the sample, confirm your quantity and packaging requirements, and pay your deposit (typically 30–50% upfront, remainder on completion). Get your confirmed production timeline and tracking information in writing.
Receive, Inspect, and Sell
When your order arrives, inspect a random sample — check at least 10–20% of units for defects: enamel chips, plating inconsistencies, misaligned colors, bent hardware. Most reputable manufacturers offer a replacement policy for defective units. Once you have confirmed quality, photograph your keychains professionally and list them for sale.
Plating Colors & Finishes
The metal plating you choose dramatically affects how your finished keychain looks. Plating is applied over the base metal before the enamel fill and interacts visually with your design’s color palette.
For a deep dive into this topic, see our beginner’s guide to enamel pin plating colors. Here is a quick overview for keychains:
| Plating | Look | Best For | Notes |
|---|---|---|---|
| Gold | Warm, bright yellow-gold | Warm color palettes, vintage, floral, fantasy | Most popular choice overall |
| Silver | Cool, bright metallic | Cool tones, tech, modern minimal | Clean and versatile |
| Rose Gold | Pink-toned warm gold | Feminine themes, pastel palettes, lifestyle brands | Very on-trend 2024–2026 |
| Antique Gold | Muted, aged warm gold | Rustic, historical, nature, gothic | Great for illustrative designs |
| Antique Silver | Muted, aged cool silver | Industrial, steampunk, Celtic, occult | Darker look, high contrast |
| Black Nickel | Dark gunmetal | Dark themes, streetwear, minimalist contrast | Very dramatic against bright colors |
| Copper | Warm orange-brown | Earthy, vintage, botanical themes | Less common, distinctive |
Sizing Guide for Enamel Keychains
Size affects cost, durability, and visual impact. Unlike pins — which are often kept small to sit neatly on a lapel — keychains can and should be larger. A keychain that is too small looks cheap and lacks presence.
| Size | Approx. inches | Best Use | Detail Level |
|---|---|---|---|
| 35 mm | ~1.4″ | Simple shapes, bold logos, minimal designs | Low — avoid fine details |
| 45 mm | ~1.75″ | Standard keychain size — sweet spot for most designs | Medium — good character detail |
| 55 mm | ~2.2″ | Illustrated scenes, complex characters, lots of color | High — can handle fine detail |
| 65 mm+ | ~2.5″+ | Statement pieces, collector editions, premium items | Very high — showcase designs |
Generally, if your original pin was 25–30 mm, aim for a 45–55 mm keychain version. This gives your artwork room to breathe and makes the product feel substantial. Most buyers perceive a 50+ mm keychain as a premium item worth a higher price point.
For more technical guidance on choosing the right dimensions, our enamel pin design size guide covers aspect ratios, thickness recommendations, and how size interacts with design complexity.
Pricing & Minimum Order Quantities (MOQs)
Minimum Order Quantities
Most reputable enamel keychain manufacturers require a minimum order of 50–100 units per design. Some offer low-MOQ tiers starting at 50 pieces, but the per-unit price will be significantly higher than at 100+.
For a first run with an untested design, ordering 100 units is a sensible starting point. You get a meaningful inventory without overcommitting, and you can test the market before reordering. For designs you know will sell well, jumping to 250–500 units immediately brings your per-unit cost down substantially.
For a detailed look at how quantity affects pricing across keychain and pin orders, see our complete custom keychain pricing guide for 2026.
Pricing Breakdown
| Quantity | Soft Enamel (per unit) | Hard Enamel (per unit) | Notes |
|---|---|---|---|
| 50 units | $2.80 – $4.50 | $3.80 – $6.00 | Higher per-unit cost; good for testing |
| 100 units | $1.80 – $3.00 | $2.80 – $4.50 | Standard starting quantity |
| 250 units | $1.30 – $2.20 | $2.00 – $3.20 | Good margin at mid-volume |
| 500 units | $0.90 – $1.60 | $1.50 – $2.50 | Significant per-unit savings |
| 1,000+ units | $0.65 – $1.20 | $1.00 – $1.80 | Best for established designs with proven demand |
Suggested Retail Pricing
A common rule of thumb for indie sellers is to price at 4–6x your landed cost (production cost + shipping per unit). At 100 units of hard enamel keychains, your landed cost might be $4–$6 per unit, suggesting a retail price of $16–$30. Typical market prices for quality enamel keychains at artist markets and online shops are $12–$20 USD.
Packaging Options
Packaging is often an afterthought, but it affects perceived value, retail display, and shipping safety. Here are the most common options for enamel keychains:
Poly Bag (OPP Bag)
A clear plastic sleeve. The bare minimum. Protects against dust and scratches during shipping, but offers no branding opportunity and looks basic at retail. Use this only if you are adding the keychain to a gift set or box, or selling at events where you will display them loose.
Backing Card
The most popular option for indie sellers. A printed card with a hole punched through it — the keychain hangs from the card on its split ring. Gives you a full-color branding surface (your logo, design name, social handles, website, care instructions). Easy to display on hook racks at conventions and markets. Inexpensive to produce (often $0.10–$0.30 per card for short runs from local printers).
Velvet or Organza Pouch
A fabric drawstring bag. Adds premium feel. Good for gift-targeted keychains or higher-price-point items. Adds ~$0.30–$0.80 per unit to your cost. Popular for jewelry-inspired keychain designs.
Custom Box
A branded box, either folded cardboard or a rigid gift box. Highest perceived value. Suitable for collector editions, bundle sets, or corporate gifting orders. Significantly increases cost and storage requirements. Most practical for quantities of 250+ where the per-unit cost becomes reasonable.
Choosing the Right Manufacturer
The manufacturer you choose will determine the quality of your finished keychains. Here is what to evaluate:
What to Look For
- Portfolio quality: Ask for photos of completed work — especially hard enamel and multi-color designs similar to yours. Look for clean enamel fill, consistent plating, and sharp line definition.
- Communication responsiveness: A supplier who takes 3–5 days to reply to a quote request is a red flag for production issues later. You want clear, timely communication.
- Sample policy: Any reputable manufacturer will offer pre-production samples. If they push back on this or charge an unusually high sample fee, look elsewhere.
- QC process: Ask specifically: “What is your quality control process, and what is your policy for defective units?” A confident manufacturer will answer clearly.
- Ethical manufacturing practices: Verify the manufacturer’s commitment to safe working conditions and fair labor. Our guide on ethical enamel pin manufacturing explains what to ask and what certifications to look for.
- Customs and import experience: If you are importing internationally (most enamel products come from Asia), your manufacturer should be experienced with export documentation. Check out our complete guide to customs clearance for importing enamel products.
Red Flags to Avoid
- No visible portfolio or only stock photos
- Unusually low quotes without explanation
- Pressure to skip the sample stage
- Vague or no quality guarantee
- Poor English and unclear communication on technical details
- No verifiable business address or company history
Ready to Turn Your Design Into a Custom Keychain?
Get a fast, detailed quote for your enamel keychain project. No commitment required — just upload your design and tell us what you need.
Get My Free Quote →Frequently Asked Questions
Most enamel pin designs can be converted to keychains, but very intricate details or ultra-fine lines may need simplification. Designs with 1.2–3 mm line widths and clear color separation work best. A good manufacturer will review your artwork and flag any production concerns before cutting the mold.
Most manufacturers require a minimum of 50–100 pieces per design. Ordering 100–300 pieces typically hits the sweet spot between cost per unit and manageable inventory. Some suppliers offer lower MOQs, but per-unit prices rise sharply below 100 units.
Standard production time is 15–25 business days after artwork approval. Rush orders may be possible in 10–15 business days at extra cost. Always add 5–15 business days for international shipping when planning product launch dates. Order earlier than you think you need to.
Adobe Illustrator (.AI) vector files are ideal because they scale without quality loss. EPS files are equally good. If you only have a raster file, send the highest-resolution PNG or PSD at actual production size (minimum 300 DPI). The factory will redraw as vectors, but a clean source file speeds the process. See our file format guide for more detail.
Soft enamel has recessed, textured color areas with raised metal lines you can feel. Hard enamel is polished completely flat and smooth like glass. For keychains specifically, hard enamel is recommended because it is more durable for daily carry — it resists chipping and abrasion much better than soft enamel when a keychain is tossed in a bag or pocket repeatedly.
At 100 pieces, soft enamel keychains typically cost $1.80–$3.00 each and hard enamel runs $2.80–$4.50 each. Larger orders (500+) can drop the per-unit price by 30–50%. There may also be a one-time mold/tooling fee of $50–$150, which is often waived or credited on larger orders. Check our full pricing guide for a detailed breakdown.
Yes. Common options include poly bags (basic protection), printed backing cards (best value for branding), velvet or organza pouches (premium feel), and custom gift boxes (highest perceived value). For most indie sellers, a custom-printed backing card is the best balance of cost, branding, and retail display.
Selling fan art merchandise commercially is a legal gray area. You do not own the intellectual property of the original characters, so selling without a license from the rights holder carries legal risk. Original art inspired by a fandom but not directly reproducing copyrighted characters is generally safer. Our guide on turning fan art into custom pins legally explains your options in detail — all of that guidance applies to keychains too. Consult a legal professional if in doubt.
45–55 mm is the sweet spot for most keychain designs. Smaller than 40 mm tends to look cheap and restricts design complexity. Larger than 65 mm can feel unwieldy on a keyring. If your original pin was 25–35 mm, scale up to 45–55 mm for the keychain version. The extra size gives your artwork more presence and allows for more detail.
Minor enamel chips can sometimes be filled with a matching nail polish color and sealed with a clear top coat. Scratched plating is harder to repair at home — it usually requires professional re-plating. For more DIY repair techniques, see our guide on fixing enamel pin damage at home — most methods apply equally to keychains.
Related Guides
Ready to go deeper? These resources will help you master every part of your custom keychain and enamel pin journey:
- Complete Enamel Pin Design Guide (2026) — master the full design process from concept to production
- How Much Do Custom Keychains Cost? (Complete Pricing Guide) — detailed cost breakdown for every order size
- How to Choose Enamel Pin Colors — build the perfect color palette for your design
- The Beginner’s Guide to Enamel Pin Plating Colors — pick the right metal finish for your artwork
- Best File Formats for Custom Enamel Pins — AI vs PSD vs PNG explained
- Technical Tips for Enamel Pin Design (Beginner Guide) — avoid the most common production mistakes
- Ethical Enamel Pin Manufacturing: What It Really Means — how to choose suppliers you can trust
- How to Make Your Own Custom Enamel Pin Mockup — visualize your design before ordering
- Best Ways to Display Enamel Pins — creative display ideas for markets and retail
- Pin Collecting Trends 2026: What’s Hot Right Now — stay ahead of the market
- Want More Than Just Custom Pins? — Discover Raoin.com — your one-stop partner for custom products like tote bags, lanyards, patches, and more.