The Ultimate Guide to Enamel Pin Add-Ons: Glitter, Glow, Epoxy, Spinners & More (2026)
Every add-on explained with real production limits, cost data, combination rules, and a designer decision tree — so you pick right the first time.
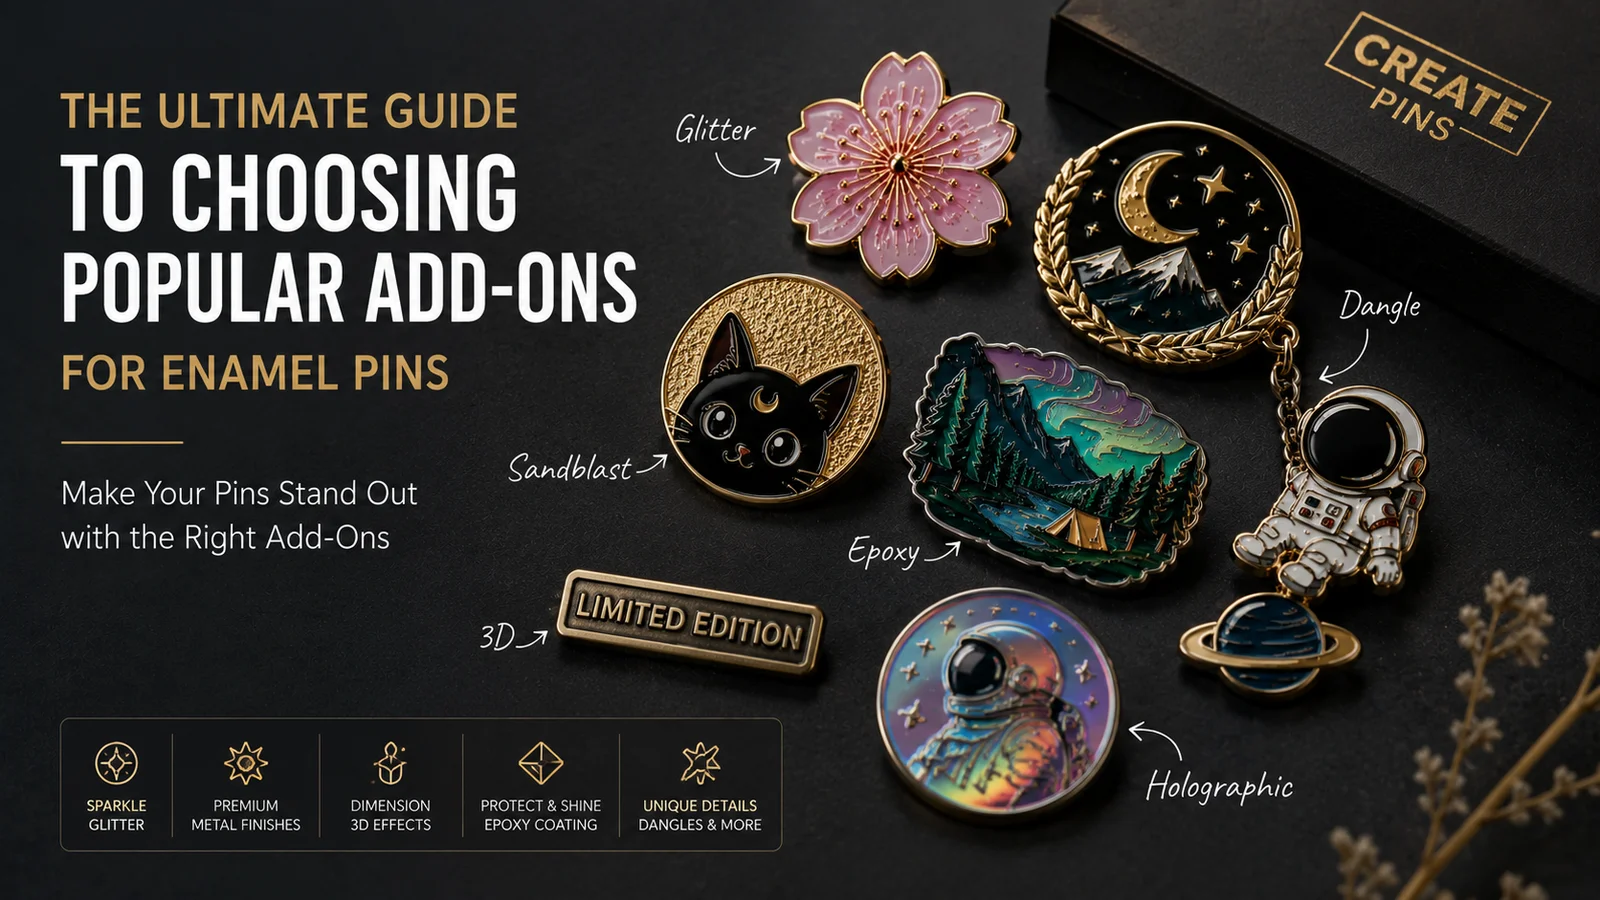
Add-ons are the single most effective way to transform a standard enamel pin into something collectors want to own, share, and pay more for. At CreatePins, roughly 42% of all custom pin orders include at least one add-on, and 13% include two or more — a clear signal that the pin market is moving toward premium featured designs.
But choosing the wrong add-on — or combining incompatible ones — can ruin a design, blow a budget, or create production headaches. This complete guide covers all 10 major add-on types with real production limits, accurate cost data, misunderstanding warnings, and clear design rules so you make the right call every time.
For the most complete foundation, pair this guide with our Complete Enamel Pin Design Guide (2026).
Why Add-Ons Matter More Than You Think
Add-ons don’t just make your pin look better — they directly affect perceived value, manufacturing method, color accuracy, durability, minimum order quantities, and unit cost. Get them right and collectors pay significantly more. Get them wrong and you’ve added cost without adding value.
The right add-on signals to collectors that a pin is worth owning — and often worth paying a premium for. The wrong combination signals inexperience and can create production defects. This guide gives you the knowledge to choose with confidence.
Complete Guide to All 10 Pin Add-Ons
Best for: Magical themes, fantasy art, food designs, cosmetics, animal characters, galaxy effects, and any design where sparkle enhances the theme.
How Glitter Enamel Really Works
Glitter is mixed directly into the enamel pigment during the fill process — it is not sprinkled on top after the fact. Glitter density creates distinctly different visual effects:
- Low density: Soft shimmer, sparkly dust effect — subtle and elegant
- Medium density: Bright, noticeable glitter pop — the most versatile option
- High density: “Full sparkle fill” — completely opaque glitter coverage, most popular on fantasy and cute-themed pins
❌ “Glitter can be controlled pixel-by-pixel.” — Glitter particles float freely within the enamel during the fill and baking process, so very fine micro-details will blur. Glitter works best in larger, open areas.
❌ “Glitter looks the same on all platings.” — The base metal plating dramatically changes how glitter appears. See the plating effect guide below.
• Gold plating — warms all glitter tones; cool blues and greens shift slightly warmer
• Silver / Nickel plating — preserves the true glitter colour most accurately; the safest choice for colour-critical designs
• Black Nickel plating — deepens and darkens glitter; creates a dramatic, moody effect that suits galaxy and Halloween themes especially well
• Minimum glitter area: 3mm — smaller areas won’t fill consistently
• Cannot apply glitter in ultra-thin lines — lines under 0.4mm will bleed
• Expect a ±5% tone shift in some glitter colours after baking — approve a physical sample for colour-critical work
• Glitter + tiny thin dividing lines is a high-risk combination — glitter particles can overflow fine borders
Best for: Halloween, galaxy and space themes, nocturnal animals, meme pins, horror, and any design concept that plays with darkness.
How Glow-in-the-Dark Enamel Works
Phosphorescent pigment is mixed into the enamel fill. The pin charges under any light source and emits in the dark for approximately 30–45 minutes per full charge. Glow brightness varies significantly by pigment colour:
- Green glow — brightest and most visible; the go-to for maximum glow impact
- Blue glow — noticeably weaker than green; softer, more subtle effect
- Purple glow — weakest glow brightness; best used as an accent alongside other colours rather than as the primary glow element
❌ “Glow areas are invisible during the day.” — They are not. Glow enamel has a clearly visible daytime tint: usually off-white, pale green, or light blue depending on the pigment. Your design must look good with that daytime tint visible — don’t design glow areas expecting them to be a neutral colour in daylight.
• Minimum fill area: 3–4mm — smaller areas glow inconsistently
• Thin outlines under 0.4mm will glow unevenly — use glow in larger, open fill areas
• Glow brightness varies by pigment density — high-density glow areas are significantly brighter
• Glow + micro areas is a problematic combination — the effect appears patchy in small zones
Best for: Protecting screen-printed elements, smooth glossy aesthetics, cute character pins, printed logos, and pins intended for children (rounded finish removes sharp surface edges).
Why Designers Choose Epoxy
- Protects delicate screen-printed elements from scratching
- Adds a glossy, modern, high-end appearance
- Creates a smooth rounded surface ideal for children’s products
- Enhances colour vibrancy — makes colours appear more saturated
- Seals the enamel surface against moisture and minor abrasion
❌ “Epoxy can be added to hard enamel.” — No. Applying epoxy over hard enamel creates an unwanted uneven raised surface on what should be a perfectly flat, flush finish. It destroys the premium hard enamel quality that makes hard enamel worth its price premium. Epoxy is for soft enamel only.
• After epoxy application, the pin loses the characteristic metal-line height difference that defines the classic soft enamel tactile feel
• Cannot combine epoxy with glitter + glow in extremely small areas — the resin can cloud fine-detail effects
• Epoxy can yellow slightly over years under direct UV / sunlight — ask about UV-resistant formulations for outdoor or long-term display pins
👉 For the complete deep-dive on epoxy dome finishing, see our dedicated guide: Translucent & Epoxy Enamel Pin Design Guide.
Best for: Anime-style eyes and face details, micro text, colour gradients, brand logos, photographic artwork, and any design with elements finer than enamel fill lines can achieve.
Why Screen Printing Is Essential for Certain Designs
Traditional enamel requires a metal border line to separate every colour area. This makes certain design elements — anime-style facial details, gradient skies, complex logos, micro text — physically impossible in pure enamel. Screen printing overlays ultra-thin ink directly on top of the enamel surface, bypassing the line limitation entirely. It’s the only way to achieve true fine detail on a metal pin.
Screen printing is the most popular add-on for anime, gaming, and pop-culture pins for exactly this reason — character faces with proper shading, gradients, and micro details are only achievable through printing.
• Minimum printed line thickness: 0.15mm — finer than this won’t reproduce cleanly
• Printed colours can scratch without an epoxy topcoat — always pair screen printing with epoxy dome for maximum durability
• Highly saturated neon prints may shift slightly after sealing — approve a physical sample for neon-heavy designs
• Screen printing adds cost per additional colour — plan your palette to minimise unnecessary colours
👉 Learn more in our dedicated guide: Best File Formats for Custom Enamel Pins — which covers preparing artwork for screen printing.
Not Sure Which Add-Ons Suit Your Design?
Send us your artwork and we’ll recommend the best add-ons based on your theme, budget, and audience. We always provide a free digital proof showing how add-ons look with your specific art before production begins.
Get Free Proof with Add-Ons →Free artwork review • No obligation • Response within 24 hours
Best for: Fashion themes, character accessories (bags, swords, wands), food and drink designs, stars and moon motifs, and any design where a hanging secondary element adds storytelling.
How Dangles Work
A secondary charm element hangs from the main pin body using a small jump ring connector. The charm can be a separate enamel piece, a metal shape, a gem, or a simple metal ring — it moves freely when the pin is worn, creating kinetic visual interest. The jump ring is always visible and cannot be made completely seamless.
❌ “Dangles can be placed anywhere on the pin.” — Placement must avoid: pin post locations (where the post attaches to the back), overhanging edges (where the charm would extend beyond the pin’s silhouette and create a packaging problem), and any position that creates a balance issue causing the pin to hang unevenly when worn.
❌ “Any charm size works.” — Charms smaller than 8mm are too delicate for the jump ring connection and may deform. Charms heavier than 2.5g put excessive stress on the connection point and the pin’s main body.
• Minimum charm size: 8–10mm in any dimension
• Maximum recommended weight: 2.5g per dangle
• Jump ring is always visible — design your concept to accommodate it aesthetically
• Cannot be placed near the back post, at thin protruding edges, or in positions that create tilt when worn
Best for: Moveable weapons (draw/sheath), speech bubbles that slide in/out, status bars, before/after reveals, and any concept where a sliding element creates an interactive moment.
How Slider Mechanisms Work
Sliders use a concealed track system built into the back plate of the pin. A secondary element sits in a channel and can be pushed horizontally (or sometimes vertically) within a defined range. The mechanism requires additional engineering: a back plate with the slider channel, the sliding element itself, and careful weight balancing to ensure smooth movement.
❌ “Sliders move loosely and freely.” — Slider movement is intentionally limited for stability and wearability. The actual movement range is typically 2–10mm depending on pin size and design. Very large movement ranges require larger pins and increase the risk of the slider detaching under stress.
• Slider track requires an extra back plate — adds thickness to the pin
• Minimum slider element width: 3–4mm
• Artwork must leave 5–6mm of internal clear space for the slider movement path
• Cannot combine sliders with heavy glitter or 3D relief on the moving element — increases friction and risks jamming
Best for: Astrology wheels, fortune tellers, directional compasses, clock or wheel designs, meme “spin the wheel” concepts, and any circular element where rotation adds meaning or interactivity.
How Spinner Mechanisms Work
A central pivot rivet is mounted through the pin’s back plate, allowing a secondary rotating element to spin freely in a full 360° arc. Unlike a slider (which has a limited track), a spinner can rotate continuously. The pivot must be precisely centred for smooth, balanced rotation — off-centre pivots cause wobble and uneven spinning.
• Spinner back plate adds 2–3mm additional thickness to the pin — design with this in mind
• Minimum spinner element diameter: 20mm — smaller elements lack enough rotational inertia for smooth spinning
• Cannot spin smoothly if the rotating element is too lightweight or unbalanced
• Heavy or heavily decorated spinning elements may cause pivot wear over time — use on collectible pins rather than high-friction daily wear items
Best for: Fashion brand pins, luxury fan merch, special edition collector pieces, wedding and event pins, and designs where a jewellery-quality finish is the explicit goal.
How Rhinestones Are Set
Rhinestones are individually hand-set into pre-cut recesses in the pin’s metal surface using adhesive bonding. The recess is created during the mold-making phase — each rhinestone position must be specified in your design file before production begins. Setting is a labour-intensive process, which is reflected in the per-stone cost.
❌ “Rhinestones always stay permanently secure.” — Rhinestones set with standard adhesive bonding can loosen on high-contact pins (worn on bags, keychains, or items that experience daily friction). Rhinestones are best used for display or collector editions rather than heavy everyday-wear accessories. If wearability is critical, discuss epoxy-sealed setting with your manufacturer.
• Minimum rhinestone size: 1.5–2mm — smaller stones are too fragile to set reliably
• Requires a flat, unrecessed area or a precisely cut recess for setting — cannot be placed on curved edges or 3D relief surfaces
• Cannot be placed closer than 1mm to metal lines — insufficient bonding surface
• Cannot be placed on curved pin edges — stones won’t sit flat and will detach
Best for: Character heads, animals with dimensional faces, weapons and props, coins and medallion designs, premium branding badges, and any concept where sculptural depth replaces enamel colour.
Why 3D Sculpted Metal Works Differently
Unlike flat enamel pins, 3D sculpted metal uses the depth and shading created by the metal itself — raised areas catch light while recessed areas fall into shadow, creating dimension and visual interest without any enamel fill at all. This makes it exceptionally well-suited to antique platings (antique gold, antique silver, antique brass) where the patina naturally settles in recessed areas, emphasising the sculptural detail.
The result is a pin that feels genuinely heavy, premium, and jewellery-like in a way that flat enamel simply cannot replicate.
• Cannot mix 3D sculpted areas with soft-enamel style colour fill in the same zone — the two production methods are incompatible in overlapping areas
• Tiny details smaller than 0.3mm may not cast well — sculpted features must be bolder than flat enamel design equivalents
• Surface appearance is heavily dependent on plating selection — always review a plated sample before approving bulk production
• One-time tooling fee applies but the mold is reusable indefinitely for all future production runs
Best for: Sequential numbering for limited editions, artist signatures, personalised edition text (“LE 100”), batch serial numbers, backer reward IDs, and custom event markings.
What Laser Engraving Achieves
A focused laser beam removes a microscopic layer of plating from the metal surface, revealing the contrasting base metal underneath. The result is a precise, permanent mark — text, numbers, or simple graphics — that is part of the metal itself rather than applied on top. Most commonly used for sequential numbering on limited-edition runs (e.g., “47/200”) and artist signatures on back stamps.
• Best results on flat metal areas only — curved or textured surfaces produce inconsistent depth and legibility
• Minimum text height: 0.8–1mm — smaller text becomes illegible at pin scale
• Cannot engrave on glitter enamel areas or epoxy-coated surfaces — the laser cannot penetrate these materials cleanly
• Dark platings may require filled engraving (engraved text filled with contrasting colour) for good visibility
👉 For the complete guide to using laser engraving for sequential numbering, see our back stamps and sequential numbering guide.
Which Add-Ons Combine Well? The Full Combo Guide
Knowing which add-ons work together — and which actively fight each other — is the difference between a pin that looks considered and one that looks confused. Here are the definitive combination rules:
✅ Great Combinations — Use These
| Add-On Pair | Why It Works | Best For |
|---|---|---|
| Glitter + Hard Enamel | Premium sparkle on a smooth, flat surface — the glitter catches light beautifully without the textural distraction of soft enamel ridges | Fantasy, collectible, premium retail |
| Glow + Soft Enamel | Raised metal walls act as natural containment for the glow pigment, helping it settle evenly and glow brightly in defined zones | Halloween, galaxy, spooky themes |
| Screen Print + Hard Enamel | Hard enamel gives a premium flat surface for printing; screen print adds the fine detail that enamel cannot achieve. Perfect for anime and character pins | Anime, gaming, character designs |
| Epoxy + Screen Print | Epoxy seals and protects the printed surface from scratching — dramatically extends the lifespan of printed enamel in high-wear environments | Any printed soft enamel pin |
| Rhinestones + 3D Sculpted Metal | Both elements have a luxury, jewellery-quality feel. The stones add colour and sparkle to sculptural metal without requiring enamel fill | Fashion, luxury editions, bridal |
| Dangles + Glitter Enamel | A sparkling main pin with a moving secondary charm creates maximum visual interest — strong collector and social media appeal | Character, fashion, fantasy |
🚫 Avoid These Combinations
| Add-On Pair | Why It Fails | What to Do Instead |
|---|---|---|
| Glitter + Tiny Thin Lines | Glitter particles float in the enamel and easily bleed across metal dividing lines below 0.4mm — creates muddy, undefined colour areas | Use glitter in larger fill areas only; keep dividing lines minimum 0.5mm in glitter zones |
| Epoxy + Hard Enamel | Creates uneven raised elevation over the flat hard enamel surface, destroying the premium flush finish that makes hard enamel valuable | Use epoxy with soft enamel only; for hard enamel, use screen print without epoxy topcoat |
| Glow + Micro Fill Areas | Glow pigment in very small areas charges and emits unevenly — the effect appears patchy and weak rather than impressive | Use glow in fill areas of 4mm+ only; combine with a solid-colour base for daytime appearance |
| Rhinestones + Curved Edges | Rhinestones require a completely flat bonding surface — curved pin edges provide insufficient contact area, causing stones to detach | Place rhinestones only in flat enamel areas or on flat metal zones, well away from curved perimeters |
| Sliders + Heavy Glitter | Glitter particles in the enamel on a sliding element significantly increase friction in the slider track, causing the mechanism to jam or move stiffly | Keep slider elements smooth — use solid enamel or screen print on sliding components |
| Laser Engraving + Epoxy or Glitter Surfaces | The laser cannot penetrate epoxy resin or glitter enamel cleanly — results are burnt-looking, inconsistent, and unreadable | Place laser engraving exclusively on flat, smooth plated metal areas (typically the pin back) |
Add-On Popularity Rankings (CreatePins Production Data)
Based on CreatePins internal production data, here’s how add-ons rank by order frequency — giving you a clear picture of what’s trending in 2026:
Designer Decision Tree: Which Add-On Should You Choose?
Answer these six questions to find your best add-on match based on your design goals:
💡 Final Tips from CreatePins Designers
• Send your artwork first. Our team will recommend the best add-ons based on your theme, budget, and target audience — sometimes the best choice is obvious from the design; sometimes it isn’t.
• Consider collector psychology. Add-ons increase the “limited edition” feel and justify higher retail pricing. A well-chosen single add-on signals intentionality; four mixed add-ons can signal desperation.
• One premium add-on beats four mediocre ones. A single perfectly executed rhinestone accent outperforms four clashing special effects every time. Choose with purpose, not accumulation.
• Always get a physical sample for add-ons. Add-ons interact with plating, light, and the physical pin in ways a digital proof can only partially show. Approve a physical sample before committing to a large production run with any add-on.
• Budget for add-ons early. Add-ons are easiest to plan for when factored into your initial budget — last-minute add-on requests after mold creation can trigger additional tooling costs or production delays.
🏆 Final Thoughts: Choose Add-Ons With Intention
The most successful enamel pin designs — the ones that sell out fast, generate social media buzz, and hold secondary market value — almost always have one or two carefully chosen add-ons that feel like a natural extension of the concept, not an afterthought bolted on for novelty.
Glitter on a fantasy pin feels inevitable. Glow-in-the-dark on a Halloween ghost feels perfect. Screen-printed anime eyes on a character pin feel essential. That’s what you’re aiming for: an add-on so well-matched to your concept that it’s hard to imagine the pin without it.
Use this guide to match the right technique to your design, understand the production limits before committing, check your combo against the compatibility table, and always approve a physical sample before bulk production. Done right, add-ons don’t just improve your pins — they transform them. 🧷
The pin market is shifting toward premium featured designs. Add-ons are how you meet that expectation — profitably, beautifully, and with confidence.
Frequently Asked Questions
What are enamel pin add-ons?
What is the most popular enamel pin add-on?
How much do enamel pin add-ons cost?
Can you combine multiple add-ons on one enamel pin?
Does glitter enamel look the same on all metal platings?
Are glow-in-the-dark enamel areas invisible during the day?
Can epoxy dome be added to hard enamel pins?
What is the minimum size for dangles on an enamel pin?
What add-on is best for anime or highly detailed artwork?
How do I choose the right add-on for my design?
Ready to Create Premium Enamel Pins?
Join thousands of designers and brands who trust CreatePins for professional enamel pin manufacturing. Send us your artwork and we’ll recommend the perfect add-ons, provide a free digital proof, and guide you from design to delivery.
Start Your Pin Project Today →Free artwork review • Free digital proof • Expert add-on advice • No obligation