How to Photograph Enamel Pins for Social Media – Complete Beginner to Pro Guide
A complete guide covering how to photograph enamel pins for Instagram, TikTok, and Pinterest. From enamel pin photography lighting and composition to pin product photography gear, editing, and social media pin photos that grab attention. Perfect for enamel pin Instagram feeds and beyond.
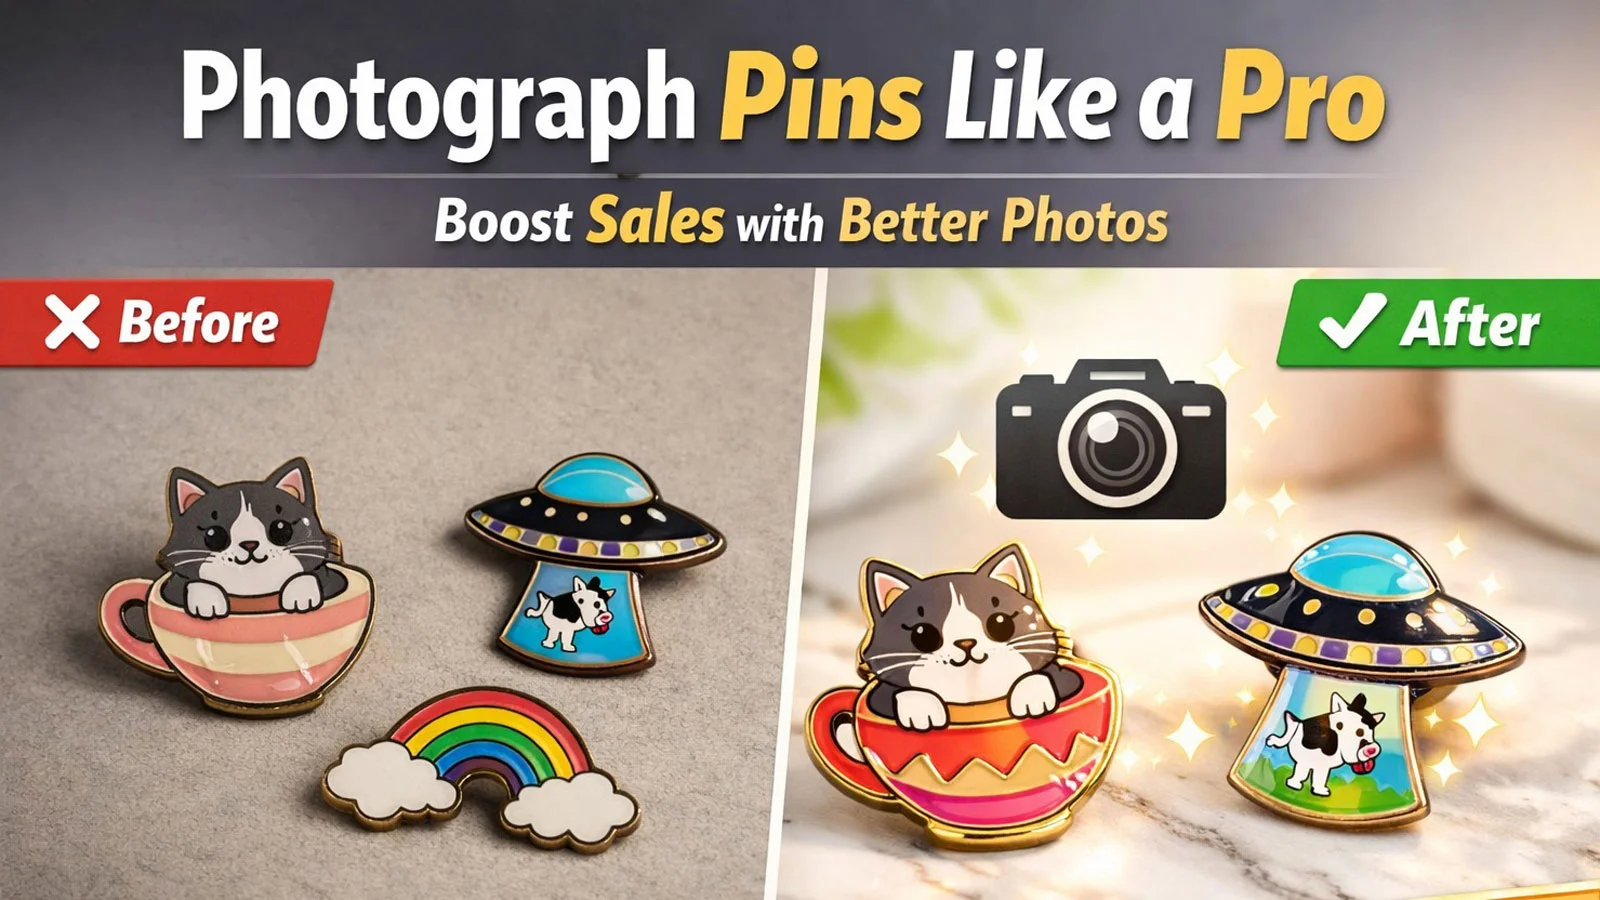
In today’s visual-first world, great enamel pin photography can make or break your sales. Whether you’re building a following on Instagram, driving traffic from Pinterest, or growing a TikTok audience, the quality of your pin product photography directly determines whether potential buyers stop scrolling — or keep going. Your pin might be beautifully designed, but if the social media pin photos don’t do it justice, that craftsmanship stays invisible.
The good news: you don’t need a professional studio or expensive camera equipment to take stunning enamel pin Instagram photos. What you do need is a solid understanding of light, composition, and the specific visual demands of each platform. This how to photograph enamel pins guide walks you through everything — from beginner fundamentals to pro-level techniques — with practical tips you can apply immediately.
Why Good Pin Photography Matters
Enamel pins are small, highly detailed products. The difference between a great photo and a mediocre one isn’t just aesthetic — it directly affects buyer trust, engagement metrics, and conversion rates. Here’s what’s at stake:
- Color accuracy — enamel pin photography must show true Pantone-matched colors; inaccurate colors lead to returns and negative reviews
- Metal finish detail — the gleam of gold plating or the depth of black nickel is a key purchase driver that only good lighting reveals
- Craftsmanship and texture — the difference between soft and hard enamel, the crispness of die lines, and the quality of the finish all communicate value
- Brand trust — professional-looking pin product photography signals that you’re a serious, quality-focused seller
- Platform algorithm performance — higher-quality, more engaging images earn more reach on Instagram, Pinterest, and TikTok
📸 Research by BigCommerce found that 78% of online shoppers want more images from e-commerce listings — and that product image quality is the single most influential factor in purchase decisions for physical goods.
The 10 Essential Techniques
Master Natural Lighting
Lighting is the single most important variable in enamel pin photography — more than your camera, your background, or any editing tool. Get the light right and everything else becomes easier. Get it wrong and no amount of editing will fully fix it.
✅ Use This
- Indirect window light (north-facing preferred)
- Morning or late afternoon “golden hour” light
- Diffused light through a sheer white curtain
- White foam board as a reflector on the shadow side
- Softbox or LED panel with diffuser (artificial)
❌ Avoid This
- Direct midday sunlight — too harsh, creates deep shadows
- Direct camera flash — flattens detail, creates hotspots
- Mixed light sources (warm + cool simultaneously)
- Overhead room lighting — produces unflattering yellow cast
- Shooting in low light and trying to correct in editing
If you’re working with artificial lighting, a two-panel softbox setup (one main light, one fill light at lower intensity) or a ring light positioned at 45 degrees above and to the side of your pin will closely replicate natural window light. For very small pins, a tabletop lightbox provides perfectly diffused, shadow-free illumination that’s ideal for macro product shots.
Choose the Right Background
Your pin should always be the undisputed star of the image. The background’s job is to complement, never compete. The right surface adds context, texture, and mood — while keeping the viewer’s eye fixed on your product.
Best backgrounds for enamel pin photography:
- White or cream paper / card stock — the classic clean product shot; ideal for marketplace listings and bright, minimalist feeds
- Natural linen or canvas fabric — adds organic warmth and texture without distracting the eye; especially good for artisan-style brands
- Wood grain surfaces — light birch for a Scandinavian aesthetic; dark walnut for a moody, premium feel
- White or grey marble — timeless and luxurious; particularly effective for metallic finish pins (gold, rose gold)
- Cork board — contextually perfect for pins; shows how they naturally look displayed
- Dark slate or black velvet — makes gold, silver, and bright enamel colors pop dramatically; ideal for contrast-heavy compositions
For lifestyle shots, place your pin on real-world surfaces: the lapel of a denim jacket, the strap of a canvas tote, a felt hat brim, or pinned to a backpack. This helps potential buyers visualize the product in their own life — one of the strongest purchase triggers available.
Choosing Your Camera or Smartphone
The good news for budget-conscious creators: you don’t need expensive camera equipment to shoot great enamel pin photography. The gap between a high-end smartphone and a professional camera has narrowed dramatically. What matters far more is how you use your gear.
Smartphone
Modern flagships are fully capable of professional-quality product photography for social media when used correctly.
- iPhone 15 Pro — exceptional macro capability and color science
- Samsung Galaxy S24 Ultra — outstanding detail and zoom range
- Google Pixel 9 — best-in-class computational photography
- Use Portrait Mode for background blur on lifestyle shots
- Add a clip-on macro lens (~$15–25) for extreme close-ups
Dedicated Camera
A DSLR or mirrorless camera gives you more manual control, better low-light performance, and superior macro capability.
- Any crop-sensor mirrorless (Sony a6000 series, Fujifilm X-T series)
- A macro lens (50mm–100mm range) is essential for pin detail shots
- Use a tripod for any shot under f/8 to avoid camera shake
- Shoot in RAW format for maximum editing flexibility
- Set aperture to f/8–f/11 for deep, sharp focus across the full pin
Focus on Sharp, Crisp Details
Enamel pins live and die by their fine details — the precise die lines, the crisp color boundaries, the texture of the enamel fill. A blurry or soft-focus photo doesn’t just look amateur; it actively conceals the quality and craftsmanship that justifies the purchase. Sharpness is non-negotiable.
- Tap to focus on your phone — always tap directly on the pin face to ensure the camera locks focus on the product, not the background
- Use macro mode when available — most modern smartphones have a dedicated macro mode for extreme close-up shots; use it for detail captures
- Lock focus and exposure together — on iPhone, press and hold to lock AE/AF so focus doesn’t shift between shots
- Use a tripod or rest your phone on a stable surface — any movement during the shot, especially in macro mode, will produce blur
- Use the camera timer — even pressing the shutter button can cause micro-shake; set a 2-second timer or use a Bluetooth shutter remote
- Shoot in burst mode and select the sharpest frame — for handheld shots, capture 5–10 frames and choose the cleanest one
Shoot from Multiple Angles
No single photo tells the complete story of an enamel pin. Different angles reveal different qualities — and for marketplace listings, social media carousels, and buyer confidence, you want a comprehensive set of shots that covers every important visual dimension.
Flat Lay
Clean overhead shot. Best for listings and minimalist feed aesthetics.
Angled Shot
30–45° angle shows metal shine and dimensional quality of enamel fill.
Macro Detail
Extreme close-up of die lines, enamel texture, and finish quality.
Back View
Shows clutch type, engraving, numbering. Builds buyer confidence.
For social media carousels and product listings, a complete set of 5–8 images covering all these angles tells a convincing, comprehensive story. Buyers who see more images convert at significantly higher rates than those shown a single product shot — particularly for small, detail-driven products like enamel pins.
📦 Want pins that look stunning from every angle? Our precision manufacturing ensures your design looks exactly as intended — in photos and in person.
Get a Free Custom QuoteControl Reflections and Glare
Metal pins are highly reflective — it’s part of what makes them beautiful in person, but it can create problematic hotspots and glare in enamel pin photography. Managing reflections is a specific skill that separates good pin photos from great ones.
- Adjust your shooting angle — move the camera or the pin slightly until the glare spot moves out of frame; even a 5° shift can make a significant difference
- Use fully diffused light — a lightbox, a large softbox, or a window with a sheer curtain eliminates the point-source reflections that cause hotspots
- Avoid direct flash entirely — on-camera flash creates a harsh, unflattering reflection directly in the center of the pin face; disable it completely
- Use a polarizing filter — this is the most effective tool for eliminating metal reflections without affecting color; available as clip-on attachments for phones or as screw-on lens filters for cameras
- Position your light source at 45 degrees rather than directly overhead or directly in front of the pin to minimize mirror-like reflections
Create Lifestyle and Story Shots
Social media is fundamentally about storytelling, and the most engaging social media pin photos don’t just show a product — they show a world. Lifestyle pin product photography places your pin in a context that helps potential buyers emotionally connect with the product and see themselves using it.
Lifestyle Shot Ideas by Platform
- On clothing — pinned to a denim jacket lapel, attached to a linen shirt collar, or displayed on a vintage blazer; show different fabric colors to illustrate versatility
- On accessories — a canvas tote bag, a leather backpack, a felt beret, a lanyard at a convention; show how pins integrate into everyday life
- In collections — displayed on a large cork board or pin display board alongside other pins; appeals to collectors and shows scale within a community
- At events or conventions — action shots of pins being worn or traded at relevant events; gives social proof and community context
- Flat lay styled scenes — the pin surrounded by complementary objects (art supplies, books, plants, coffee) that tell a story about the intended lifestyle audience
Edit Your Photos the Right Way
Editing enhances what’s already there — it can’t rescue a poorly lit or out-of-focus image, but it can elevate a good photo into a great one. The key principle: keep all edits in service of accuracy and clarity, not stylistic transformation.
Essential Adjustments (in priority order)
- White balance — correct first; ensure whites are neutral (not yellow or blue) so enamel colors read accurately
- Exposure / brightness — bring the overall brightness to a level that matches how the pin looks in person
- Contrast — increase slightly to make metal lines crisp and enamel colors vivid; avoid over-contrasting which creates blown-out highlights
- Clarity and sharpness — increase clarity to reveal texture; add output sharpening at 25–40% for web use
- Color saturation — nudge saturation only if colors read as dull; avoid heavy saturation boosts which make enamel colors inaccurate
- Crop and straighten — straighten horizons and crop for platform-specific aspect ratios
Recommended Editing Apps
Snapseed
Best all-around free mobile editor. Excellent Selective tool for targeted adjustments on specific parts of the pin.
Lightroom Mobile
Professional-grade controls with preset saving — the most powerful free option for consistent brand editing.
VSCO
Beautiful film-inspired presets for aesthetic consistency. Best for lifestyle shots rather than pure product images.
Adobe Photoshop
Full desktop power for complex edits, background removal, compositing, and precise color work.
Build a Consistent Visual Identity
Consistency is the compound interest of content creation. A single great photo builds a moment; a consistent visual style across dozens of photos builds a recognizable brand. When someone scrolls past one of your posts, they should recognize your aesthetic before they read your name.
The four decisions that define your enamel pin photography style:
- Background palette — choose 2–3 surfaces you return to consistently; this creates visual cohesion across your feed even as pin designs vary
- Lighting signature — always shooting from the same direction (e.g., window light from the left) creates a consistent shadow pattern that becomes part of your aesthetic
- Editing preset — save your preferred Lightroom or Snapseed settings as a named preset; apply it to every image for immediate consistency
- Composition rules — decide whether you shoot centered or rule-of-thirds; portrait or square orientation; minimal or styled; and stick with it
Create a simple one-page document listing your chosen background colors, your editing preset name, your typical lighting setup, and 3–5 reference images that represent your ideal aesthetic. Share it with collaborators and revisit it when your feed starts to feel inconsistent.
Optimize for Each Platform
Every social platform has a different visual culture, algorithm behavior, and ideal image specification. Shooting the same image and posting it identically across all platforms leaves significant reach and engagement on the table.
1080×1350 (4:5)
Feed posts: clean, aesthetic, cohesive. Reels: 9:16 vertical video. Stories: 9:16 with text overlay. Carousel posts drive the highest saves and reach for product reveals.
TikTok
1080×1920 (9:16)Vertical video only. Unboxing, pinning process, and collection showcase videos perform best. Add captions — over 80% of TikTok is watched with sound off.
Tall vertical images dominate. Styled flat lays and lifestyle shots with text overlay perform best. Pinterest has the longest content lifespan of any platform — a great pin image can drive traffic for years.
Etsy / Shopify
Min 2000px long sideMultiple images per listing are essential. Lead with a clean white background product shot, followed by lifestyle, detail, and scale reference images. Enable zoom.
Landscape format favored for link shares and ads. Clean product shots with minimal text in the image perform best for boosted posts and marketplace listings.
Best for B2B pin campaigns (corporate branded pins, event pins). Professional context shots (conference lanyards, branded merchandise) resonate with this audience.
Bonus: Build a Simple DIY Home Studio
You don’t need a professional photography studio to take great enamel pin photography. This minimal home setup costs under $50 and can produce results that are virtually indistinguishable from professional pin product photography for social media use.
🏠 The $50 DIY Pin Photography Studio
Everything you need, nothing you don’t. Set up near a window with good indirect light and you’re ready to shoot.
🛒 What You Need
- A table positioned near a large window
- White foam board or poster board (reflector + background) — ~$3
- Assorted background surfaces: white paper, linen fabric, wood offcut — ~$10–15
- Small desktop tripod or phone stand — ~$15–20
- Bluetooth shutter remote (optional) — ~$8
- Clip-on macro lens for phone (optional) — ~$15–20
- Sheer white curtain or tracing paper (window diffuser) — ~$5
📐 Setup Instructions
- Position your table perpendicular to the window (light hits from the side, not directly overhead)
- Place your chosen background surface on the table
- Set your pin on the background and position your phone/camera on the tripod
- Place a white foam board on the opposite side of the pin from the window to bounce fill light
- Diffuse the window light with a sheer curtain if the sun is too bright or harsh
- Use the camera timer or Bluetooth remote to eliminate shutter shake
- Shoot 20–30 frames per setup and select the best in editing
Common Mistakes to Avoid
✅ Do This
- Shoot in natural, indirect window light
- Use a tripod or stable surface for every shot
- Tap to manually focus on the pin face
- Shoot multiple angles including back view and macro detail
- Keep color edits subtle and accurate
- Maintain a consistent background palette and editing style
- Optimize image dimensions for each specific platform
- Use lifestyle shots to show the pin in context
❌ Avoid This
- Using direct camera flash — flattens and creates hotspots
- Shooting in harsh midday direct sunlight
- Ignoring glare and reflections on metal surfaces
- Over-editing colors until they no longer match the real pin
- Posting the same square image across all platforms
- Relying on a single product shot with no lifestyle or detail images
- Shooting handheld in macro mode (always use a tripod)
- Inconsistent editing from post to post — it breaks feed cohesion
Need High-Quality Pins Worth Photographing?
At CreatePins, we help artists and brands produce enamel pins that look just as good in photos as they do in real life. From precise Pantone color matching to clean metal finishes and sharp die lines — we make sure your pins are photo-ready from day one.
Get Your Free Custom Quote →Precise color matching · Clean metal finishes · Photo-ready from production
Frequently Asked Questions
Common questions from pin creators and sellers about how to photograph enamel pins for social media.
Natural indirect light from a window is the gold standard for enamel pin photography. It reveals true colors, brings out metallic sheen, and avoids harsh shadows from direct flash. Shoot during morning or late afternoon for the softest results. If using artificial lighting, a two-panel softbox or ring light with diffuser at 45 degrees above the pin closely replicates natural window light.
Absolutely. Modern smartphones — including the iPhone 15 Pro and Samsung Galaxy S24 Ultra — are fully capable of producing high-quality enamel pin photography for social media. The key factors are good lighting, a stable tripod surface, and tapping the screen to manually focus on your pin. For very close macro shots, a clip-on macro lens attachment (under $20) significantly improves detail capture.
Use diffused rather than direct light (a white curtain, foam board, or lightbox works well), shoot at a slight angle rather than directly overhead, and avoid direct flash entirely. For polished hard enamel pins, a polarizing filter — available for phone lenses and DSLR lenses — can dramatically reduce reflections without affecting color accuracy.
Clean, textured neutrals work consistently well — white or cream paper, linen fabric, natural wood, cork board, and white marble. For lifestyle shots, dark backgrounds like slate or black velvet make metallic finishes pop dramatically. Avoid backgrounds that compete with the pin’s colors or have patterns that are too busy.
Snapseed (free) is the most beginner-friendly editor with powerful tools for sharpness, brightness, and color correction. Lightroom Mobile (free version) offers professional-grade controls and allows you to save editing presets for a consistent style. VSCO is excellent for applying consistent aesthetic filters. For advanced editing, Adobe Photoshop Express and Darkroom (iOS) offer layer-based mobile editing.
Instagram feed: 1080×1080px (1:1) or 1080×1350px (4:5). Instagram Stories and Reels: 1080×1920px (9:16). TikTok: 1080×1920px (9:16 vertical). Pinterest: 1000×1500px (2:3) or taller. Product listings on Etsy or Shopify: at least 2000px on the longest side to enable zoom functionality.
Consistency comes from locking in three core decisions: your background palette (2–3 surfaces you always return to), your editing preset (save a Lightroom preset you apply to every image), and your lighting setup (so every shot has the same quality and direction of light). Create a simple brand style guide document noting these choices, and shoot multiple products in one session to maintain consistency.
References & Further Reading
- Complete Enamel Pin Design Guide (2026)
- How to Order Enamel Pins (Step-by-Step Guide)
- Hard Enamel vs Soft Enamel Pins: The Ultimate Guide
- Epoxy Dome Pins – Complete Guide to Finishing, Design & When to Use It
- The Beginner’s Guide to Enamel Pin Plating Colors
- How to Choose the Right Enamel Pin Backings – Complete Guide
- Complete Enamel Pin Packaging Guide: Types, Costs & Best Practices
- Best File Formats for Custom Enamel Pins (AI vs PSD vs PNG)
- Enamel Pin Production Specifications (Beginner Guide)
- How to Choose Enamel Pin Colors: A Complete Color Palette Guide
- Essential Criteria for Grading Enamel Pins
- Common Enamel Pin Defects & How CreatePins Prevent Them
- The Biggest Enamel Pin Design Mistakes That Ruin Everything