How to Launch a Successful Enamel Pin Kickstarter: The Complete Guide
Crowdfunding has become one of the most powerful ways to launch a new enamel pin design. Platforms like Kickstarter allow artists, brands, and creators to validate ideas, fund production, and build an engaged community—before a single pin is manufactured. This Kickstarter guide walks you through every step of a successful enamel pin campaign, from design to delivery.
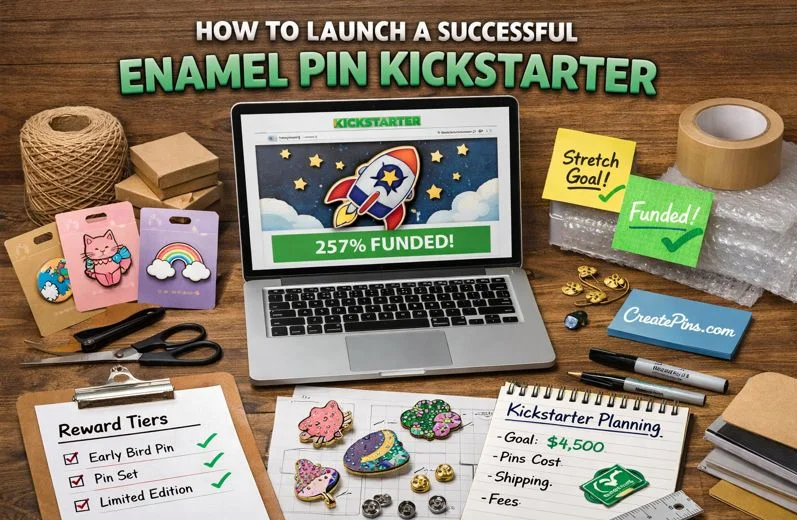
Table of Contents
- Why Pins Are Perfect for Kickstarter
- Step 1: Validate Your Idea
- Step 2: Finalize Design
- Kickstarter Calculator
- Step 3: Calculate Funding Goal
- Step 4: Create Reward Tiers
- Step 5: Plan Stretch Goals
- Step 6: Build Converting Page
- Step 7: Promotion Strategy
- Step 8: Choose Manufacturer
- Step 9: Fulfillment & Shipping
- Step 10: Long-Term Brand Building
- Frequently Asked Questions
Important: While enamel pin Kickstarter campaigns can be incredibly successful, they can also fail if rushed or poorly planned. In this comprehensive guide, we’ll walk you step by step through how to launch a successful enamel pin campaign, from idea validation and pricing to production, fulfillment, and post-campaign growth—plus insider tips from working with experienced enamel pin manufacturing partners like CreatePins.com.
Why Enamel Pins Are Perfect for Kickstarter
Enamel pins are one of the most Kickstarter-friendly products because they are:
- Visually appealing and easy to showcase in campaign images
- Affordable to produce in bulk, with economies of scale
- Lightweight and inexpensive to ship globally
- Highly collectible (perfect for stretch goals and series)
Many top pin creators use Kickstarter not just for funding, but to build long-term brands and communities. The platform’s all-or-nothing funding model reduces risk while the built-in social features help amplify your reach. A well-executed enamel pin crowdfunding campaign can launch your brand with momentum that’s hard to replicate through traditional retail.
Step 1: Validate Your Pin Idea Before You Launch
Before you touch Kickstarter, you should already know people want your pin. Validation is the most critical step that most beginners skip.
How to Validate Your Design Effectively
- Share sketches or mockups on Instagram, TikTok, or Twitter/X with clear calls to action
- Run polls or “which colorway?” stories to gauge interest in variations
- Offer email sign-ups for early access to build a pre-launch list
- Post in niche communities (fandoms, art groups, pin collectors) relevant to your design
Pro Tip
Successful enamel pin campaigns often launch with 30–50% of their goal pledged on Day 1—usually from a pre-built audience. Start building that audience at least 4-6 weeks before your enamel pin Kickstarter launch date.
Step 2: Finalize Your Enamel Pin Design (Production-Ready)
Kickstarter backers expect professional results. That means your design must be manufacturer-ready before you start filming your campaign video.
Design Considerations for Manufacturing
- Choose hard enamel vs soft enamel: Hard enamel has a smooth surface, while soft enamel has textured grooves. Hard enamel is more premium but slightly more expensive.
- Limit ultra-thin lines: Typically lines thinner than 0.3mm can be risky and may not fill properly during production.
- Use Pantone colors for accuracy: This ensures color consistency between your mockups and final product. See our enamel pin color guide.
- Decide on size: 1″–1.75″ performs best on Kickstarter. Smaller pins get lost in photos, larger pins become costly to produce and ship. Learn more about size & thickness best practices.
Explore specialized finishes: plating colors, glitter enamel pins, and glow-in-the-dark options.
At CreatePins.com, our team reviews Kickstarter designs before production to help creators avoid costly mistakes and delays. We provide free design consultations to ensure your pins are production-ready for your enamel pin campaign.
Enamel Pin Kickstarter Calculator
Use this calculator to estimate your funding goal based on production costs, fees, and quantities for your enamel pin crowdfunding campaign.
Step 3: Calculate Your Kickstarter Funding Goal (Correctly)
One of the biggest Kickstarter mistakes is underpricing. Your goal must cover ALL expenses, not just pin production.
Your Goal Should Cover:
- Pin production (including a 5-10% defects buffer)
- Mold/setup fees (one-time cost per design)
- Packaging (backing cards, bags, boxes) – backing card guide
- Kickstarter + payment processing fees (~8–10% of total raised)
- Shipping materials and postage (don’t forget international!) – customs clearance guide
- Taxes/VAT (depending on your location)
- Emergency buffer (10–15% for unexpected costs)
For deeper cost breakdowns, read what affects the cost of custom enamel pins and pricing for profit.
Rule of Thumb
If your total cost is $3,500 → set your goal closer to $4,200–$4,500, not the bare minimum. This buffer protects you from unexpected expenses and shipping cost increases.
Ready to Launch Your Pin Kickstarter?
Get expert guidance and a free quote from CreatePins.com, the enamel pin manufacturing partner trusted by hundreds of successful Kickstarter creators. We’ll help you optimize your design for production, plan realistic stretch goals, and ensure your pins arrive on time and with perfect quality.
Get Your Free Pin Quote & Kickstarter PlanIncludes: Design review, production timeline, and detailed cost breakdown
Step 4: Create Irresistible Reward Tiers
Reward tiers are where enamel pin Kickstarter campaigns really shine. Well-designed tiers can increase your average pledge amount significantly.
Popular Reward Ideas That Convert
- Single pin (early bird): Limited quantity at a discount to drive early momentum
- Full pin set or color variants: Perfect for collectors who want everything
- Limited edition finishes: Glitter, glow-in-the-dark, or rainbow plating exclusives
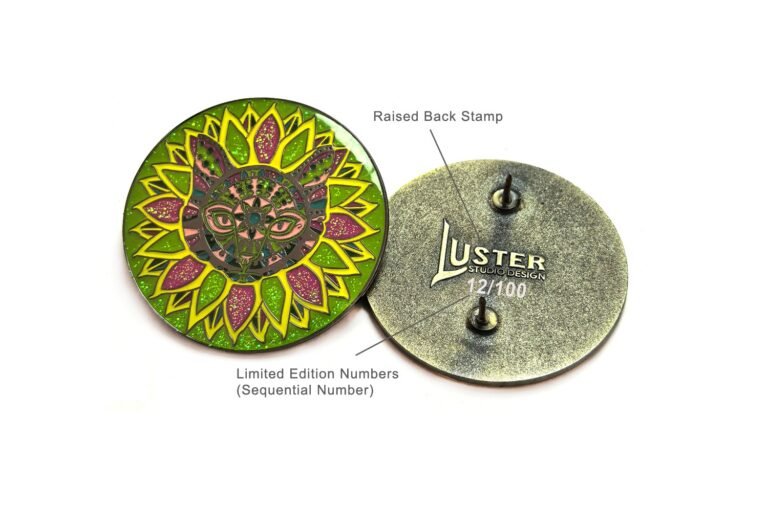
- Numbered pins or Kickstarter-exclusive backstamps: Creates urgency and exclusivity – back stamp guide
- Collector bundles: Combine pins with stickers, prints, or other merch
Best Practice
Keep tiers simple—too many options cause decision paralysis. 3-5 well-defined tiers perform better than 10+ confusing options.
Step 5: Plan Stretch Goals That Scale Smoothly
Stretch goals increase pledge size without increasing risk—if planned correctly. Announce stretch goals after you hit 100% funding to maintain momentum. See our guide to pin quantities for crowdfunding.
Great Stretch Goal Examples
- New pin designs (pre-designed and costed in advance)
- Additional colorways for existing designs
- Upgraded metal plating (gold instead of silver)
- Free extras unlocked for all backers (stickers, thank-you cards)
At CreatePins, we help Kickstarter creators pre-quote stretch goals, so you’re never guessing costs mid-campaign. This prevents the common mistake of promising rewards that eat all your profits.
Step 6: Build a Kickstarter Page That Converts
Your campaign page should answer every backer question before they ask it. Assume they know nothing about enamel pins or manufacturing.
Must-Have Sections for High Conversion
- Clear hero image/video: Your best pin mockup in action
- Short, compelling story: Why this pin exists and why you’re the right creator
- High-quality mockups or prototypes: Show every angle and variation – mockup tutorial
- Reward breakdown visuals: Clear graphics showing what each tier includes
- Production timeline: Transparent schedule from funding to delivery – production timeline explained
- Shipping estimates: Clear costs by country/region
- FAQ section: Address common concerns about quality, shipping, and timelines
Image Tip
Use clean, bright mockups with minimal text—Kickstarter is very visual. Lifestyle shots (pins on jackets, bags, or displayed on boards) outperform plain product shots.
Step 7: Promote Before and During the Campaign
Kickstarter doesn’t “find” backers for you—you bring them. Promotion is a continuous effort from pre-launch through fulfillment. Stay updated on 2026 pin collecting trends to tailor your messaging.
Pre-Launch Promotion (4-6 Weeks Before)
- Set up a Kickstarter pre-launch page and share the link everywhere
- Email list warm-up with teasers and behind-the-scenes content
- Countdown posts on social media with consistent branding
- Teasers of stretch goals to build anticipation
During the Campaign (Daily Engagement)
- Daily or every-other-day updates to maintain momentum
- Mid-campaign boosts (new rewards or stretch goal reveals)
- Behind-the-scenes production content (factory photos, design iterations)
- Cross-promotion with similar creators (not direct competitors)
Remember: Consistency beats virality. Regular engagement with your existing audience is more reliable than hoping for one viral post.
Step 8: Choose a Reliable Enamel Pin Manufacturer
Your manufacturer can make—or break—your Kickstarter reputation. Research thoroughly before committing.
What to Look For in a Manufacturer
- Kickstarter experience (ask for case studies or references)
- Clear communication and responsive customer service – avoid communication pitfalls
- Transparent pricing with no hidden fees
- Quality control process (how they handle defects) – quality handling guide
- Packaging & fulfillment support (can they ship directly to backers?)
Learn from common mistakes: top 10 enamel pin mistakes and design mistakes to avoid.
CreatePins.com specializes in working with Kickstarter creators, offering:
- Free design checks and optimization
- Clear production timelines with regular updates
- Stretch-goal planning and pre-quoting
- Quality-controlled production with samples before full run
- Global shipping support and customs documentation
Step 9: Fulfillment, Shipping & Backer Communication
After funding, your job isn’t done. Fulfillment is where many creators stumble, damaging their reputation for future projects.
Fulfillment Best Practices
- Update backers regularly: Even if there are delays, communicate transparently
- Lock surveys early: Collect shipping addresses as soon as possible
- Order extra units: 5-10% extra for replacements and defects
- Pack pins securely: Use backing cards, bubble wrap, and sturdy envelopes – packaging guide
- Track everything: Use shipping with tracking whenever possible
For international logistics, read our complete customs clearance guide.
Critical Insight: Backers are far more forgiving of delays than silence. If production takes longer than expected, send weekly updates explaining why and showing progress. Transparency builds trust for your next enamel pin campaign.
Step 10: Turn Your Kickstarter Into a Long-Term Brand
Your campaign is just the beginning. The most successful creators use Kickstarter as a launchpad for sustainable businesses.
After the Campaign: What’s Next?
- Open an online store: Use Shopify, Etsy, or your own website to sell remaining stock – Etsy selling tips
- Collect emails for future drops: Your backers are your best customers
- Launch Series 2 or seasonal designs: Build on your existing audience
- Offer retail or wholesale versions: Reach customers who missed the Kickstarter
- Leverage your success: Use your campaign stats to attract press and collaborations – see how brands turn pins into $10K drops
Many of today’s top pin brands started with one well-executed enamel pin Kickstarter. The community you build during your campaign can become the foundation for years of creative business growth.
How CreatePins Helps Kickstarter Creators Succeed
At CreatePins.com, we’ve helped hundreds of artists and brands bring enamel pin campaigns to life. We understand the unique challenges of crowdfunding and provide end-to-end support.
We support you with:
- 🎨 Design optimization for manufacturing: We review your files for potential issues before production
- 📊 Accurate pricing & stretch goal planning: No surprises, just clear numbers for your campaign
- 🏭 Reliable, quality-controlled production: Samples before full production to ensure perfection
- 📦 Custom packaging & global shipping: We can ship directly to your backers worldwide
Frequently Asked Questions (FAQ)
Is Kickstarter good for first-time enamel pin creators?
Yes. Kickstarter is ideal for beginners because it reduces financial risk and validates demand before production. You only produce if you hit your funding goal, eliminating the risk of sitting on unsold inventory. This Kickstarter guide is designed specifically for first-timers.
How long should an enamel pin Kickstarter run?
Most successful enamel pin campaigns run 20–30 days. Longer campaigns rarely perform better and can lose momentum. The urgency of a shorter campaign encourages immediate backing.
How many pins should I order for my first enamel pin campaign?
Base production is often 100–300 units per design, but this depends on your audience size and pricing. With stretch goals, you might produce 500-1000+ pins across multiple designs. Start modestly—you can always do a reprint.
Can manufacturers really help with Kickstarter planning?
Absolutely. Experienced enamel pin manufacturing partners like CreatePins can help with pricing, timelines, and stretch goals. We’ve seen what works (and what doesn’t) across hundreds of campaigns and can provide invaluable guidance to first-time creators.
References & Further Reading
- Get a Free Custom Pin Quote – CreatePins
- How Much Do Enamel Pins Cost to Make in 2026?
- Pricing Custom Enamel Pins for Profit (Cost Breakdown & Calculator)
- Custom Enamel Pin Hidden Costs You Should Know
- No Minimum Order Custom Pins: What You Need to Know
- Hard Enamel vs Soft Enamel Pins: The Ultimate Guide
- The Beginner’s Guide to Enamel Pin Plating Colors
- Custom Enamel Pin Production Timeline Explained
- Custom Enamel Pin Order Process Explained
- How to Order Enamel Pins (Step-by-Step Guide)
- Custom Enamel Pin Sample Approval Process Explained
- How to Scale Custom Enamel Pin Production from 100 to 10,000 Pins
- How to Plan a Successful Enamel Pin Crowdfunding Campaign
- Why Custom Pin Prices Vary by Manufacturer?
- Want More Than Just Custom Pins?