Enamel Pin Design Guide: How to Create Manufacturable & High-Quality Pins (2026)
Everything you need to know — from what enamel pins are and how they’re made, to exact specifications, cost breakdowns, design risk assessment, and a copy-ready production checklist
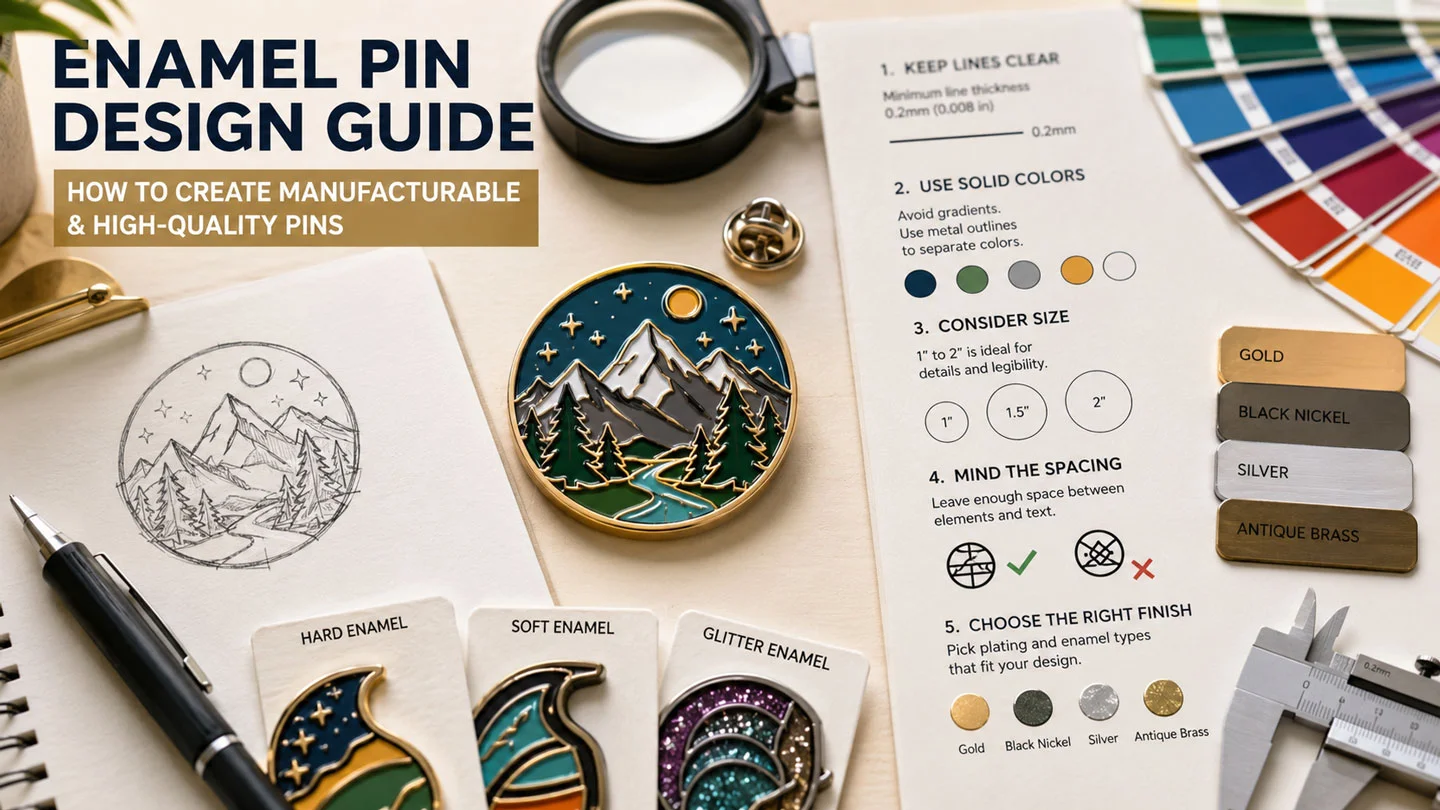
Designing a great enamel pin isn’t just about making something that looks good on screen — it’s about creating artwork that survives the manufacturing process and arrives as a beautiful, durable physical object. The gap between a good design and a manufacturable one is technical knowledge: understanding what factories can and can’t produce, what specifications ensure clean results, and how design decisions affect both quality and cost.
This guide covers everything — from the basics of what enamel pins are and how they’re made, to exact production specs, cost data, design risk assessment, and a checklist you can paste directly into your order form.
What Is an Enamel Pin?
An enamel pin is a custom metal badge made through a multi-step manufacturing process: metal is stamped with a mold to create a raised design, the recessed areas are filled with colored enamel, and the finished piece is plated and polished. The result is a colorful, detailed, durable accessory that can be worn on clothing, bags, and hats — or displayed as a collectible.
Metal stamping → Plating → Enamel filling → Baking → Finishing (polishing, epoxy, clutch attachment). Each step has design implications — understanding the process helps you design smarter from the start.
Common Uses of Enamel Pins
- Brand merchandise — custom logo pins for employees, events, and customers; wearable brand ambassadors
- Event giveaways — memorable souvenirs for conferences, festivals, weddings, and fundraisers
- Artist collections — monetize illustration work through limited-edition pin series sold at conventions or online
- Retail accessories — fashion statements for jackets, hats, bags, and backpacks
- Community building — pins for fan communities, online groups, sports teams, and social causes
- Recognition & achievement — milestone pins, employee recognition, and award-style pieces
Soft Enamel vs Hard Enamel — Full Comparison
Choosing between soft and hard enamel is the first critical design decision you’ll make. Each produces a fundamentally different visual and tactile result — and carries different cost implications.
Soft Enamel
Recessed enamel areas sit below raised metal lines, creating a dimensional, tactile surface you can feel when touching the pin. The texture adds character and makes colors appear particularly vivid.
✅ Advantages
- Brighter, more vibrant colors due to recessed depth
- Better detail retention for intricate designs
- 15–25% lower cost than hard enamel
- Faster production — typically 1–2 weeks quicker
- Tactile, dimensional texture adds collector appeal
⚠ Considerations
- Textured surface — not smooth to the touch
- Slightly less scratch-resistant over many years
- Recessed areas can accumulate dust over time
Hard Enamel
Polished flat after enamel filling — the enamel is level with the metal lines, creating a smooth, glassy, jewelry-like surface. Feels premium and significant in the hand.
✅ Advantages
- Premium, jewelry-like look and feel
- Higher durability and scratch resistance
- Smooth, polished surface — easy to clean
- Professional appearance ideal for corporate use
- Colors protected under polished glassy surface
⚠ Considerations
- Higher cost — 15–25% more than soft enamel
- Slight color darkening can occur during polishing
- Slightly reduced capability for very fine detail
- Longer production time (+5–7 business days)
If this is your first pin project, start with soft enamel. It’s more forgiving design-wise, costs less, and lets you understand the manufacturing process before investing in the higher cost of hard enamel. Once you’ve validated your design concept, consider upgrading to hard enamel for a premium edition.
Manufacturing Process — Step by Step
Understanding how enamel pins are made helps you anticipate how your design choices will translate to the finished object. Each manufacturing step has design implications that affect what’s possible and what isn’t.
Artwork to Metal Mold (Die) Creation
Your vector artwork is converted into a steel mold (die) that physically stamps the design into metal. This mold is custom-cut for your specific design and can be reused for future reorders at no additional die cost.
This is why bold, clean design is essential — the mold can only reproduce details above a certain size threshold. Features under 0.3 mm may not stamp cleanly or may disappear entirely.
Metal Stamping, Cutting & Plating
The metal blank (iron, brass, or copper) is stamped with your mold, cut to shape, and electroplated with your chosen finish.
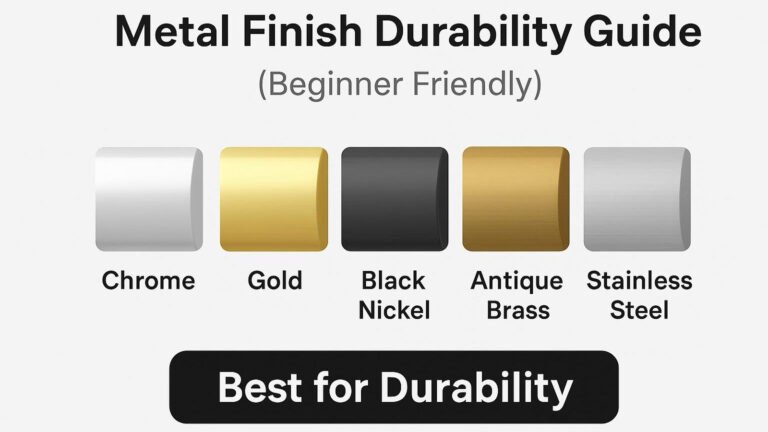
| Plating | Appearance | Best For |
|---|---|---|
| Gold | Classic, warm, luxurious | Premium pins, vintage designs |
| Silver / Nickel | Bright, modern, clean | Modern designs, tech brands |
| Black Nickel | Dark, sophisticated, high-contrast | Bold designs, artistic pins |
| Antique Finishes | Weathered, vintage, dimensional | Vintage themes, historical designs |
| Dyed Black | Flat matte black | Cartoon and line art styles |
Enamel Filling & Color Matching
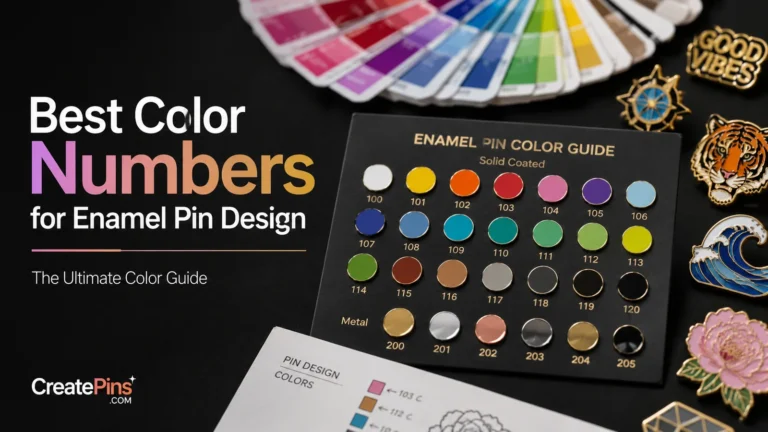
Enamel is hand-filled into each recessed color area by skilled artisans. Each color is mixed to match your specified Pantone shade. This is why only Pantone Solid Coated (PMS) colors can be used — RGB and HEX values have no reliable physical equivalent.
Expect a natural ±5–10% variation between batches due to the handmade nature of enamel mixing and firing.
Baking, Polishing & Final Finishing
Pins are baked at high temperatures to harden the enamel. Hard enamel pins then go through an intensive polishing stage to achieve the flat, glassy surface. Optional finishes are then applied:
- Epoxy (resin) dome — adds a glossy, protective coating over the surface
- Glitter or glow-in-the-dark enamel — special enamel mixes with visual effects
- Screen or UV printing — for details too fine for standard enamel (down to 0.1 mm)
- Clutch attachment — butterfly, rubber, locking, or magnetic backing
🎨 Have a design ready? Submit it for a free artwork review — our team checks line thickness, color separation, and manufacturability before your order starts.
Get a Free Quote & Artwork ReviewEnamel Pin Design Guide Specifications & Minimum Requirements
These are the absolute minimum requirements for successful manufacturing. Designing above these limits — ideally to the recommended “safe zone” values — ensures your design translates cleanly from screen to physical pin without costly corrections or production compromises.
| Design Element | Minimum | Recommended | What Happens Below Minimum |
|---|---|---|---|
| Pin size range | 0.75″ – 2.0″ | 1.0″ – 1.5″ | Too small: details lost. Too large: mold cost increases significantly |
| Raised metal line thickness | ≥ 0.3 mm | ≥ 0.4 mm | Lines may break during stamping or wear away during polishing |
| Recessed enamel area width | ≥ 0.3 mm | ≥ 0.5 mm | Enamel may overflow into adjacent areas or fail to fill properly |
| Spacing between color areas | ≥ 0.3 mm | ≥ 0.5 mm | Colors may bleed together during the enamel filling stage |
| Text size (simple sans-serif) | ≥ 5 pt | ≥ 8 pt | Text becomes unreadable or fills in when stamped at pin scale |
| Metal stroke for text characters | ≥ 0.2 mm | ≥ 0.3 mm | Letter details fill in with enamel; text becomes illegible blocks |
| Fragile neck / protrusion width | ≥ 1.5 mm | ≥ 2.0 mm | Thin connections risk bending or snapping during stamping or wear |
Below these minimum values, production risks increase significantly and may result in additional correction costs, production delays, or compromised quality. Always design with the recommended “safe zone” values rather than pushing the absolute minimums. The minimum exists for theoretical reference — the recommended values are what experienced designers actually use.
Cost Breakdown & Pricing Tables
Understanding the factors that drive pin cost lets you make strategic design decisions — choosing where to invest and where to simplify for budget efficiency.
Base Cost Factors
| Cost Element | Impact on Price | Cost-Saving Tip |
|---|---|---|
| Pin size | Larger = higher mold cost and per-unit cost | 1.0″–1.5″ offers the best value for most designs |
| Enamel type | Hard enamel adds ~15–25% to per-unit cost | Start with soft enamel for first projects |
| Color count | Each additional enamel color adds cost | Limit to 4–6 colors for your first design |
| Plating type | Antique and special finishes cost more | Gold, silver, or black nickel are most cost-effective |
| Special effects | Glitter, glow, epoxy dome add per-unit cost | Reserve effects for hero designs with proven demand |
| Order quantity | Higher quantity dramatically lowers per-unit cost | 200+ units show significant per-piece savings |
Indicative Cost Table — 1.25″ Soft Enamel Pin
| Quantity | Approx. Unit Cost | Approx. Total | Best For |
|---|---|---|---|
| 100 pcs | $1.60 – $2.20 | $160 – $220 | Testing a new design concept |
| 200 pcs | $1.10 – $1.60 | $220 – $320 | First-time creators validating a design |
| 500 pcs | $0.75 – $1.10 | $375 – $550 | Established artists and small brands |
| 1,000 pcs | $0.55 – $0.85 | $550 – $850 | Growing brands and retail businesses |
📌 Pricing varies by design complexity, color count, and add-ons. Hard enamel adds approximately 15–25% to the per-unit cost above. Custom plating, special effects, and custom backing cards are priced as additional line items.
Soft vs Hard Enamel Cost Comparison
| Feature | Soft Enamel | Hard Enamel |
|---|---|---|
| Mold / die cost | Same for both types | Same for both types |
| Enamel process cost | Lower | Higher (+15–25%) |
| Polishing | Minimal | Intensive — adds time and cost |
| Production time | Shorter | Longer (+5–7 business days) |
| Best for first project? | ✅ Yes | Consider for second project |
Design Risk Assessment
Use this risk guide to identify potential issues in your design before submitting for manufacturing. Addressing high-risk elements before ordering saves correction costs and production delays.
High-Risk Elements — Avoid These
Lines thinner than 0.3 mm · Open color areas without metal borders · Text under 5 pt · Gradients without specifying screen printing · RGB or HEX color references instead of Pantone · Extremely fine isolated details · Photos or photographic imagery · Designs submitted at the wrong scale
Medium-Risk Elements — Proceed with Caution
Very large flat enamel areas (prone to slight color variation) · High color counts (8+) · Dark enamel colors next to dark plating · Decorative or script fonts at small sizes · Very intricate linework near the 0.3 mm threshold · Multiple tiny isolated enamel islands · Complex die-cut shapes with thin protrusions
Low-Risk Elements — These Work Reliably
Bold outlines of 0.5 mm or thicker · High-contrast color combinations · 5–7 total Pantone colors · Simple, clean sans-serif fonts at 8 pt or above · Clear metal separation between all color zones · Balanced compositions with adequate breathing room · Standard geometric or organic shapes without fine protrusions
Beginner Design Tips
Follow these expert-tested recommendations to give your first pin project the best possible chance of a clean, successful result.
Design at 300–500% Scale
Work at 3–5× the final pin size in your design software. This makes thin lines and small details immediately visible, so you can fix issues before production.
Convert All Text to Outlines
Before submitting, convert text to vector outlines (paths). This prevents font errors during mold creation if the factory doesn’t have your typeface installed.
Use Metal as a Design Element
Metal plating lines are part of your visual composition, not just borders. Incorporate the plating color intentionally — it can define outlines, add depth, or create contrast.
Limit Your Color Palette
Fewer colors = lower cost and fewer potential issues. Start with 4–6 Pantone colors for your first design to keep it manageable and cost-effective.
Test at Final Print Size
Print your design at 100% final size and look at it from arm’s length. If details are hard to see, they’ll be worse in metal. This simple test catches most legibility issues.
Separate Metal and Color Layers
Keep metal die lines on one layer and enamel fill areas on separate layers in your file. Clear layer organization helps manufacturers interpret your design intent correctly.
Recommended Starter Specifications
🎯 The Safest First-Pin Setup
This combination offers the best balance of cost, quality, and design flexibility for first-time creators.
File & Software Requirements
| Requirement | Details | Why It Matters |
|---|---|---|
| Software | Adobe Illustrator, Inkscape (free), CorelDRAW, Affinity Designer | Vector software maintains quality at any size; raster programs (Photoshop, Procreate) cannot create manufacturer-ready files |
| File types | AI, EPS, SVG, PDF (vector only) | Raster files (JPG, PNG) cannot be used for mold creation — they pixelate when scaled and have no path data for die cutting |
| File setup | Separate layers: Metal-Line, Color-Fill, Cut-Line, Back-Stamp | Clear layer separation helps manufacturers understand your design intent and reduces back-and-forth corrections |
| Color system | Pantone Solid Coated (PMS) numbers only | Standardized Pantone references ensure consistent color reproduction across batches; RGB and HEX are screen colors with no physical manufacturing equivalent |
| Scale | Submit at 1:1 final size, or clearly note “Design shown at 2× — final size = 32 mm” | Ambiguous file scale causes sizing errors that may only be discovered after mold creation — an expensive correction |
| Text | All text converted to vector outlines before submission | Prevents font substitution errors; the factory may not have your font installed, causing characters to change or fail to load |
Proofing & Quality Control
Never skip the proofing stage. A digital proof is your last low-cost opportunity to catch errors before the mold is created and production begins. At that point, changes become significantly more expensive.
Digital Proof — Required
Before production begins, you’ll receive a digital proof showing exactly how your pin will be manufactured, including color labels, line interpretation, and plating specification. Review these elements carefully before approving:
Size and proportions match your expectations · Color labels correspond to the correct Pantone numbers · All metal lines meet minimum 0.3 mm thickness · Plating type is correctly specified · Back stamp text (if any) is spelled correctly · All text has been converted to outlines · Die-cut shape matches your intended outline
Physical Sample — Recommended for Large or Complex Orders
For an additional fee (usually credited toward your order), you can request a physical pre-production sample. This is the highest-confidence approach for:
- Retail pins — where quality directly impacts customer reviews and repeat sales
- Large orders — 500+ units where mistakes are proportionally more costly
- Premium designs — high-end pins for collectors, corporate gifts, or award programs
- Complex designs — pins with unusual shapes, multiple special effects, or fine detail elements
- First-time hard enamel orders — to verify color accuracy and polishing quality before full commitment
Production-Ready Design Checklist
Use this checklist before submitting your design file. All items should be confirmed before your order enters production.
📋 Pre-Production Submission Checklist
Ready to Create Your First Enamel Pin?
At CreatePins, we don’t just manufacture pins — we review designs, flag risks, and optimize artwork before production begins. Get a free quote and artwork review from our team.
Free Design Review
Expert feedback on line thickness, color separation, and manufacturability before you commit.
Manufacturing-Safe Optimization
We’ll flag any artwork issues and suggest fixes before the mold is created.
Transparent Pricing
Itemized quotes with no hidden fees — see exactly what you’re paying for.
Average turnaround 14–21 days · Free artwork review included · Global shipping available
Frequently Asked Questions
The most common questions from first-time and experienced enamel pin creators.
An enamel pin is a custom metal badge made by stamping metal with a mold, filling recessed areas with colored enamel, and finishing it with plating and polishing. Enamel pins are used for brand merchandise, events, retail accessories, artist collections, and community building — combining artistry with manufacturing craftsmanship.
Soft enamel pins have recessed enamel areas with raised metal outlines, creating a textured, dimensional surface and brighter colors. Hard enamel pins are polished flat for a smooth, glossy, jewelry-like finish with higher durability. Hard enamel typically costs 15–25% more and takes longer to produce. Soft enamel is recommended for first-time creators due to lower cost and greater design flexibility.
The minimum raised metal line thickness is 0.3 mm, with 0.4 mm recommended as a safe working standard. Lines thinner than 0.3 mm may not form correctly during stamping or may break during polishing. Recessed enamel areas and spacing between colors should also be at least 0.3 mm, with 0.5 mm recommended for reliable results.
Text should be at least 5 pt using a simple sans-serif font such as Helvetica or Arial, with 8 pt recommended for reliable legibility after manufacturing. Decorative or script fonts require larger sizes to remain readable. All text must be converted to vector outlines before submitting your file to avoid font substitution errors.
Cost depends on size, quantity, enamel type, color count, and plating. For a standard 1.25-inch soft enamel pin: 100 pieces costs approximately $1.60–$2.20 per unit; 200 pieces costs $1.10–$1.60; 500 pieces costs $0.75–$1.10; 1,000 pieces costs $0.55–$0.85. Hard enamel adds approximately 15–25% to the per-unit cost. Get an exact quote for your specific design at createpins.com.
Use Pantone Solid Coated (PMS) colors exclusively. RGB and HEX are screen-based color spaces with no reliable physical manufacturing equivalent — they cannot be used to specify enamel colors. Expect a natural ±5–10% variation between batches due to the handmade nature of enamel mixing and firing. Use a physical Pantone swatch book to verify color choices before ordering.
Vector files are required: AI (Adobe Illustrator), EPS, SVG, or print-quality PDF. Raster files (JPG, PNG) cannot be used for mold creation. All text must be converted to outlines, colors labeled with Pantone Solid Coated references, layers clearly organized, and the design set to actual final size (1:1 scale) or with a clear scale notation.
Yes. CreatePins provides a free design review with every quote — checking line thickness, color separation, text size, enamel area minimums, and overall manufacturability before production begins. This review helps flag and fix issues before the mold is created, when corrections are still low-cost. All artwork changes before die creation are far cheaper than corrections after molds are made.
References & Further Reading
- CreatePins — How to Order Enamel Pins (Step-by-Step Guide)
- CreatePins — Common Enamel Pin Types: Differences, Costs & Mistakes (2026)
- CreatePins — Enamel Pin Production Specifications: Line Thickness, Text, Colors & File Requirements
- CreatePins — Best File Formats for Custom Enamel Pins (AI vs PSD vs PNG)
- CreatePins — 20 Common Enamel Pin Design Mistakes That Can Ruin Your Order
- CreatePins — 15 Enamel Pin Design Ideas That Always Sell (Proven & Creative)
- CreatePins — Turning AI Art into Manufacturable Enamel Pins
- CreatePins — How to Make Your Own Custom Enamel Pin Mockup
- CreatePins — How to Choose Enamel Pin Colors: A Complete Color Palette Guide
- CreatePins — Why Enamel Pin Colors Look Slightly Different From Your Screen Mockup
- CreatePins — The Beginner’s Guide to Enamel Pin Plating Colors
- CreatePins — How to Choose the Perfect Size & Thickness for Your Enamel Pin Design (Expert Size Guide 2026)
- CreatePins — Custom Enamel Pin Production Expectations & Tolerances
- CreatePins — Essential Criteria for Grading Enamel Pins: Complete Quality Standards & Inspection Guide (2026)
- CreatePins — Common Enamel Pin Defects & How CreatePins Prevent Them
- CreatePins — Ethical Enamel Pins Manufacturing: What It Really Means
- CreatePins — How Much Do Enamel Pins Cost to Make in 2026?
- CreatePins — Pricing Custom Enamel Pins for Profit: Cost Breakdown, Calculator & Pricing Tips
- CreatePins — Custom Enamel Pin Production Timeline Explained
- CreatePins — Can You Get Custom Pins in 7 Days? (What’s Realistic)
- CreatePins — What Enamel Pin Manufacturers Don’t Tell You Before Ordering
- CreatePins — Top Misunderstandings When Communicating With Pin Manufacturers
- CreatePins — Custom Enamel Pin Hidden Costs You Should Know Before Ordering
- CreatePins — No Minimum Order Custom Pins: What You Need to Know Before You Buy
- CreatePins — Last-Minute Event Pins: What’s Realistic
- CreatePins — Want More Than Just Custom Pins?