Best Online Tools for Enamel Pin Design Mockups
A complete guide for artists and brands who want to visualize, test, and perfect their pin design mockup before manufacturing — from beginner-friendly apps to professional software. Explore the best enamel pin mockup tools available today.
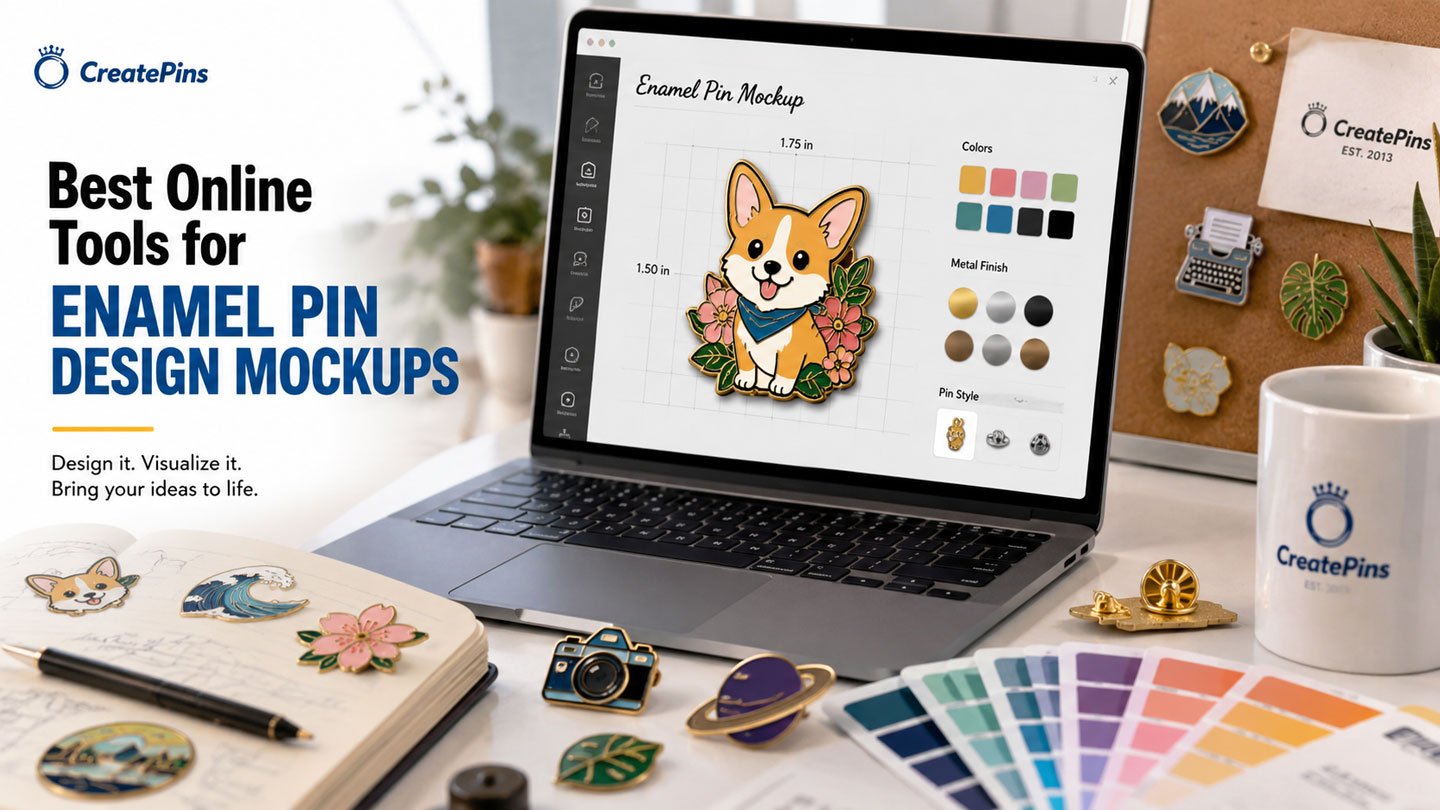
Before investing in custom enamel pin production, creating a pin design mockup is one of the smartest steps any artist or brand can take. A mockup lets you see exactly how your pin will look in the real world — testing color combinations, checking proportions, and catching design issues before a single piece of metal is stamped. The right enamel pin mockup tools can save you significant time, money, and frustration down the line.
Whether you’re a solo artist launching your first pin, a game developer creating merch, or a brand preparing a full product line, choosing the right software matters. From canva pin design for beginners to adobe illustrator pin artwork for professionals, and procreate enamel pin sketching for illustrators, there’s a tool for every stage of the creative process.
In this guide, we’ll walk through the best online tools for enamel pin design mockups, explain how each one is best used, and show you how to move from a polished mockup to a production-ready design with CreatePins.com.
Why Pin Design Mockup Tools Are Important
A pin design mockup is more than just a pretty preview. It’s a practical design checkpoint that helps you validate your concept before committing to production costs. Here’s why creating a mockup should be a standard part of your pin design workflow:
Test Color Combinations
See how your enamel color choices work together at actual pin scale before any manufacturing begins.
Catch Design Issues Early
Identify overly detailed areas, thin lines, or unclear elements before they become expensive production problems.
Present to Backers & Buyers
High-quality mockups help sell your pins before they’re produced — essential for Kickstarter, pre-orders, and online stores.
Create Social Content
Shareable mockup images generate excitement and community engagement ahead of your launch.
Prepare Artwork for Production
Mockup tools help you develop and refine the design before handing it off to a manufacturer for vectorization.
Explore Design Variations
Quickly compare alternate color palettes, plating options, or layout changes without redrawing from scratch.
1. Canva — Simple and Fast Canva Pin Design
Canva
Free / Pro PlanCanva is one of the most accessible design tools available and is an excellent starting point for canva pin design mockups. Its drag-and-drop interface makes it easy to place your pin design into professional-looking layouts in minutes — perfect for those new to enamel pin mockup tools.
Best For
- Beginners creating their first pin design mockup
- Kickstarter campaign images and promotional graphics
- Social media posts showcasing pin designs
- E-commerce product listing images
- Quick color and background experimentation
Key Features
- Drag-and-drop design interface — no learning curve
- Thousands of background templates and product display scenes
- Easy color editing and palette testing
- Social media size presets (Instagram, Facebook, Pinterest, etc.)
- Collaboration tools for team projects
- Basic photo editor for mockup image composition
Many artists use Canva to compose flat-lay mockup images showing pins displayed on fabric, cork boards, or aesthetic backgrounds. While Canva is not a manufacturing-ready design tool, it’s excellent for visual presentations and quick canva pin design iterations.
2. Adobe Photoshop — Realistic Product Renders
Adobe Photoshop
SubscriptionAdobe Photoshop is the industry standard for creating photorealistic product mockups. For pin designers who want high-quality promotional images that show exactly how a pin will look in the real world, Photoshop offers unmatched control over lighting, shadows, materials, and texture simulation — ideal for elevating any pin design mockup.
Best For
- Creating photorealistic pin product renders
- Simulating metal plating finishes (gold, silver, black nickel)
- Adding enamel shine and surface reflections
- Building high-quality e-commerce store images
- Compositing pins into real photography
Key Features for Pin Mockups
- Smart Objects — place your pin design into a pre-made PSD mockup template non-destructively
- Layer styles — add realistic metal textures, gloss, and drop shadows
- Adjustment layers — fine-tune color matching without altering original artwork
- High-resolution output for print and web
- Compatible with thousands of third-party PSD mockup templates
Many professional merchandise brands use Photoshop to composite their pin designs into lifestyle photography — showing pins worn on jackets, attached to backpacks, or displayed in retail settings.
3. Adobe Illustrator — Adobe Illustrator Pin Design
Adobe Illustrator
SubscriptionAdobe Illustrator is the most important tool in the enamel pin design workflow. While it’s primarily a design creation tool rather than a presentation mockup platform, it is essential for preparing manufacturing-ready artwork. Most enamel pin manufacturers, including CreatePins, require vector files — and Illustrator is the gold standard for creating adobe illustrator pin artwork that meets production specifications.
Best For
- Creating and refining the actual pin artwork design
- Defining clean metal dividing lines between color areas
- Assigning precise Pantone or custom enamel colors
- Preparing production-ready .AI or .EPS files
- Scaling and testing designs at actual pin dimensions
Key Features for Pin Design
- Pen tool for precise vector path drawing
- Pathfinder and Boolean operations to define enclosed color areas
- Pantone color libraries built in
- Stroke width control for setting minimum metal line thickness
- Artboard scaling to preview at exact 1:1 pin size
- Export to .AI, .EPS, .SVG, and .PDF for manufacturer submission
4. Placeit — Quick Lifestyle Product Mockups
Placeit
Free / SubscriptionPlaceit is a browser-based mockup generator that lets creators upload their design and instantly see it placed into professional lifestyle photography scenes. There’s no software to install and no photo editing skills required — the results are immediate, making it one of the most convenient enamel pin mockup tools for e‑commerce visuals.
Best For
- E-commerce product listing images (Etsy, Shopify, etc.)
- Social media promotional content
- Kickstarter and crowdfunding campaign visuals
- Quickly generating multiple mockup scenes from one design
Pin-Specific Mockup Scenes Available
- Pins pinned onto denim jackets
- Pins clipped to backpacks and bags
- Pin display boards and backing card arrangements
- Flat-lay product photography setups
- Pin on a lanyard or strap
Placeit is especially useful if you want to show your pin design mockup in a real-world context for marketing purposes without investing in product photography. Simply upload a transparent PNG of your pin design and Placeit handles the rest.
5. Procreate — Procreate Enamel Pin Sketching & Illustration
Procreate
iPad Only (One-Time Purchase)Procreate is arguably the most popular illustration tool among indie pin artists and character designers. Its natural brush feel, responsive Apple Pencil support, and intuitive layer system make it ideal for developing pin concepts and exploring ideas before moving to vector software — a core part of any procreate enamel pin workflow.
Best For
- Sketching initial pin character concepts
- Experimenting with color palettes in a natural drawing environment
- Creating detailed line art that can be referenced for vectorization
- Developing full pin sheet layouts with multiple designs
- Drawing artists who find Illustrator’s pen tool limiting
Key Features for Pin Artists
- Hundreds of brushes including inking and flat-fill brushes perfect for pin art
- Quick Shape tool to create clean circles, rectangles, and custom pin shapes
- Reference layer feature for clean line art coloring
- Color fill tools ideal for simulating flat enamel color areas
- Export to layered PSD for handoff to Illustrator for vectorization
- Animation Assist for social media product reveal clips
6. Inkscape — Free Vector Alternative
Inkscape
100% FreeInkscape is a powerful, completely free and open-source vector editor that provides many of the same core vector design capabilities as Adobe Illustrator. For pin artists who don’t want to pay for an Adobe subscription, Inkscape is the best alternative for preparing production-ready vector artwork.
Best For
- Budget-conscious creators who need vector design capabilities
- Creating clean metal-line vector artwork for manufacturing
- Students and beginners learning vector design
- Simple to moderately complex pin designs
Key Features
- Full vector path drawing tools (Bezier pen, node editor)
- Boolean path operations for creating enclosed color regions
- Stroke and fill controls for defining metal lines and enamel fills
- Export to SVG, EPS, and PDF formats
- Free to use on Windows, macOS, and Linux
7. Figma — Collaborative Design & Mockups
Figma
Free / Pro PlanFigma is a browser-based design platform primarily known for UI/UX design, but it’s increasingly used by product designers for mockup creation and team collaboration. Its vector tools and real-time collaboration features make it useful for pin teams working together on designs.
Best For
- Teams collaborating on pin design collections
- Building structured mockup presentations for client approval
- Creating simple vector pin layouts and color explorations
- Organizing and presenting design variations side by side
Key Features
- Real-time collaborative editing — multiple designers working simultaneously
- Component and variant system for managing design variations
- Vector path tools for basic enamel pin design work
- Prototyping tools for interactive design presentations
- Free plan available with unlimited personal projects
Side-by-Side Enamel Pin Mockup Tools Comparison
Not sure which pin design mockup tool to start with? Here’s how each option stacks up across the most important considerations for pin designers:
| Tool | Mockups | Vector / Mfg Ready | Skill Level | Cost | Best Use |
|---|---|---|---|---|---|
| Canva | ✓ | ✗ | Beginner | Free / $15/mo | Canva pin design for social & Kickstarter |
| Photoshop | ✓✓ | ✗ | Advanced | ~$22/mo | Realistic renders |
| Illustrator | ✓ | ✓✓ | Advanced | ~$22/mo | Adobe Illustrator pin production files |
| Placeit | ✓✓ | ✗ | Beginner | Free / $15/mo | E-commerce images |
| Procreate | ✓ | ✗ | Intermediate | $12.99 one-time | Procreate enamel pin concept & illustration |
| Inkscape | Limited | ✓ | Intermediate | Free | Free vector design |
| Figma | ✓ | Partial | Intermediate | Free / $15/mo | Team collaboration |
Tips for Creating Better Pin Design Mockup Images
Regardless of which enamel pin mockup tools you use, these best practices will help your mockups look professional and accurately represent how the final manufactured pin will appear:
1. Always Include Metal Line Outlines
Enamel pins have visible metal borders between all color areas. Your pin design mockup must clearly show these dividing lines — not just flat color fills. A mockup without metal lines won’t give you an accurate preview of what the real pin will look like, and could lead to mismatched expectations after manufacturing.
2. Avoid Gradients — Use Flat Solid Colors
Enamel cannot replicate smooth color gradients. Mockups that use gradient shading look attractive on screen but will be misleading if you take them into production. Replace any gradients in your pin design mockup with clearly separated flat color areas, just as the real pin will appear.
3. Test Multiple Color Variations
One of the best uses of a mockup tool is exploring design alternatives before committing to production. Try:
- Different plating colors (gold vs. silver vs. black nickel vs. antique brass)
- Alternative enamel color palettes
- Glitter, glow-in-the-dark, or translucent enamel effects
- Color-swap variants for a limited edition series
4. Always Preview at Real Pin Scale
Most enamel pins range between 25mm and 50mm (1–2 inches). A design that looks detailed and beautiful at full screen size may become unclear or cluttered at actual pin dimensions. Always scale your pin design mockup to the intended real-world size and assess it critically before finalizing the design.
5. Use Transparent PNG Files for Scene Mockups
When using tools like Canva or Placeit to place your pin into lifestyle scenes, always export your pin design as a transparent PNG. This allows the pin to sit naturally within the scene without a white background box around it, creating a much more realistic pin design mockup.
6. Match Plating Color in Your Mockup
The metal outline color in your mockup should reflect the plating you intend to order — gold, silver, black nickel, rose gold, or antique brass. This small detail significantly affects how the overall design reads and helps you make a more informed plating choice.
Using Mockups for Kickstarter & Pre-Orders
Many enamel pin creators launch through crowdfunding platforms like Kickstarter or Indiegogo, or through pre-orders on their own store. High-quality pin design mockup images are critical to the success of these campaigns — backers are investing in a product they can’t physically hold yet.
What Makes a Strong Campaign Mockup
- Lifestyle context — show the pin worn or displayed in a real-world setting
- Multiple angles — front view, close-up detail, and context shot
- Scale reference — include a size comparison so backers know the actual dimensions
- Variation showcase — if offering stretch goal variants, show alternate colors side by side
- Packaging preview — a mockup of the backing card or packaging box adds perceived value
- Clean white background — for product listing photos on storefronts
From Mockup to Manufacturing
Once your design is finalized in mockup form, the next step is transforming it into a production-ready enamel pin. This is where many creators need support — particularly if they’ve been working in non-vector tools like Canva, Procreate, or Photoshop.
The Mockup-to-Production Workflow
- Finalize your pin design mockup Confirm your design, colors, and dimensions using your chosen mockup tool. Export the final concept as a high-resolution PNG or PDF.
- Convert to vector artwork Redraw your pin design in Adobe Illustrator or Inkscape, creating clean closed vector paths for every color area with defined metal line separations.
- Assign enamel colors Replace any general colors with specific Pantone color references that your manufacturer can match. Check with CreatePins for their standard enamel color chart.
- Submit your artwork Upload your .AI or .EPS file to your chosen manufacturer. If you don’t have vector artwork, CreatePins can help convert your mockup into a production-ready design.
- Review the manufacturing proof Your manufacturer will return a digital proof showing exactly how the pin will look. Review carefully, request any adjustments, then approve for production.
- Optional: request a physical sample For orders of 500+ pins, request a physical prototype before full bulk production to verify color accuracy and quality in hand.
- Approve and proceed to production Once satisfied with the proof (or physical sample), give final approval and your order moves into full manufacturing.
How CreatePins Helps at Every Stage
At CreatePins.com, the team works with creators at every point in this process — from rough pin design mockup to final manufacturing. Services include:
- Converting non-vector mockups (Canva, Procreate, Photoshop) into production-ready vector artwork
- Refining and cleaning up existing vector files to meet manufacturing tolerances
- Advising on color palette simplification and Pantone color matching
- Creating accurate digital proofs that show the final pin appearance before production
- Offering sampling for large orders to confirm quality before bulk runs
- Guiding creators on pin type, size, plating, and backing options
Frequently Asked Questions About Pin Design Mockup Tools
Have a Pin Design Mockup Ready? Let’s Make It Real.
Whether you have a polished vector file or just a rough concept mockup, the team at CreatePins.com can help transform your design into a high-quality custom enamel pin — with expert guidance from artwork to delivery.
Further Reading
- How to Make Your Own Custom Enamel Pin Mockup
- Best File Formats for Custom Enamel Pins (AI vs PSD vs PNG)
- Complete Enamel Pin Design Guide (2026)
- How to Prepare Perfect Artwork for Custom Keychains
- Turning AI Art into Manufacturable Enamel Pins
- Why Enamel Pin Colors Look Different From Your Screen Mockup
- How to Choose Enamel Pin Colors: A Complete Color Palette Guide
- The Biggest Enamel Pin Design Mistakes That Ruin Everything