Enamel Pin Backing Cards: Complete Design, Size, Printing & Finish Guide
Standard sizes, bleed setup, matte vs glossy vs spot UV, double-sided printing, design tips, common mistakes — everything pin makers and brands need to get backing cards right the first time.
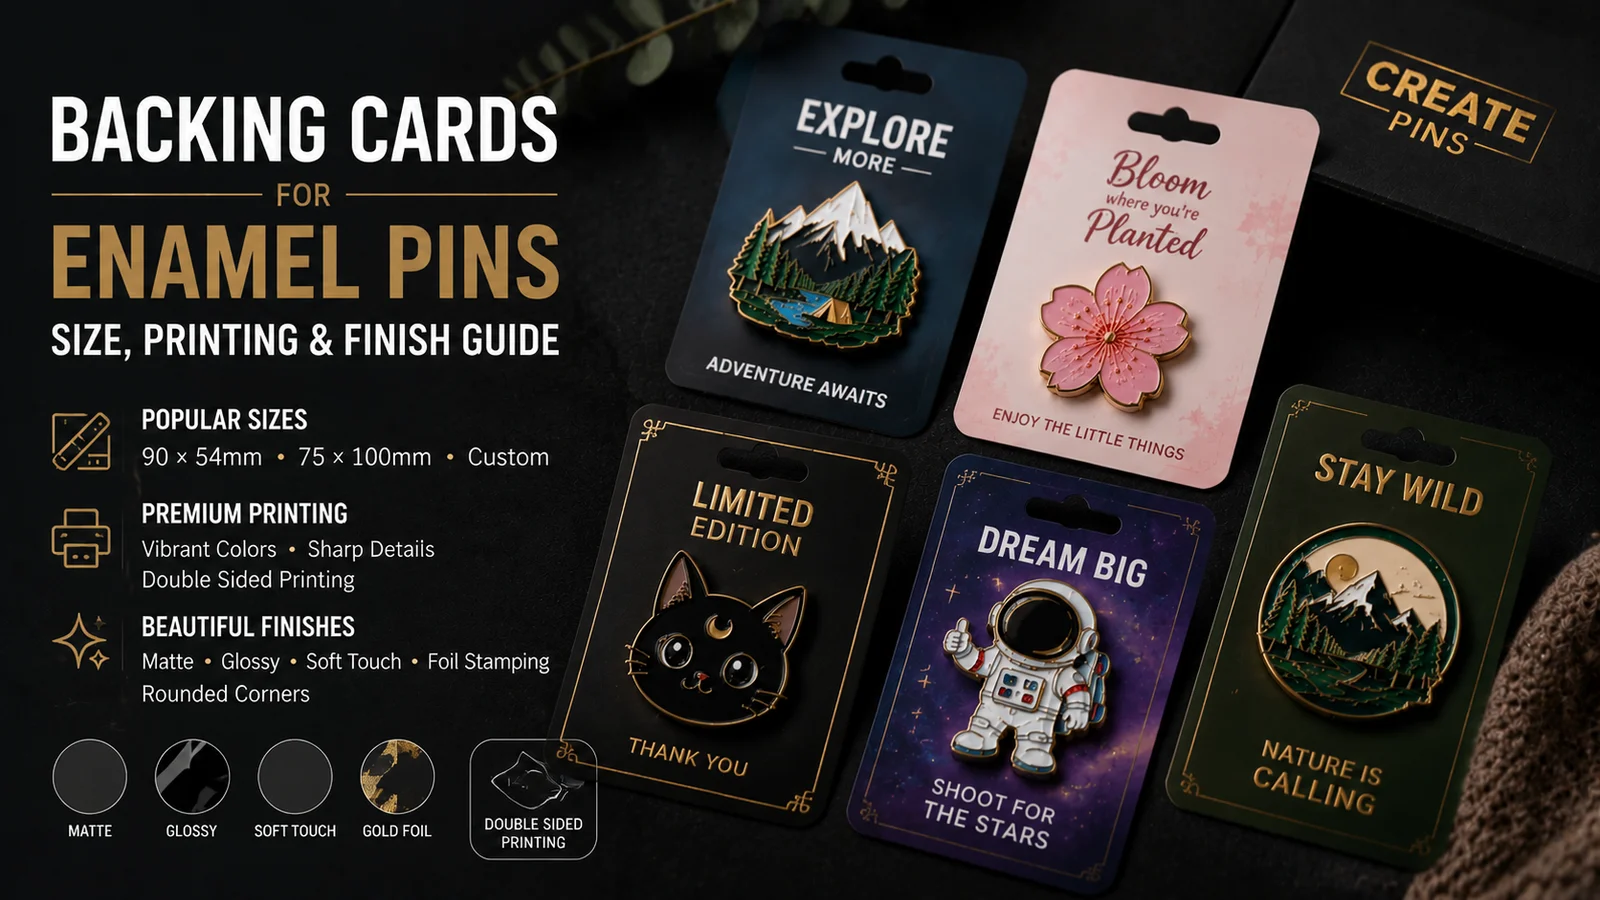
Custom enamel pins don’t just sell because of great artwork — presentation matters as much as the pin itself. A professionally designed backing card elevates your pins from bare accessories into retail-ready products, signals brand professionalism, and gives customers something beautiful to experience before they even open the package.
This complete guide covers everything: standard sizes and how to choose them, bleed setup explained from scratch, single vs double-sided printing, every surface finish option, step-by-step design advice, the most common mistakes and how to avoid them, and strategy differences for retail vs online sellers.
A backing card (also called a backer card or pin card) is the printed cardstock that your enamel pin attaches to — the pin’s post passes through a small punch hole in the card, and a rubber clutch or butterfly clasp holds it in place from the back. It’s like a miniature billboard for your brand, and it protects the pin during shipping and retail display.
- Standard sizes — 90×54mm most popular, with full size guide by pin size
- Bleed & print setup — explained for beginners with visual diagram
- Single vs double-sided printing — when and why to upgrade
- Surface finishes — matte, glossy, spot UV, rounded corners
- Design best practices — layout, branding, and what to include
- Common mistakes — and how to avoid every one of them
- Retail vs online strategy — different channels need different approaches
Why Enamel Pin Backing Cards Matter More Than You Think
A backing card does far more than hold your pin in place. It’s your silent salesperson — working for your brand every time someone picks up your pin, photographs it, displays it, or passes it along to someone new. Here’s exactly what a well-designed backing card adds:
Brand Identity
Reinforces your visual brand — colours, logo, typography, and overall aesthetic in every package.
Perceived Value
Customers immediately feel they’re receiving a premium, professional product rather than a loose bare pin.
Marketing Space
Space for your logo, website URL, social handles, collection name, QR code, and limited edition details.
Retail Display
Cards with hang holes sit on retail peg hooks — dramatically increasing shelf visibility and sales impulse.
Transit Protection
The card acts as a rigid base that prevents the pin from shifting, bending, or scratching inside the sleeve during shipping.
Photography Ready
A well-designed card makes product photography significantly easier — giving your pin a clean, branded backdrop.
For serious pin creators and brands: packaging is part of the product experience. The card is the first physical touchpoint your customer has with your brand — before they even detach the pin. Don’t underinvest in it.
Standard Enamel Pin Backing Card Sizes
Backing card size should be chosen based on your pin’s diameter and the amount of visual breathing room you want around it. Here are all four standard sizes with guidance on when to use each:
Designed for small 1″ pins and minimal layout designs. Lightweight and low-cost, but limited space for branding. Good for simple artist cards or budget-conscious runs.
The industry standard — approximately credit card width, slightly taller. Works perfectly for 1.5″ to 2″ enamel pins and fits standard retail peg hooks. The go-to choice for most pin makers.
Vertical format — ideal for larger pins (2.5″+) and designs with vertical artwork or multiple pieces displayed together. More space for brand storytelling and imagery.
Square format for oversized pins, bold branding, or premium collector presentation. Strong visual impact on retail shelves. Perfect for centrepiece or hero designs.
Choose by pin size:
📌 1″ pins → 85 × 54 mm or 90 × 54 mm
📌 1.5″–2″ pins → 90 × 54 mm (most popular)
📌 2.5″+ large pins → 75 × 100 mm or 90 × 90 mm
Always allow visual margins so the card doesn’t feel cramped or imbalanced.
Bleed & Print Setup — Explained for Beginners
Bleed is the single most misunderstood concept in print design — and forgetting it is the number one production issue we see from first-time pin makers. Here’s what it means and why it’s non-negotiable:
What Is Bleed?
Bleed (2mm on all sides) is extra background artwork that extends beyond the final trim line. Cutting machines cannot guarantee a perfectly precise cut every single time — a 2mm buffer ensures that if the cut is 1–2mm off, no unprinted white edge appears on the finished card.
- Final trim size: 90 × 54 mm
- With bleed (what you send): 94 × 58 mm
- Safe zone for text: 3–5mm inside the trim edge
🖨️ Print File Setup Checklist
Colour Mode: CMYK
Always set your document to CMYK colour mode — designed for physical printing. Never use RGB (designed for screens). RGB colours shift dramatically when converted for print, especially blues, purples, and vibrant greens.
Resolution: 300 DPI minimum
All rasterised images (photos, textures, gradients) must be at least 300 DPI at the actual print size. 72 DPI screen resolution will print extremely pixelated and blurry — a common mistake that can ruin an otherwise great card design.
Add 2mm Bleed on All Sides
Extend all background colours and full-bleed elements 2mm beyond the trim edge. For a 90×54mm card, your total file canvas should be 94×58mm. Set bleed guides in Illustrator or InDesign before you start designing.
Safe Zone: 3–5mm Inside Trim
Keep all important text, logos, and key design elements at least 3–5mm inside the trim edge. Anything in this margin zone risks being cut off in production. The pin post hole area also needs to be factored into your layout.
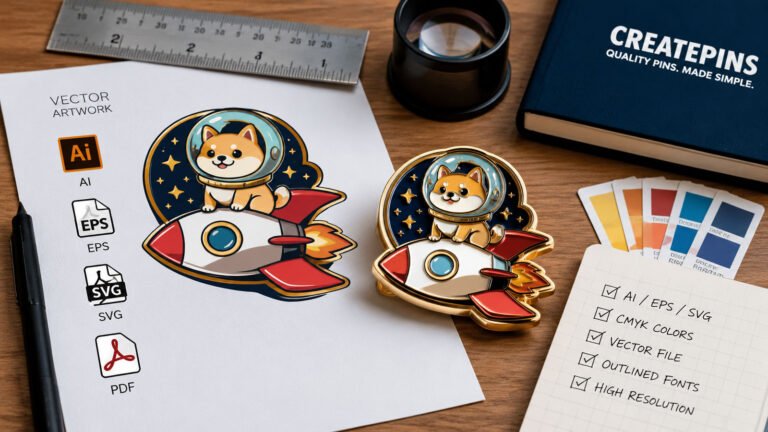
File Format: AI or PDF (Vector)
Export as Adobe Illustrator (.ai) or PDF — both are resolution-independent vector formats that print sharply at any size. Avoid PNG or JPEG unless created at exactly 300 DPI at print size. PDF/X-1a or PDF/X-4 are the safest export presets for print production.
⚠️ The Fastest Way to Fix Every Bleed Issue
Download and use professional templates with bleed and safe-zone guides already set up. You simply design within the correct boundaries rather than measuring manually. See the template download section below.
Printing Options: Single vs Double-Sided
Single-Sided (Most Common)
- Front artwork only — back is blank white
- Most cost-effective option for all order sizes
- Perfect for starter orders and artist merch tables
- Fastest production and lowest minimum order quantities
- Back can be used for handwritten notes (personalisation)
Double-Sided (Brand Upgrade)
- Full front design + branded back artwork
- Back can include: brand story, care instructions, QR code, social handles, barcode, limited edition numbering, or copyright
- Ideal for retail distribution, Kickstarter rewards, and convention sales
- Increases brand recall — buyers hold the card, read the back, remember you
- Small additional cost, significant impact on perceived professionalism
Pro tip — double-sided backs that work best: Include your website URL, social media handle, a QR code linking to your shop, pin care instructions (“Store away from moisture. Avoid dropping.”), collection name, and edition size. If space allows, a one-sentence brand story adds personal connection that drives repeat purchases.
Surface Finish Options
Your card’s finish affects both how it looks and how it feels in the hand. Choosing the right finish for your brand and sales channel makes a meaningful difference to customer perception:
Matte Finish
Smooth, non-reflective surface with a premium soft feel. Colours appear more subtle and refined. No glare under lighting.
Best for: Product photography (no glare = cleaner photos), premium or minimalist brand aesthetics, Etsy and Shopify listings, boutique and independent artists.
Glossy Finish
Shiny, reflective surface with more vibrant, saturated colour reproduction. More visually arresting from a distance.
Best for: Retail shelf displays where visual brightness attracts attention, bold graphic designs with vibrant colour palettes, convention and market table displays.
Spot UV (Premium)
High-gloss coating applied to specific areas — your logo, text, or pattern — over a matte base card. The contrast between matte background and glossy highlighted elements creates a tactile, luxury feel.
Best for: Boutique brands, limited edition collector series, high-end retail collections. MOQ: 500 pieces.
Rounded Corners
A subtle optional upgrade where the card corners are die-cut to a soft radius instead of sharp 90° corners. Creates a softer, more modern feel and resists corner bending during handling.
Best for: Premium packaging presentation, brands targeting a “cute” or rounded aesthetic, any order where a slightly more refined finish matters.
| Finish | Feel | Photography | Retail Impact | MOQ |
|---|---|---|---|---|
| Matte | Soft, premium | ✅ Excellent — no glare | Refined, subtle | Low (standard) |
| Glossy | Shiny, vibrant | ⚠️ Glare in some angles | Bold, eye-catching | Low (standard) |
| Spot UV | Luxury, tactile | ✅ Beautiful if lit well | Premium, stand-out | 500 pcs minimum |
| Rounded Corners | Modern, refined | ✅ Clean profile | Subtle upgrade | Low add-on |
Designing the Perfect Enamel Pin Backing Card (Step by Step)
A great backing card design requires a different mindset than designing the pin itself — you’re working with a small canvas where the pin overlaps a significant portion. Here’s the complete design process:
Set Up Your Document With Correct Dimensions and Bleed
Start from a template (not a blank document) to ensure correct trim size, bleed zone, and safe zone guides are already in place. Design within these guides from the first element you place. This single step eliminates the most common production file errors. Download the free templates linked below.
Position the Pin Visually First
Before designing any background artwork, mark where the pin will sit on the card. The pin post hole is typically centred horizontally on the upper half of the card. Important text and branding must work around the pin — not compete with it. Create a rough layout with the pin mock-up placed at actual size before committing to your artwork direction.
Keep It Balanced — The Pin Is the Hero
Avoid placing important design elements directly behind where the pin will sit — they’ll be hidden. Leave generous breathing room (visual margins) around the pin. A common beginner mistake is overcrowding the card with text and decoration that competes with the pin rather than framing it. Clean, spacious layouts look significantly more professional.
Add Brand Information Strategically
Include: your brand logo or name (prominent, front and centre or in a clear position), website URL or social handle, collection name, and optionally a QR code. For double-sided cards, move secondary information (care instructions, brand story, edition details) to the back — keeping the front clean and focused on the visual experience.
Check Colour Mode and Resolution Before Export
Switch your document to CMYK colour mode and verify all placed images are at 300 DPI minimum. Proofread all text — typos are expensive to fix after print. Do a final check: all bleed extends to the guide, all important text is within the safe zone, no critical element sits where the pin hole will be punched.
Mock Up Before Sending
Create a realistic mock-up showing the actual pin placed on the card at correct size. This lets you catch issues that are invisible in the flat file: does important text get hidden by the pin? Does the card feel overcrowded? Does the colour palette work together? Many production problems are discoverable — and free to fix — at the mock-up stage. They become expensive to fix after print.
📥 Free Professional Eanmel Pin Backing Card Templates
Templates for all four standard sizes — with bleed, safe zones, and trim guides pre-set. Open in Illustrator or compatible software and start designing immediately without manual setup.
👉 Download AI / PDF TemplatesIncludes: 90×54mm, 85×54mm, 75×100mm, 90×90mm — all with bleed & guides
Need Help With Your Custom Pin Backing Card Design?
Our CreatePins team guides you through the entire backing card setup — from choosing the right size and finish to reviewing your artwork for bleed and safe zones. Get expert advice alongside your custom pin quote.
🚀 Get Your Free Quote & Design ReviewFree templates • Instant quotes • Expert artwork review • No obligation
Retail vs Online Sellers: Strategy Differences
The right backing card strategy differs significantly between retail and online sales. Understanding these differences helps you make smarter decisions about size, finish, and printing options:
Retail Stores & Boutiques
- Larger cards increase shelf visibility and peg hook presence
- Glossy finish attracts attention from a distance in bright shop lighting
- Spot UV elevates perceived value for premium boutique or gift shop placement
- Hang hole essential — must fit standard retail peg hook diameter
- Barcode placement on the back for POS scanning if required by the retailer
- Double-sided printing adds product info and brand story for browsing customers
Online (Etsy, Shopify, Kickstarter)
- Matte finish photographs significantly better — no distracting glare in product shots
- Double-sided improves brand recall for unboxing moments and social sharing
- Smaller card sizes reduce shipping weight, especially important for international orders
- QR code on back links to your shop, socials, or a care guide — drives repeat visits
- Care instructions on the back reduce support queries about pin maintenance
- Handwritten thank-you notes on blank single-sided backs build personal connection
The 7 Most Common Enamel Pin Backing Card Mistakes (And How to Fix Them)
The most common mistake — and the most expensive to reprint. Set bleed from the start using a template. Every background colour and full-bleed graphic must extend to the bleed guides.
Text or logos placed within 3mm of the trim edge risk being partially cut off. Always keep critical elements well inside the safe zone guides in your template.
Images sourced from social media, websites, or phone screenshots are typically 72 DPI — they print blurry. Always use high-resolution source files or create elements as vectors.
Too much text, too many design elements, and cramped layouts make cards feel busy and amateurish. Clean, spacious designs consistently look more premium. Move secondary information to the card back.
The pin covers a significant portion of the card. Without a mock-up, important text or design elements often sit exactly where the pin will hide them. Catch this for free in design — not after printing.
RGB is for screens; CMYK is for print. Converting from RGB to CMYK at the end often causes significant colour shifts — especially vibrant blues, purples, and neon colours. Set CMYK from document creation.
A 1″ pin on a 90×90mm card looks lost; a 2.5″ pin on an 85×54mm card looks cramped. Use the size guide above to choose a proportionate card for your pin diameter.
The fastest solution to almost all of these mistakes: use a professional pre-built template with correct dimensions, bleed, and safe zone guides already set up. Design within the guides and most errors become impossible to make.
Cardstock Weight Guide
The weight of your cardstock directly affects how premium the card feels in hand and how well it supports the pin’s weight without bending:
Standard Weight Recommendations
- Below 300 gsm: Too thin — feels flimsy and inexpensive. Cards may bend during retail handling or bend under heavier pins. Not recommended.
- 350 gsm: Industry standard — the sweet spot for most pin backing cards. Sturdy enough to support pins up to 2″ without bending, light enough to keep postage costs low.
- 400 gsm: Premium weight — noticeably more substantial and rigid in hand. Ideal for larger pins, collector editions, or brands targeting a luxury feel.
- Above 450 gsm: Very thick — adds cost and weight without meaningful quality improvement for most pin sizes. Reserve for very large or heavy pins where extra structural support is genuinely needed.
Our recommendation: 350 gsm for standard runs; 400 gsm for premium retail and collector series.
🎁 Final Thoughts: Small Card, Big Impact
Custom enamel pin backing cards are one of the highest-return investments in your pin business — a small additional cost per unit that meaningfully increases perceived value, brand recognition, and retail readiness. The difference between a pin on a bare backing card and one on a beautifully designed card with premium finish is immediately visible to customers and collectors alike.
Get the fundamentals right — correct size for your pin, proper bleed setup, appropriate finish for your sales channel — and your backing cards will work as hard for your brand as the pins themselves.
Your enamel pins will stand out both online and in retail with the right:
Frequently Asked Questions
What is a backing card for enamel pins?
What is the standard backing card size for enamel pins?
What is bleed on a backing card and why does it matter?
What is the difference between matte and glossy backing card finish?
What is Spot UV on a backing card?
Should I use single or double-sided printing for my pin backing cards?
What file format and resolution should I use for backing card artwork?
What are the most common backing card design mistakes?
Do I need a punch hole in my backing card?
What cardstock weight should I use for enamel pin backing cards?
Ready for Retail-Perfect Pin Packaging?
Our CreatePins team guides you through the entire backing card setup — from choosing the right size and finish to reviewing your artwork bleed and safe zones. Start your custom pin order with expert backing card guidance included.
🚀 Start Your Custom Pin OrderFree design templates • Instant quotes • Expert artwork review • No obligation