Glitter Enamel Pins: The Complete Guide to Sparkle
Everything you need to know about designing, ordering, and caring for glitter enamel pins — from glitter types and particle sizes to color pairing, cost, production, and common mistakes to avoid.
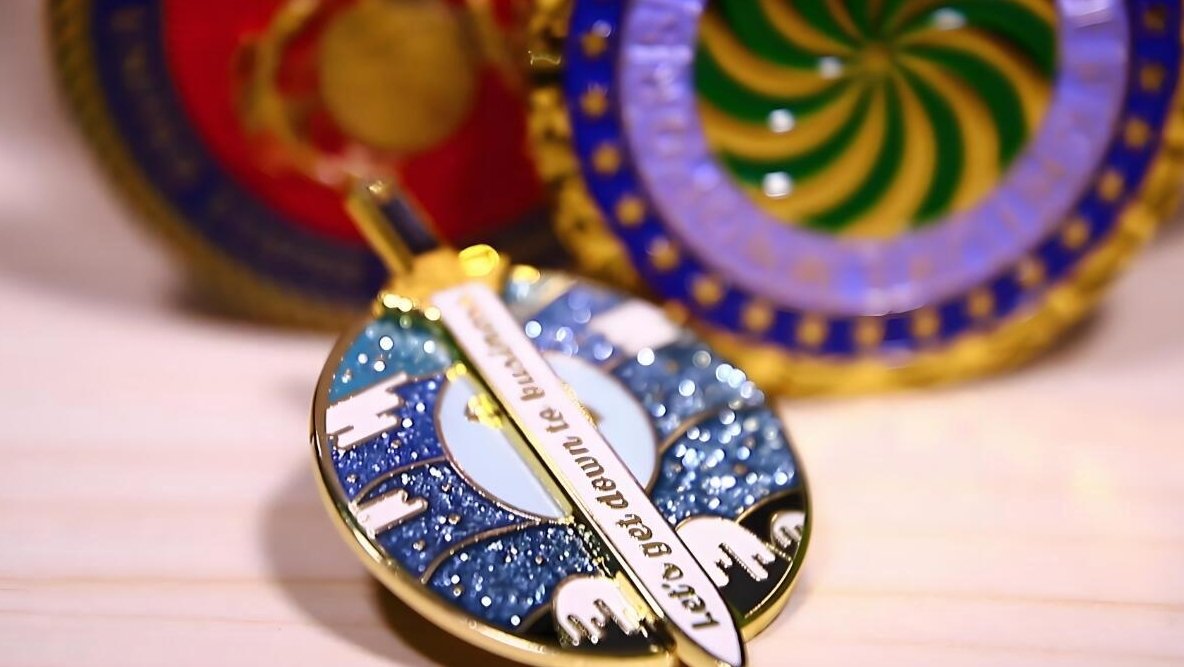
Glitter enamel pins have a special charm that goes beyond ordinary pins. They catch the light with mesmerizing sparkle, add visual depth and texture, and make your designs stand out in a sea of flat colors. Whether you’re designing pins for your brand, for collectors, or as special event merchandise, glitter can transform a simple idea into something eye-catching, memorable, and highly collectible.
This comprehensive guide walks you through everything you need to know about using glitter in your pin designs — from how it works in production to advanced design tips and creative applications that will make your pins shine.
What Are Glitter Enamel Pins?
A glitter enamel pin is a standard die-struck pin where fine metallic or holographic glitter particles are mixed into the enamel fill before it’s cured, instead of using flat, solid-colored enamel. The glitter sits inside the recessed, die-struck cells of the pin, so it’s permanently sealed under the enamel surface — it won’t rub off or flake like glitter glue or glitter vinyl would.
Because the sparkle is embedded in the material itself, glitter pins work with both hard enamel (polished flush, smooth to the touch) and soft enamel (enamel sits slightly below the metal lines, giving texture) production methods. Most manufacturers offer a standard set of glitter colors, and some will custom-blend a glitter tone to match your Pantone reference for an extra fee.
Why Are Glitter Enamel Pins So Popular?
Glitter pins — sometimes called sparkle enamel pins — appeal to a wide range of audiences because they:
- Add versatility: They suit everything from whimsical themes like unicorns and rainbows to professional branding logos.
- Boost visual impact: The added shine makes designs more eye-catching, especially in bright light.
- Increase collectibility: Glitter editions often feel more exclusive, driving collector demand.
- Evoke emotion: Glitter represents joy, fun, and celebration, making it perfect for holidays, events, and special launches.
📊 Real Case Study: Ocean-Themed Glitter Pins
An Etsy designer offered two versions of her ocean-inspired enamel pins — standard hard enamel and glitter hard enamel. Even though the glitter pins were priced 50% higher, they outsold the standard versions by 16%, showing how much customers value the sparkle.
Types of Glitter Effects
Not all “sparkle” pins use the same technique. Understanding the differences helps you brief your manufacturer accurately and set the right expectations for how the finished pin will look.
| Effect | How It Works | Best For |
|---|---|---|
| Glitter Enamel | Fine glitter flakes suspended directly in colored enamel resin, cured in the recessed cells. | General sparkle fills — stars, backgrounds, dresses, magical themes. |
| Holographic Glitter | Rainbow-refractive glitter particles that shift color depending on the viewing angle. | Sci-fi, fantasy, unicorn/mermaid themes, statement pieces. |
| Glitter + Epoxy Dome | A clear epoxy dome is applied over glitter enamel, magnifying the sparkle and adding shine. | Maximum shimmer, candy/gem aesthetics. |
| Glitter + Glow-in-the-Dark | Glow pigment and glitter are blended so the pin sparkles in light and glows in the dark. | Space, Halloween, and nightlife themed pins. |
| Glitter + Pearl Swirl | Two pearlescent enamel colors are swirled together with glitter for a marbled sparkle effect. | Organic, dreamy designs. |
Common Glitter Varieties
- Rainbow Glitter: Versatile, adds a multi-colored effect.
- Laser Glitter: Multidimensional shine for futuristic designs.
- Fantasy Glitter: Soft, dreamy shimmer that pairs well with pastels.
- Fluorescent Glitter: Bold, high-impact colors for playful, attention-grabbing themes.
Glitter Particle Sizes
Selecting the right glitter particle size is essential for achieving the desired effect. Glitter varies from fine to coarse:
- Small (0.1mm): Perfect for detailed designs, subtle shimmer. More expensive due to precision work.
- Medium (0.2mm): Best for bold designs and larger color areas. Strong sparkle, versatile use.
- Large (0.4mm): Ideal for large enamel fields where a bold, dazzling shine is needed.
💡 Quick Tip: Glitter doesn’t match Pantone colors exactly. Always request samples to confirm color and effect before finalizing production.
How Glitter Pins Are Made
The production process for a glitter pin follows the same core steps as a standard enamel pin, with one extra stage:
- Die casting: Your artwork is converted into a metal die and stamped into the pin blank, creating raised metal lines and recessed cells.
- Plating: The pin is plated in your chosen finish (gold, silver, black nickel, copper, or rose gold).
- Glitter enamel filling: Instead of standard liquid enamel, a glitter-infused enamel is hand-poured into each cell. This step requires more care than flat color because the glitter density needs to stay even across every pin in the run.
- Curing: The pin is baked to harden the enamel and lock the glitter permanently in place.
- Polishing & quality check: The surface is polished (for hard enamel) and each pin is inspected against your approved proof.
- Backing attachment: Butterfly clutch, rubber clutch, or locking pin backs are attached last.
Because the glitter-fill step is manual and slightly slower than flat enamel, glitter pins typically add a small amount of time to your production timeline — worth factoring in if you’re working toward an event or launch date.
Common Production Challenges & Solutions
| Challenge | Solution |
|---|---|
| Uneven glitter distribution | Use soft enamel + epoxy coating to hold glitter securely. |
| Higher glitter costs | Choose common glitter types (rainbow, normal color) for affordability. |
| Inconsistent color matching | Select glitter that complements enamel instead of matching Pantone. |
| Glitter shedding | Apply epoxy for long-term durability. |
Design Tips for Glitter Pins
Glitter changes how light interacts with your design, which means a few standard enamel pin rules need adjusting:
1. Keep detail areas glitter-free
Glitter particles are physical flakes, not a flat color, so extremely thin lines or tiny text filled with glitter can look muddy or uneven once cured. Reserve glitter fill for larger shapes — backgrounds, dresses, wings, hair — and keep fine linework and small text in flat enamel for crisp readability.
2. Respect minimum cell size and metal line thickness
Because glitter enamel needs slightly more room to sit evenly, most manufacturers recommend keeping metal line thickness and minimum detail size a touch larger than standard flat-enamel minimums. Check our size and thickness guide before finalizing your file.
3. Use the right file format
Vector files (AI or high-resolution PDF/EPS) are strongly preferred so the manufacturer can cleanly separate glitter zones from flat-color zones. See our comparison in Best File Formats for Custom Enamel Pins.
4. Plan around your plating color
Glitter enamel sits next to metal, so your plating choice (gold, silver, black nickel, rose gold) shifts the overall tone of the sparkle. Review the options in our plating colors guide before locking your palette.
5. Get the general enamel pin fundamentals right first
If this is your first pin project, it’s worth reading our full enamel pin design guide and technical design tips before adding glitter into the mix — the basics apply to every finish.
Designer Secret: Create a “glitter map” in your design file to visualize sparkle placement before sending to production. This helps balance the glitter distribution across your design.
Choosing Colors That Sparkle
Glitter reflects and scatters light rather than absorbing it, so color choice matters more than on a flat pin. A few pairing principles:
- Dark backgrounds make glitter pop. Navy, black, and deep purple glitter enamel show off individual glitter flakes far more than pale pastels.
- Pair one glitter color with flat accents. A fully glittered pin can look busy; using glitter for 30–60% of the design with flat enamel accents keeps the piece balanced and legible.
- Match glitter tone to plating. Gold plating warms up glitter tones; silver and black nickel plating make holographic and cool-toned glitter feel more electric.
- Test under different lighting. Ask your manufacturer for a physical or photographed proof under both daylight and indoor lighting — glitter enamel colors can look noticeably different from your on-screen mockup.
Popular Glitter Color Combinations
For a broader primer on building your palette before adding glitter, see our complete color palette guide.
Creative Variations & Advanced Techniques
Beyond Basic Glitter
- Gradient Glitter Fills: Mix two glitter colors in the same area for a beautiful blended effect (e.g., blue to purple transition).
- Transparent Glitter: Add glitter to translucent enamel for a stained-glass sparkle that allows metal plating to show through.
- Glow-in-the-Dark + Glitter: Combine GITD enamel with glitter for pins that shine both day and night — magical for celestial designs.
- Layered Effects: Use glitter in background areas and solid enamel in foreground elements to create depth and dimension.
- Glitter Outlines: Create thin glitter outlines around key design elements for subtle accent sparkle.
- Mixed Sizes: Combine fine and medium glitter in the same area for multi-textural sparkle.
- Extremely detailed designs — small glitter areas may not show well.
- Overly professional/corporate logos unless sparkle fits your brand.
- Historical or serious themes where sparkle might undermine the tone.
- Very small pins under 0.75″ where glitter might overwhelm the design.
- Tight budget constraints — glitter adds a small premium.
How Much Do Glitter Pins Cost?
Glitter is typically priced as an add-on per color, on top of your base enamel pin cost. As a general starting point for new creators:
- Base hard enamel pin: priced primarily by pin size, color count, and quantity — see our full breakdown in How Much Do Enamel Pins Cost to Make in 2026?
- Glitter add-on: usually a small flat fee per glitter color used, since it requires a separate enamel mix and extra fill-line care. Typically $0.10–$0.30 per color per pin.
- Combining add-ons (glitter + epoxy dome, or glitter + glow) increases cost further since each effect adds its own production step.
- Quantity still drives your per-unit price down the most — the same volume discounts that apply to standard pins apply to glitter pins.
For a full cost calculator and margin planning if you’re selling your pins, read Pricing Custom Enamel Pins for Profit. It’s also worth reviewing hidden costs to know before ordering so your glitter pin quote doesn’t have surprises.
Ready to Bring Your Glitter Pin Design to Life?
Upload your artwork and get a free, no-obligation quote with glitter, epoxy, and glow-in-the-dark options included.
Common Mistakes to Avoid
- Overusing glitter across the whole design. It can wash out fine detail and make the pin look flat under low light instead of sparkly.
- Ignoring minimum line thickness. Thin metal lines next to glitter cells are more prone to enamel bleed than flat-color pins.
- Skipping a physical proof. Screen colors and glitter density can look different in person — always request a proof photo before full production.
- Not confirming glitter color availability. Most manufacturers offer a standard glitter palette; custom-matched glitter tones may need extra lead time.
- Underestimating production time for last-minute events. Glitter and combined finishes take longer — check what’s realistic in Last-Minute Event Pins: What’s Realistic.
For the broader list of design pitfalls that apply to every enamel pin (not just glitter), see The Biggest Enamel Pin Design Mistakes That Ruin Everything.
Care, Storage & Display
Glitter enamel is sealed and won’t shed, but it still deserves the same care as any enamel pin:
- Avoid dropping pins on hard surfaces — chipped enamel is one of the most common repair requests. Fixes are covered in How to Fix Enamel Pin Damage at Home.
- Store pins flat or on a dedicated pin board rather than loose in a drawer, where clutches can scratch the enamel surface. See How to Store Enamel Pins & Display Tips.
- If you’re building a collection or a shop display, browse creative setups in Best Ways to Display Enamel Pins.
- For gifting or retail, consider how packaging affects perceived value — our packaging guide covers backer cards, poly bags, and boxes.
Frequently Asked Questions
Does glitter enamel wear off or flake over time?
No. Because the glitter is mixed into the enamel and cured/sealed inside the recessed cell, it’s locked in place the same way solid enamel color is. It won’t flake like glitter glue, glitter vinyl, or loose craft glitter.
Can I combine glitter with other finishes like glow-in-the-dark or epoxy?
Yes. Glitter is commonly combined with an epoxy dome for extra shine, or with glow-in-the-dark pigment for a pin that sparkles in the light and glows at night. Each combination adds a production step, so build in a little extra cost and lead time.
Is glitter available on both hard enamel and soft enamel pins?
Yes, glitter enamel can be used with both hard enamel (polished, smooth finish) and soft enamel (slightly recessed, textured finish) production methods.
How much extra does glitter cost compared to a standard pin?
Glitter is typically a small flat add-on fee per glitter color used, on top of your base pin price, which is driven mainly by size, color count, and order quantity.
Will my glitter pin look exactly like my digital mockup?
It will be close, but glitter density and light reflection can make the finished pin look slightly different from a flat screen mockup. Requesting a physical or photographed proof before full production is the best way to confirm the final look.
What file format should I submit for a glitter pin design?
A vector file such as AI, EPS, or a high-resolution layered PDF is recommended so your manufacturer can clearly separate glitter zones from flat-enamel zones during production.
How many glitter types exist for enamel pins?
Over 200 varieties exist, but rainbow, laser, fantasy, and fluorescent are the most common.
Can glitter match Pantone colors?
No. Glitter shades are pre-mixed and only approximate Pantone colors.
What glitter size is best for my design?
Small glitter (0.1mm) for intricate designs; medium (0.2mm) for most designs; large (0.4mm) for bold areas.
Which designs work best with glitter?
Whimsical, fantasy, celebratory, and bold patterns (like galaxy or ocean themes).
Turn Your Sparkle Idea Into a Real Pin
Whether it’s your first design or your fiftieth, our team will help you fine-tune glitter placement, color, and finish before production starts.
✨ In a world of flat colors, a little sparkle makes all the difference. ✨