Gemstone Enamel Pin Design Guide: Practical Tips, Specifications & Production Risks
Everything you need to know about gemstone pin manufacturing — sizes, clearances, stone materials, settings, and gemstone pin design ideas for enamel pins with crystals and custom jeweled pins.
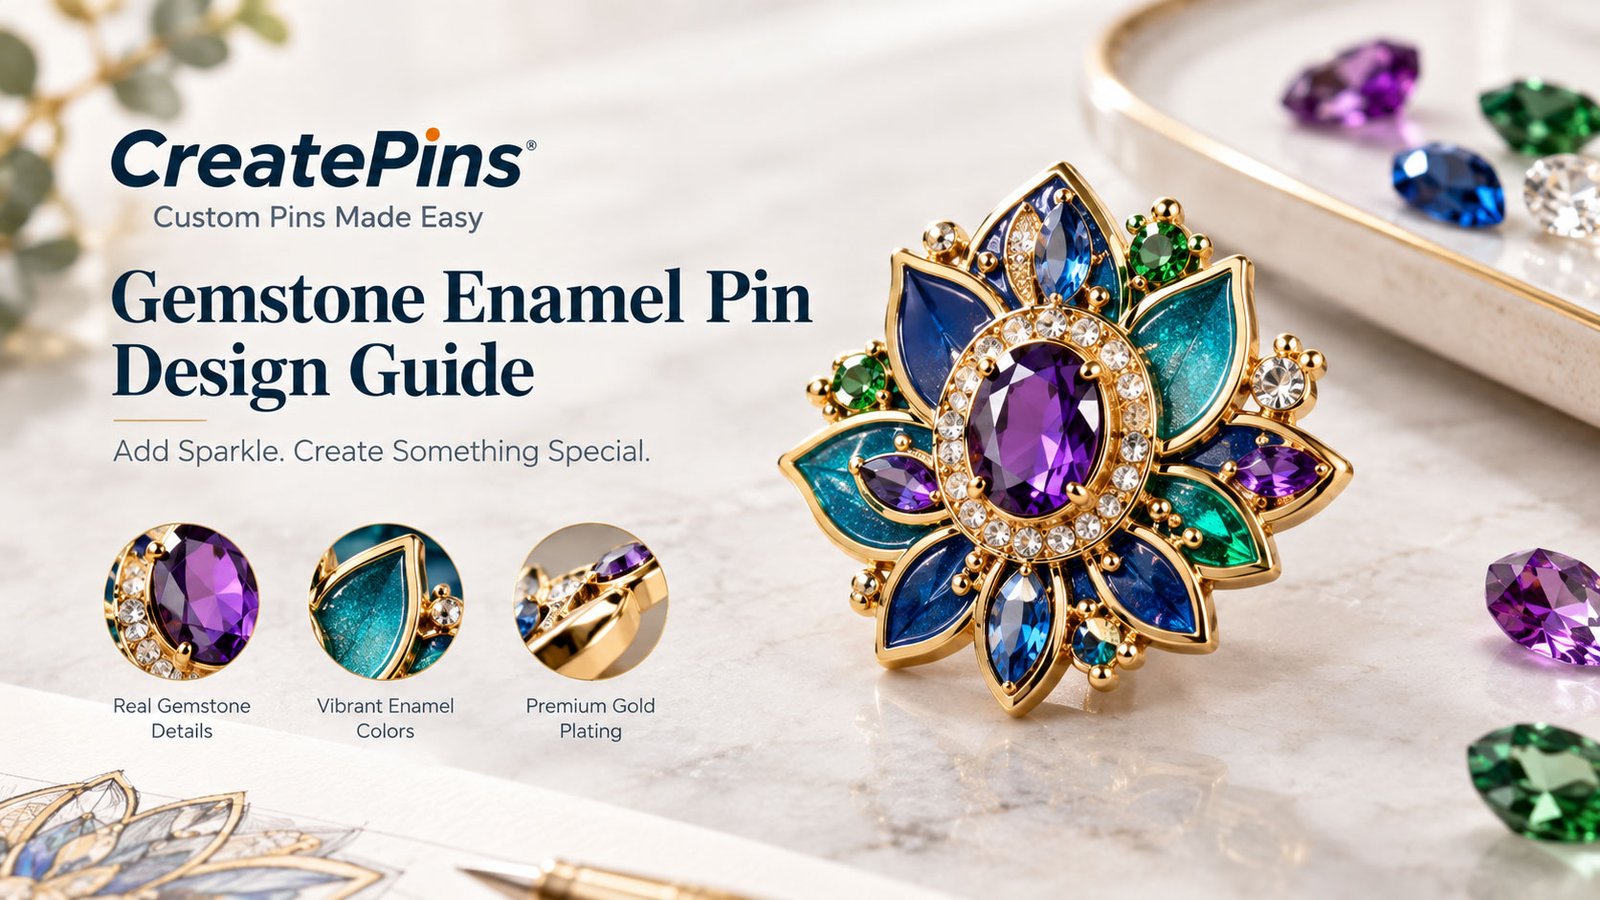
A gemstone enamel pin combines metal outlines, colored enamel, and decorative stones or crystals. Designing one for production takes more than choosing attractive colors: stone dimensions, metal borders, enamel areas, overall thickness, attachment methods, and weight all have to work together. A design that looks excellent on screen can be difficult to manufacture if the stones take up too much space, the metal connections are too thin, or the mounting structure interferes with the enamel.
This practical guide explains how to prepare gemstone pin artwork, choose suitable materials, estimate production requirements, avoid common gemstone pin manufacturing problems, and control costs before you order enamel pins with crystals or any other custom jeweled pins.
In This Guide
- Choose the Pin Size First
- Practical Design Specifications
- Gemstone Size, Shape & Material
- Metal Borders & Enamel Areas
- Match the Enamel Technique
- Plating & Enamel Colors
- Stone Attachment & Durability Risks
- Control Production Costs
- Prepare Artwork for Manufacturing
- Confirm Before Production Approval
- Request a Custom Quote
- Frequently Asked Questions
The Short Version
Start at about 25–38mm (1–1.5 inches), keep metal lines at 0.20mm or wider and enamel fill at 0.35mm or wider, and leave roughly 0.5–1.0mm of clearance around each setting. Specify the actual stone material, mark every stone’s position in the artwork, pick a backing that suits the finished weight, and get manufacturing approval before production. These numbers are planning references, not guaranteed limits — always confirm with your manufacturer.
1. Choose the Pin Size Before Finalizing the Artwork
Sizing is the first decision in gemstone pin manufacturing, because every gemstone pin design idea has to fit inside the finished footprint. Overall dimensions determine how much room you have for the metal framework, enamel sections, gemstones, and fastening components. A useful starting range for many gemstone enamel pin designs is 25–38mm (about 1–1.5 inches). Smaller sizes can work for simple motifs, while more detailed gemstone pin design ideas usually need extra space. The right size depends on the number of stones, the complexity of the artwork, and the finished look you want.
Practical design recommendations
- Determine the finished width and height before adding small decorative details.
- Choose the main gemstone first, then arrange the surrounding artwork around it.
- Consider the complete setting footprint, not just the visible face of the stone.
- Leave enough room for metal borders and enamel filling.
- Check the artwork at its actual finished size.
- Increase the overall dimensions or simplify the artwork if the design becomes crowded.
For example, a 32mm floral pin with one central gemstone and six broad petals is easier to manufacture than a 32mm floral pin with several stones, narrow leaves, intricate outlines, and tiny decorative details. If a design gets crowded, you have three options: (1) increase the pin size, (2) reduce the number or size of the stones, or (3) simplify the surrounding artwork.
2. Practical Design Specifications for Gemstone Enamel Pins
Whether you’re planning enamel pins with crystals or fully custom jeweled pins, this table gives initial artwork-planning references. These dimensions are not guaranteed manufacturing limits, particularly where gemstone settings are involved.
| Design Element | Initial Specification | Practical Recommendation |
|---|---|---|
| Overall pin size | 25–38mm | A useful starting range for many decorative designs |
| Metal line thickness | 0.20mm or greater | Consider 0.25–0.30mm or wider for critical narrow details |
| Enamel fill width | 0.35mm or greater | Aim for 0.4–0.5mm or wider where possible |
| Gap between adjacent color areas | About 0.3–0.5mm | Confirm enough metal separation between enamel colors |
| Small text | 5pt as an initial reference | Prefer 8pt or larger and test readability at actual size |
| Narrow metal connections | Avoid very thin connections without review | Consider a 1.5mm or wider connection for vulnerable projecting elements where the design permits |
| Clearance around a gemstone setting | Initially allow 0.5–1.0mm where space permits | Confirm the actual mounting footprint and clearance with the manufacturer |
| Spacing between neighboring stones | Initially test about 1mm or more | Check setting dimensions, alignment, and available metal between components |
These are preliminary guidelines. The metal-line and enamel-fill references reflect general enamel pin artwork considerations; gemstone clearances and spacing are proposed starting points for design review, not universal industry standards. The 1.5mm connection reference is not a mandatory minimum either — a smaller or larger connection may be right depending on geometry, metal thickness, and manufacturing method. For the general rules behind these numbers, see our production specifications guide.
Why these dimensions matter
Metal Lines
Outlines define enamel sections and contribute to structure. Very thin lines are hard to reproduce consistently and can become fragile.
Enamel Areas
Tiny recessed sections are difficult to fill cleanly, especially when surrounded by several narrow metal borders.
Stone Clearance
A stone needs room for its setting or retaining structure. Measuring only the visible diameter leads to overcrowded designs.
Small Text
Letters that read well in a large rendering can become illegible on a finished pin — simplify the lettering or enlarge the design.
Important: confirm final dimensions with your manufacturer before production. Polishing, stone mounting, metal geometry, and enamel technique can all affect acceptable dimensions. Our typography guide helps with small lettering.
3. Select the Right Gemstone Size, Shape, and Material
The stones define most gemstone pin design ideas, so choose them early. Decorative stones are often the focal point of enamel pins with crystals — their size and placement should complement the artwork, not overwhelm it. Large stones give a strong focal point but take more space and add weight; small stones offer flexibility but can be harder to position and secure consistently.
Gemstone Pin Design Ideas: Example Stone-Size Starting Points
| Design Concept | Example Stone Size | Suggested Approach |
|---|---|---|
| Small floral pin | 3–4mm central stone | Keep the petals simple and relatively broad |
| Medium floral pin | 4–6mm central stone | Balance the central stone with enough room for the petals |
| Celestial pin | 2–4mm accent stones | Use a few carefully positioned stars or crystals |
| Crown or jewelry motif | 3–5mm accent stones | Confirm the settings fit within the metal framework |
These are example gemstone pin design ideas, not approved size limits — suitable stone dimensions depend on the pin’s overall size and the actual setting footprint.
Select a shape that suits the artwork
- Round stones: flower centers, stars, and small decorative accents.
- Oval stones: pendants, crowns, and ornamental designs.
- Teardrop stones: leaves, petals, and elegant motifs.
- Square or rectangular stones: geometric patterns and structured artwork.
Unusual shapes may require extra sourcing or assembly, so confirm availability before finalizing the design.
Specify the actual stone material
The term gemstone enamel pin doesn’t necessarily mean the pin contains natural gemstones. Possible decorative materials include glass crystals, synthetic stones, acrylic accents, and genuine gemstones — they differ in appearance, cost, weight, and durability. If genuine gemstones are essential, say so explicitly in your quote request and ask the manufacturer to confirm the material. Never rely on a digital rendering alone to establish a stone’s identity.
4. Design Metal Borders and Enamel Areas Carefully
Good gemstone pin manufacturing starts with a sound metal structure. The metal framework separates enamel colors and supports the decorative components. Gemstone settings add restrictions, so artwork must leave room for both.
Avoid excessively thin metal lines
Pay particular attention to narrow connections between separate sections, thin stems, branches, and flourishes, small metal areas surrounded by enamel, metal surrounding gemstone openings or settings, and narrow bridges connecting the main body to projecting shapes. As an initial reference, CreatePins’ general artwork guidance uses metal lines of about 0.20mm or greater and enamel fill widths of about 0.35mm or greater — not guaranteed minimums for every gemstone design. Where the artwork permits, slightly wider lines and fill areas give more manufacturing flexibility.
Keep gemstone settings away from important details
Don’t position a stone directly over a critical outline, letter, facial feature, or narrow enamel section. A stone and its mounting structure can obscure part of the artwork, so leave enough visual clearance for the main illustration to stay recognizable.
Prepare a clear production drawing
For complex designs, separate the artwork into clearly identified elements: metal outlines and structural areas, individual enamel color regions, gemstone positions, shapes, and nominal dimensions, and any special construction or assembly requirements. This lets the manufacturer evaluate the physical design instead of interpreting a decorative illustration. If you’re still sketching, our guide to making a custom pin mockup can help.
5. Match the Enamel Technique to the Gemstone Design
Gemstone pin manufacturing offers several construction routes for enamel pins with crystals. Not every gemstone pin should use the same construction method — the best approach depends on the artwork, the surface appearance you want, and the stone attachment requirements.
Hard Enamel
Smooth, polished surface with enamel and metal borders finished evenly. Consider it for refined, jewelry-inspired designs where the finish and gemstone construction are compatible.
Soft Enamel
Recessed color areas with raised metal outlines. The height difference can complement decorative stones and suits colorful character art, fantasy designs, and collectibles.
Mixed-Material Construction
Combines gemstones with exposed metal, recessed enamel, raised details, or other decorative components — distinctive, but needs more planning and assembly work.
6. Choose Metal Plating and Enamel Colors Together
Color choices make or break custom jeweled pins. Plating influences how the enamel and gemstones look in the finished pin, so select the complete palette rather than judging each component alone.
| Metal Finish | Suitable Color Combinations | Design Effect |
|---|---|---|
| Gold | Green, red, clear, purple | Warm and luxurious |
| Rose gold | Pink, peach, lavender, clear | Soft and contemporary |
| Silver | Blue, purple, clear, black | Cool and versatile |
| Black nickel | Red, purple, blue, clear | Dramatic contrast |
| Antique gold | Deep green, red, amber-like tones | Vintage and ornamental |
Practical color tips
- Limit the number of dominant colors so the gemstones stay visually distinct.
- Use contrasting enamel colors when a stone needs to stand out.
- Consider how dark enamel will look against the selected metal finish.
- Avoid relying on subtle color differences between very small areas.
- Provide Pantone references for important enamel colors where applicable.
For example, a green gemstone against green enamel can blend into the design — a lighter enamel background or a contrasting metal border helps the stone stand out. Color risk: digital renderings can’t fully reproduce reflective stones, polished plating, or the depth of physical enamel, so clarify important color expectations and review the proof carefully. Our guides on plating colors and why colors differ from screen mockups go deeper.
7. Understand Stone Attachment and Durability Risks
Attachment is the biggest risk in gemstone pin manufacturing, especially for enamel pins with crystals. A gemstone pin must stay secure through normal handling, storage, transport, and wear. The right attachment method depends on the stone material, dimensions, setting, and overall construction.
| Potential Problem | Possible Cause | Recommended Prevention |
|---|---|---|
| Loose or missing stones | Unsuitable attachment method or inconsistent assembly | Confirm the securing method and inspection process |
| Scratched or chipped stones | Damage during assembly, handling, or transport | Ask about handling precautions and finished-product inspection |
| Uneven stone placement | Difficult positioning or insufficient assembly control | Clearly mark each stone’s position in the approved artwork |
| Unexpectedly tall stones | Setting depth and component height not considered | Confirm the intended profile and finished thickness |
| Pin rotates when worn | Unbalanced weight or insufficient backing | Review weight distribution and attachment points |
| Scratches on adjacent surfaces | Components contact each other during handling or shipping | Discuss protective packaging and component separation |
Check the backing attachment
Decorative stones add weight, particularly with several stones or a larger pin. A single clutch may be fine for some designs, while larger or wider pins may benefit from two attachment points to reduce rotation. Choose the backing based on finished weight, shape, and intended use rather than appearance alone, and ask your manufacturer how stone security and backing quality will be inspected. See our backings guide and thickness guide, and our common defects guide for what inspection should catch.
8. Control Production Costs Without Sacrificing the Design
Custom jeweled pins and other enamel pins with crystals can cost more than comparable standard enamel pins because they need additional components, sourcing, positioning, and assembly. The best way to manage budget is to simplify features that add cost without improving the design:
Use Fewer, Well-Placed Stones
A single central gemstone can create a stronger focal point than numerous small accents.
Standardize Stone Specs
Reusing the same size, shape, and color may simplify sourcing and assembly — confirm availability first.
Avoid Unnecessary Construction Changes
Multiple platings, unusual stone shapes, complicated settings, and layered components add complexity.
Choose a Practical Size
Bigger means more room but also more material, weight, packaging, and shipping cost.
Keep Packaging Proportional
Premium packaging suits a premium product, but its cost should fit the selling price and market.
Request a Feasibility Review Early
Revising artwork before production is easier than fixing a construction problem after approval.
Also compare realistic quantities — tooling, setup, sourcing, and assembly all affect total price, so request quotes for your intended quantity rather than assuming a fixed difference between order sizes. For a first estimate, use the custom pin price estimator; see why custom pins cost what they do and our packaging guide for more.
9. Prepare Your Artwork for Manufacturing
Clear artwork is the foundation of reliable gemstone pin manufacturing — it reduces misunderstandings and avoidable revisions.
| Item | Recommendation |
|---|---|
| Preferred file format | AI, EPS, or vector PDF |
| Artwork scale | 1:1 at the intended finished dimensions |
| Metal layer | Clearly identify metal outlines and structural areas |
| Enamel layer | Separate and label each color region |
| Gemstone layer | Mark each stone’s position, shape, nominal dimensions, and color |
| Color references | Provide Pantone Solid Coated references where applicable |
| Text | Convert fonts to outlines and check legibility at actual size |
| Reference rendering | Include a colored image showing the intended appearance |
Traditional filled enamel uses solid color areas separated by metal — gradients, photographic detail, and complex color transitions may need printing or another decorative technique. If you only have a sketch or raster image, send the clearest version you have and flag the details that must stay unchanged. Our file formats guide and PNG/JPG guide explain your options, and why a design can’t be manufactured covers common blockers.
Artwork submission checklist
- Confirm the finished pin width and height
- Identify stone material, shape, size, and color
- Mark every stone’s intended position
- Identify enamel colors and metal plating
- Review thin metal connections and small enamel areas
- Allow enough room around gemstone settings
- Check that stones don’t obscure important artwork
- Consider finished thickness, weight, and backing
- Specify any critical color or material requirements
- Confirm production feasibility before final approval
10. What to Confirm Before Production Approval
For custom jeweled pins, approval deserves extra care. A digital proof is an important approval step, but it doesn’t independently confirm the strength of a stone setting or the exact look of reflective materials. Before approving production, confirm:
Materials
Are the stones the specified material? Are enamel colors and plating correct?
Construction
Is the attachment method understood and accepted? Are borders and enamel areas suitable?
Appearance
Are dimensions, stone positions, colors, and surface profile clearly represented?
Weight & Fastening
Is the backing appropriate for the finished pin?
Quality Control
What inspections cover stone placement, attachment security, plating, enamel, and visible defects?
Delivery
Are lead time and shipping confirmed, including extra time for sourcing or assembling components?
When should you request a physical sample?
Consider asking about a sample or pre-production evaluation if the pin has many stones or unusual settings, the stones are expensive or delicate, the pin is large or heavy, color matching is critical, or the order value makes a production-wide correction costly. Confirm sample availability, cost, and added lead time first — and for important durability requirements, ask how they can be evaluated before committing to the full order, since a proof confirms intended appearance, not real-world strength. Read our sample approval process guide for details.
11. Request a Custom Gemstone Enamel Pin Quote
Whether you’re after gemstone pin design ideas for a new collection or custom jeweled pins for a brand, to help your manufacturer evaluate the design efficiently, provide:
- Artwork or a reference image
- Finished pin dimensions
- Order quantity
- Preferred enamel technique
- Metal plating color
- Stone material, shape, size, and color
- Required backing attachment
- Packaging requirements
- Target delivery date
- Any special material, durability, or quality requirements
You don’t need to finalize every spec before asking for advice — if you’re still developing the artwork, explain your design goals and budget so the manufacturer can suggest practical alternatives. See what a custom enamel pin quote should include for a model quote.
The goal isn’t to include as many decorative features as possible — it’s to create a design that looks distinctive, can be manufactured consistently, and performs as intended.
Final Recommendations
Successful gemstone enamel pin design — and successful gemstone pin manufacturing — balances visual detail with physical construction. Whatever gemstone pin design ideas you’re developing, prioritize these five steps:
- Design at the intended size. Evaluate artwork at actual dimensions, not enlarged screen views.
- Plan the stone settings early. Allow space for the mounting structure, not just the visible gemstone.
- Maintain practical metal and enamel dimensions. Use the numerical references as starting points and confirm final requirements.
- Evaluate weight and durability. Select an appropriate backing and confirm how stones will be secured.
- Get manufacturing approval before production. Resolve material, construction, color, and quality-control questions before authorizing the order.
Frequently Asked Questions
Can gemstones be used with hard enamel and soft enamel?
Potentially, yes. Compatibility depends on stone dimensions, mounting method, metal layout, and enamel process, so have the complete construction reviewed before choosing the final technique.
What is the minimum line thickness for a gemstone enamel pin?
CreatePins’ general artwork references use about 0.20mm or greater for metal lines and 0.35mm or greater for enamel fill widths. These are preliminary guidelines, not universal limits — gemstone settings and specific construction may call for different dimensions.
How much space should I leave around a gemstone?
As an initial layout exercise, test about 0.5–1.0mm of clearance around the proposed setting where space permits. The real requirement depends on the setting footprint, adjacent metal, enamel areas, and assembly method — confirm it with your manufacturer.
Are gemstone enamel pins more expensive than regular enamel pins?
They can be. Cost depends on the stones, pin size, construction, plating, assembly, quantity, packaging, and shipping. Simplifying the design and standardizing components helps control it.
How can I reduce the risk of stones falling out of enamel pins with crystals?
Confirm the attachment method, setting suitability, and inspection process before production. If stone security is critical, ask whether a physical sample or specific evaluation is available.
Can I use my own artwork for custom jeweled pins?
Yes. For custom jeweled pins, gemstone pin manufacturing is subject to manufacturing feasibility. Provide your illustration, sketch, or reference image and specify the intended size, stones, colors, and finish — the design may need adjustments to accommodate physical components.
Ready to Develop Your Own Gemstone Enamel Pin?
Request a custom quote on custom jeweled pins to discuss your artwork, gemstone pin design ideas, stone preferences, and gemstone pin manufacturing requirements — we’ll review feasibility before anything goes into production.